When it comes to captivating learners’ attention in eLearning courses, videos play an important role. Using videos can turn a dry and dull eLearning course into a truly engaging and enjoyable one. So, inserting and manipulating videos in projects should be easy. Knowing that, ActivePresenter 8 – All-in-One Screen Recorder, Video Editor & eLearning Authoring Software provides you with many ways to add videos. Basically, ActivePresenter 8 supports many video formats, namely MP4, MKV, WMV, FLV, AVI, and WebM. Moreover, the app also lets you edit them effortlessly. Now, let’s explore how to insert videos into ActivePresenter 8 projects.
In this article, you will learn:
- Insert Video from Files
- Insert Video by Recording Webcam
- Insert Video by Recording Screen
- Customize Added Videos
Insert Videos from Files
Needless to say, this is the fastest way to add videos from your computer to projects. So, do either of the following:
- Select an existing video file then drag and drop it into the Canvas.
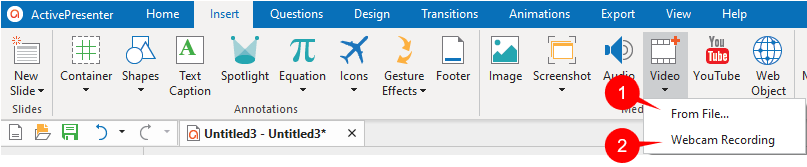
- Access the Insert tab > Video > From File…(1). Next, select a video file from your computer > Open.
After that, the selected video will be inserted into the slide that you are working with.
Insert Videos by Recording Webcam
This is the second way to add videos to ActivePresenter projects. This way, the software will insert the video into the slide that you are working on.
So, access the Insert tab > Video > Webcam Recording (2).
As can be seen, the Webcam Recording dialog appears like the below picture:
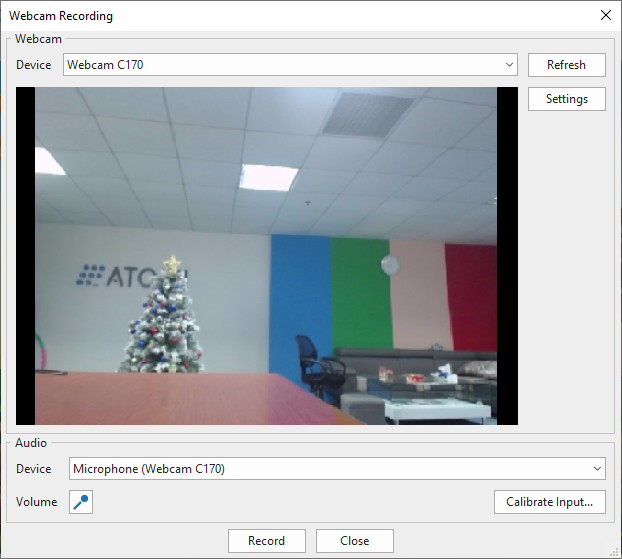
Overall, you don’t have to change properties in this window. You can click Record to start recording.
Check out the article How to Record Webcam for further information.
Insert Videos by Recording Screen
In fact, ActivePresenter 8 allows you to add videos by recording screen. Keep in mind that ActivePresenter will not save the recorded video in the slide that you are working on when you add videos with this method. As a result, it will be saved in the new slide next to the currently working slide.
Now, to capture a new video and add it to your project, open the Home tab first. Then select Record Screen > Record Video.
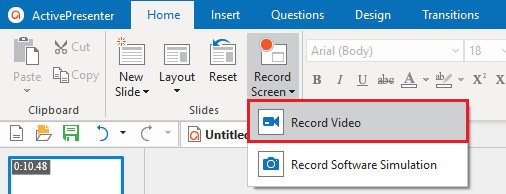
As you can see, a Record Video Slide dialog and a blue rectangle appear to let you record the screen. Take a look at Record Video Demonstrations to get more details.
Customize Added Videos
On the whole, many video editing features ranging from basic to advanced are available for you on ActivePresenter 8 tutorial page. Visit the page to get more useful tutorials. Besides, you can refer to How to Insert Audio to have a brief look at the editing tools.
In addition, a video is also an object. Therefore, you can change its size, position and adjust its timing easily.
Change Video Timing
To begin with, to change the video timing, do any of the following:
- Drag the video object time bar along the timeline.
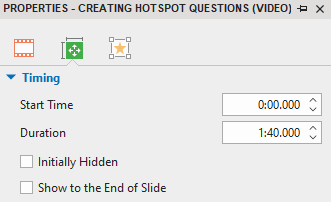
- In the Properties pane > Size & Properties tab > Timing section. Then, change the values in the Start Time and Duration box.
Change Video Size and Position
You can resize the video by dragging its resizing handles. On the other hand, hover the mouse over the video until the mouse turns to a four-way arrow, drag the video to the position you want.
Alternatively, access the Properties pane of the video > Size & Properties > Transform section. Here, you are free to resize or change the position for your video.
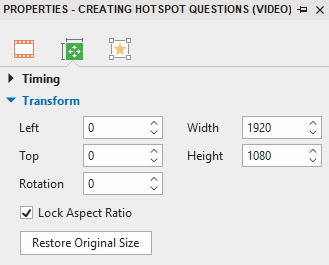
If the changes aren’t satisfied with you, click Restore Original Size to restore the original size of the video.
Remove Videos
In case you no longer want to use the video in your project. Just delete it by doing one of the following:
- Select the video and press the DELETE key on your keyboard.
- Select the video then go to the Properties pane > Media tab > Video section > Remove video from this object.
So, you know how to insert videos to ActivePresenter 8. Hope that it helps. In addition, visit more useful tutorial videos on our YouTube channel. Feel free to contact us.
Recommended articles: