When it comes to editing videos, changing video speed is an effective tool, obviously. For example, you might have a long video scene or some parts which contain not much important information such as writing a text, repeating some steps, changing the appearance of objects, etc. In these cases, let’s increase or decrease speed either for the whole video or just parts of it. Now, we will walk you through how to change video speed in ActivePresenter 8.
In general, you will learn:
So, if you want to provide a better viewer’s experience, don’t miss this article.
Change Speed for the Whole/ Specific Video Part
Firstly, let’s take a quick glance at how to change speed for the whole video or specific video part. Do as below guiding:
Step 1: Select the entire video (on the Canvas, Timeline, or Selection pane). Alternatively, select a specific video part by dragging the Start and End marker of the Playhead along the Timeline.
Sept 2: Click the Change Playback Speed button (1) to show up the dialog below:
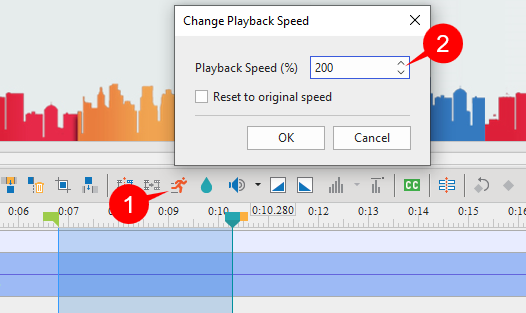
Step 3: Specify the percentage in the Playback Speed box (2) > click OK.
As can be seen, the default value is 200%. If you want your video object to run faster, enter the value higher than 100%. In contrast, enter the value lower than 100%.
Reset to Original Video Speed
After making changes, you still can restore the original speed. To get it done, do as follows:
Step 1: Select the entire video or select exactly the range that you have changed the speed before.
Tip: Before selecting the range, turn the Timeline Snapping mode on so that you can select it more exactly. To do that, access the View tab and click Timeline Snapping ![]() .
.
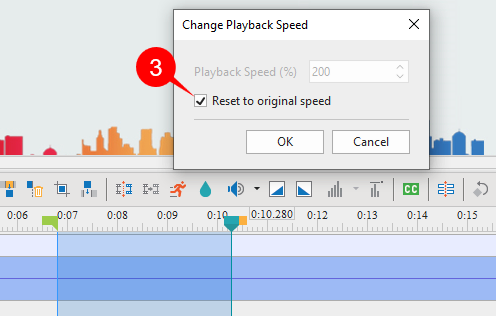
Step 2: Click the Change Playback Speed button (1).
Step 3: Select Reset to original speed check box (3). Finally, click OK.
So, it’s quite easy to change video speed with ActivePresenter, isn’t it? Download the app and use this feature to save the duration and the file size of your videos. Hope that it will help in your video/audio editing procedure.
Related content: