Welcome to ActivePresenter 9! This article offers a comprehensive guide for beginners who are interested in using ActivePresenter to unleash their creativity and potential. Now, let’s get started with ActivePresenter 9.
ActivePresenter 9 is an easy-to-use powerful eLearning authoring tool, screen recorder, and video editor. In other words, the integration of these useful functions in ActivePresenter allows you to quickly create amazing eLearning content, capture your screen, and edit recorded videos with just simple steps.
The article covers 4 main parts as follows:
Keep reading to explore the first part.
Create Interactive eLearning Content
In this part, let’s get started with creating interactive eLearning content in ActivePresenter 9.
Create New Blank Projects
Creating a new blank project from scratch is the very first step if you want to create interactive eLearning content in ActivePresenter. Just start your journey by clicking Blank Project. After that, ActivePresenter 9 will automatically open a new project with a blank slide. That’s a normal new non-responsive project. Additionally, you can also create responsive projects depending on your needs. Responsive projects make your content display perfectly on any device with different screen sizes thanks to the responsive design and flexbox features. Of course, it is possible to capture the screen and use it in eLearning projects when needed.
Moreover, ActivePresenter enables you to import PowerPoint presentations into the application even if you do not have Microsoft PowerPoint installed on your system. Then, feel free to edit them just like you are working on the ActivePresenter slides.
For more details about creating new projects, check out the post below:
- Create a New Project
- Build Responsive Projects
- Create Projects from Microsoft PowerPoint Presentations
Insert Objects to Project
As you may know, ActivePresenter 9 offers users a dozen of beautiful themes and templates to create consistent visual experiences. Besides, you can make your courses more informative by inserting a variety of visualization objects. For example, 3D Models, Charts, Tables, Images, Videos, Audio, YouTube videos, and so on. You can find them all in the Insert tab.
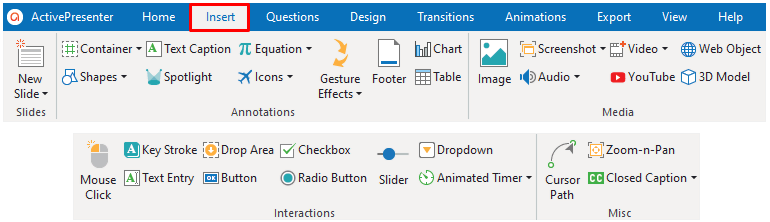
Otherwise, adding interaction objects to the projects is a great idea, as well. Those are special objects designed to respond to users’ actions in a predefined manner. Users can interact with these objects by using the mouse button (to click on an area, select checkboxes or radio buttons, etc.), or using keyboards (to press a key or a combination of keys). Applying these objects in your interactive quizzes or courses helps stimulate learners’ interaction. Also, interaction objects help keep track of learners’ activities by assessing their performance.
Add Interactivity
Next, get started with adding interactivity to your project in ActivePresenter 9. In fact, courses that transform learners from passive participants to active ones are the best. And adding interactivity to courses seems to be the most effective along with quickest way to motivate learners. ActivePresenter 9 comes with a large number of flexible events – actions, conditional and advanced actions, variables, JavaScripts, etc. to help create highly interactive quizzes, courses, and games.
In addition, the latest version supports you to create 13 interactive question types with a few clicks. All of them are available in the Questions tab.

What’s more, you can also import hundreds of questions from GIFT files and CSV files into your course at once. Just access the Questions tab and click From File.
For details about events – actions, interactive questions, or other related features, see the following:
Record Screen
When you first launch the app, there are two recording features right on the Start Page for your choices. Select Record Screen as Video if you want to create a video demonstration. Besides, Record Interactive Simulation is perfect for creating an interactive software simulation.
The Record Screen as Video function enables you to get a full-motion video.
Otherwise, the Record Interactive Simulation feature allows you to capture all actions on the screen. Then, convert them into a slide-based training material including:
- Image slides (mouse click, keystroke);
- Video slides (mouse scroll, drag-n-drop).
For details about these two recording modes, see the following:
Edit Video/Audio
Once finished recording, ActivePresenter 9 will automatically transfer your work into the workspace with a very clear and easy-to-navigate user interface.
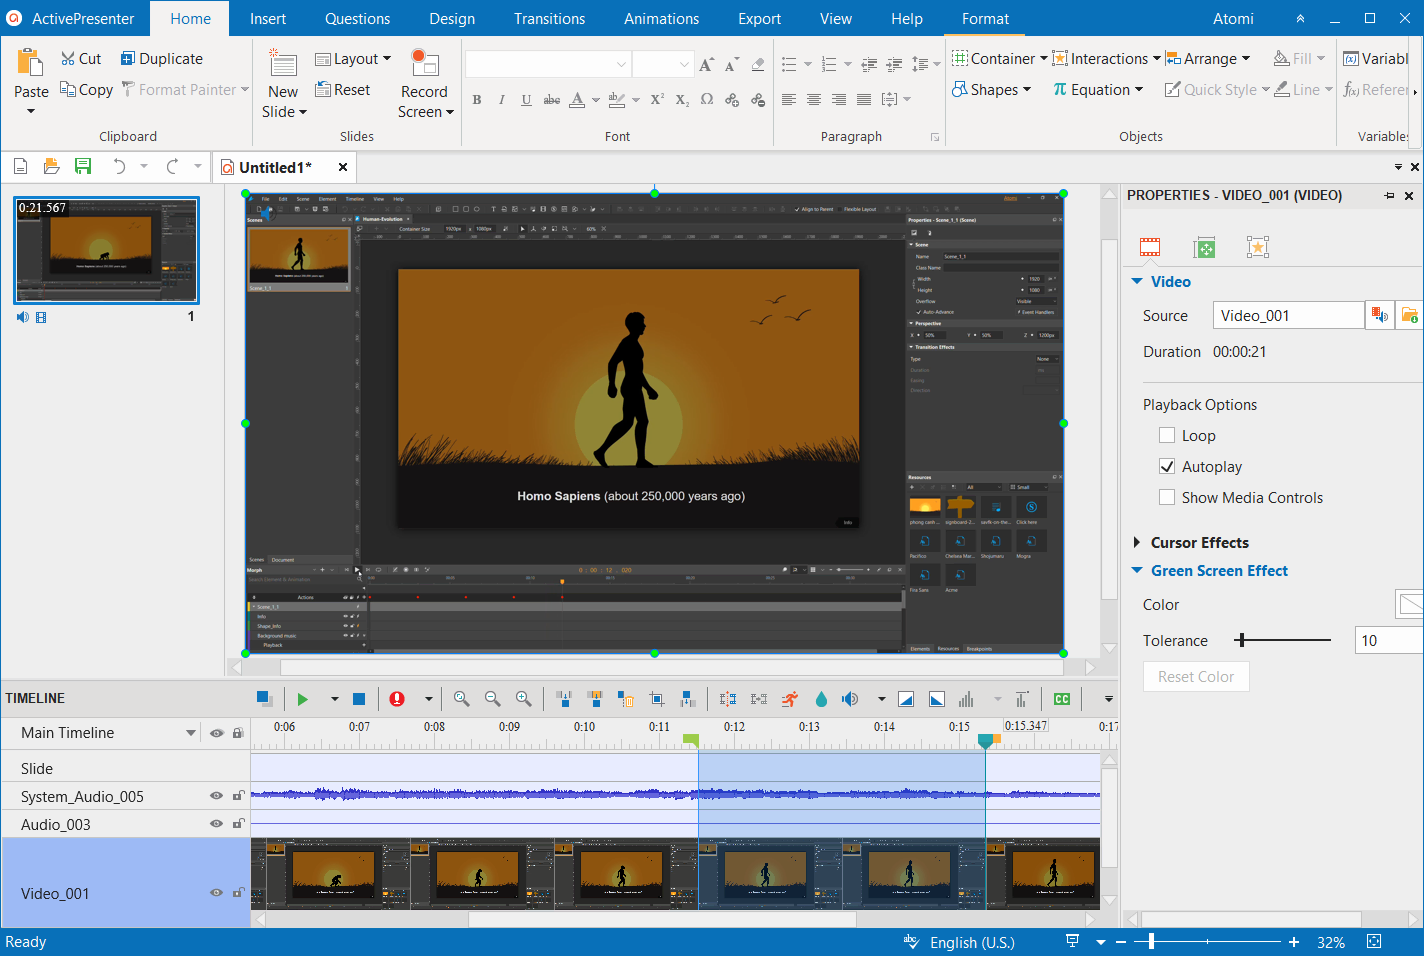
ActivePresenter 9 has a rich-featured editing timeline. It is located at the bottom of the working screen and contains the most powerful video/audio editing tools and features. For example, Cut/Copy/Delete/Crop to Range, Add background music, Speed up and Slow down the video/audio, and so on. You can apply commands to the whole selected objects or just a specific range. Especially, ActivePresenter 9 now allows displaying video frames directly in the Timeline pane. This helps to enhance video display as well as users’ experiences.
For more information about how to edit recorded video/audio, let’s take a closer look at the Edit Screen Recordings article.
Export Projects
Finally, let’s get started with exporting projects in ActivePresenter 9. After completing your project, you can click HTML5 Preview or press F5 to see how it works. With the release of the latest version, it is possible to preview a specific slide instead of the whole project in the browser. Then, feel free to choose any appropriate output format in the Export tab that meets your requirements. Further, the app now allows saving the selected slide as an image or video.

So, you’ve walked through a comprehensive guide for ActivePresenter 9 beginners. Hope that you found it helpful. Feel free to contact us through our User Community, Facebook, Twitter, and YouTube channel.
Click the buttons below and give ActivePresenter a try!

