In Saola Animate, inserting animations for elements has never been so easy with Preset Effects. It allows users to apply not only one but also multiple effects to elements. In addition, it is possible to convert those default effects to keyframes or save keyframe animations as a custom effect to reuse across projects. Moreover, you can use the built-in effects to create text animation in seconds.
Let’s find out the basic information to work with Preset Effects through this tutorial.
We will walk you through 3 main parts:
- Insert Preset Effects to Elements
- Convert Effects to Keyframe Animations
- Save Keyframe Animations as a Custom Effect
Insert Preset Effects to Elements
In general, a preset effect is a combination of one or more keyframe animations. For example, the Grow & Turn effect contains animation segments for the Opacity, Display, Rotate and Scale properties. Meanwhile, the Bounce effect is built up from Opacity, Display, and Location ones.
Firstly, to insert preset effects to elements in Saola Animate, follow the steps below:
Step 1: Select one or multiple elements on the Canvas, and do either of the following:
- Click the Timeline menu > Effects.
- Click the Effects button in the Timeline pane.
Then, the Preset Effects dialog appears :
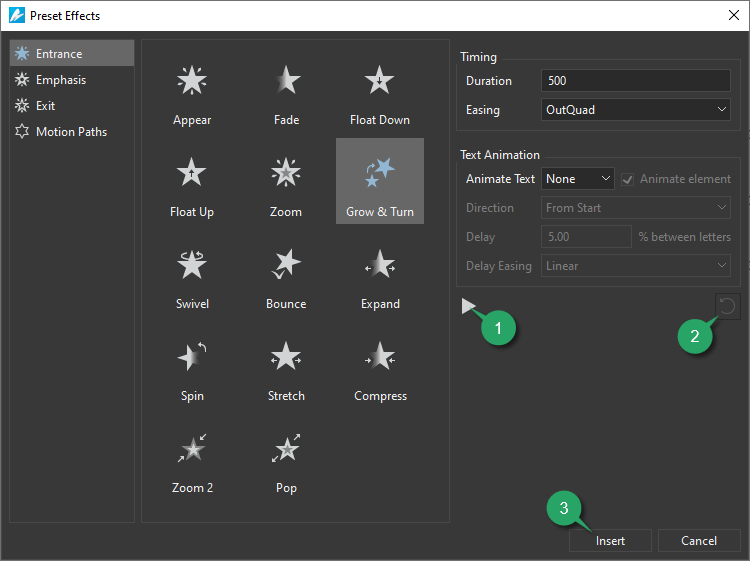
Step 2: Select one out of four effect categories, namely Entrance, Emphasis, Exit, or Motion Paths.
Step 3: Select an effect. It will automatically preview on the Canvas.
Besides, click the Preview Effect button (1) to see how the animation works. Click Restore Defaults (2) if the changes don’t please you.
Step 4: Click Insert (3), or double-click an effect to apply it to elements.
You can adjust the Timing and Text Animation of the element on the right side of the dialog while setting or later. And we’ll learn in detail in the next part.
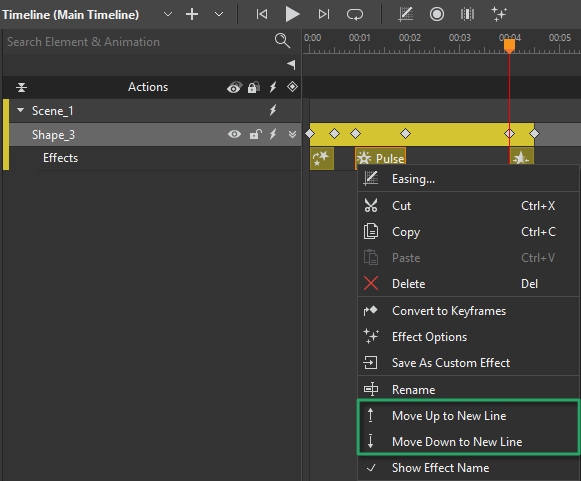
Note: Repeat the steps above if you want to apply multiple effects to an element. By doing so, the effects will display in the same line. To make any of them show up in a different line, right-click it > Move Up to New Line or Move Down to New Line.
Customize the Preset Effect Timing
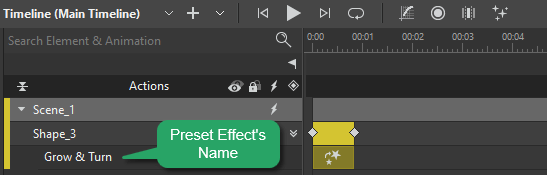
After inserting, a preset effect will be displayed in the Timeline pane with its name and the default duration. Its duration is indicated by two keyframes (except the Appear and Disappear effects):
Here, you can change its timing by performing any of the following:
- Click to select the preset effect segment and drag it along the Timeline to change its start time. Select the start or ending keyframe, then drag it to change the duration.
- Right-click the preset effect segment > Effect Options. Alternatively, double-click the segment in the Timeline pane. This opens the Effect Options dialog allowing you to change some specific value:
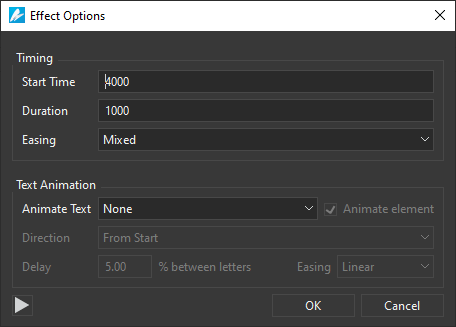
- Start Time: Specify the start time of the animation.
- Duration: Set the duration of the animation.
- Easing: Select one type from the list to set easing functions.
Regarding the Text Animation section, refer to Create Text Animations in Saola Animate 3 to get detailed information.
After customizing, click OK to save the changes and close the dialog.
Copy and Paste Preset Effects
It is very easy to copy and paste preset effects in Saola Animate 3.0.
To copy preset effects, select them in the Timeline pane. Then, do either of the following:
- Click the Copy command in the dockable toolbar.
- Right-click them > select Copy.
- Press CTRL C.
To paste preset effects, select elements in the Timeline pane first. After that, place the Playhead at the timestamp you want to start the effect. Next, perform any of the following:
- Click the Paste command in the dockable toolbar.
- Right-click them > choose Paste.
- Press CTRL V.
Remove Inserted Preset Effects
If you are not satisfied with any applied preset effect, you can remove or replace them. Firstly, select preset effects in the Timeline pane. Then, do one of the following:
- Click Delete in the dockable toolbar.
- Right-click them > pick Delete.
- Press DELETE.
Rename and Show an Effect Name
The app allows renaming your inserted effect right in the Timeline pane. To achieve that, right-click its segment > Rename. Besides, you can show/hide the effect name of all the effects in the Timeline pane as you want. Just right-click the effect segment > Show Effect Name. By default, this option is selected with a checkmark symbol in the beginning.
Convert Preset Effects to Keyframe Animations
After inserting effects to elements, Saola Animate gives you one option to convert those to keyframe animations for further editing. In other words, you can add, change or remove keyframe animations based on the original preset effects’ animation segments.
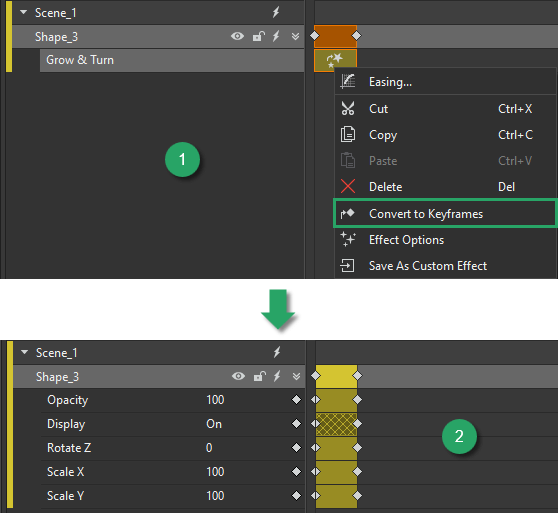
To do that, right-click the preset effect in the Timeline pane > Convert to Keyframes (1). As can be seen, the effect is converted to animation segments of multiple properties. (2).
From now on, you are free to add more animations or remove any that you do not need. Also, you can customize these property values and save them as your own custom effects to reuse across projects.
Note: Text Animations cannot be converted to keyframes. After converting, the animations for text will be removed.
Save Keyframe Animations as a Custom Effect
As you may know, Saola Animate allows you to create keyframe animations manually or use built-in preset effects. Then, you can save one or multiple animations as a custom effect to reuse later in other projects. To get it done, just follow the steps below:
Step 1: Select one or multiple animation segments and right-click it > Save as Custom Effect to open the Add Custom Effect dialog.
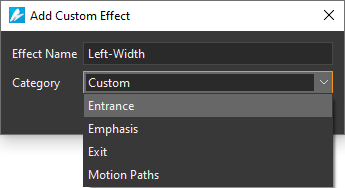
Step 2: Enter the effect name. Then, select one default category, or type a different category name to create a new one.
Step 3: Click OK to finish.
After that, you can see your newly added custom category appears in the Preset Effects dialog.
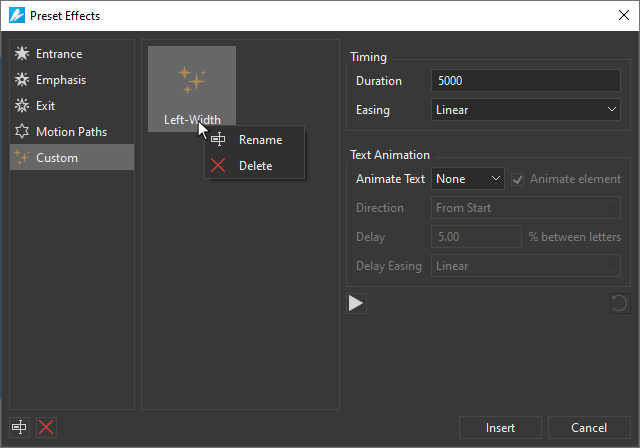
Here, you are able to rename or remove your custom effect.
- To rename a custom effect, right-click it > Rename
 . Alternatively, you can click the Rename button at the bottom-left corner of the dialog.
 - To delete a custom effect, right-click it > Delete. On the other hand, select the Delete button at the bottom-left corner of the dialog to get the same result.
Note: To remove a custom category, you have to remove all the custom effects in that category.
In short, that’s all about using Preset Effects in Saola Animate 3.0. Hopefully, this feature will help bring your content to life. Give Saola Animate a try. And feel free to contact us if you need any help.
See also: