Keyframes define the value of a property at a specific time. They are available throughout the Properties pane to set parameters of any property that can be changed over time. To create animation with keyframes, you need at least two keyframes with different values of the same property. Keyframe animations are formed based on the property changing from the start position to the end position.
As a keyframe-based animation tool, Saola Animate allows you to create animation keyframes by using:
Use the Properties Pane
The first way to add keyframes is using small diamonds next to the properties that can be animated in the Properties pane. After you click any of these diamonds, a keyframe will appear at the Playhead position on the Timeline.
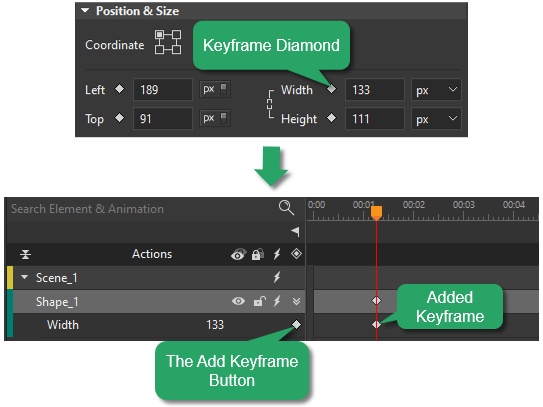
After a keyframe is added, its keyframe diamond also appears in the Timeline pane. It’s very convenient for you to add more keyframes by clicking the Add Keyframe button.
Tip: The best practice is to use the keyframe diamonds in the Properties pane to add the starting keyframes, then use the diamonds in the Timeline pane for other keyframes of the same property.
Use the Add Keyframe Menu
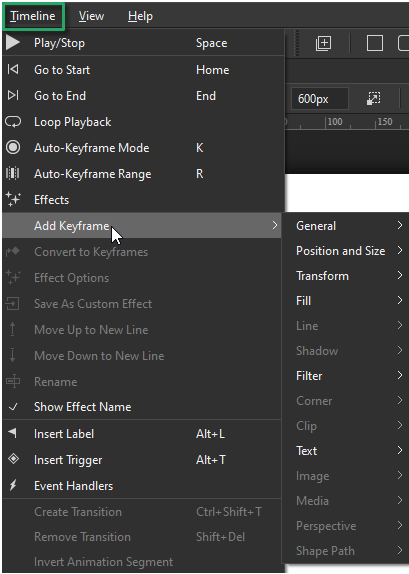
Another way to add keyframes is using the Add Keyframe menu which appears when you do either of the following:
- Right-click an element on the Canvas/ Timeline/ Elements pane > Add Keyframe.
- Select an element > Timeline menu > Add Keyframe.
When you point to the Add Keyframe option, a list of available keyframes appears. Select the keyframe you want.
Use Auto-Keyframes
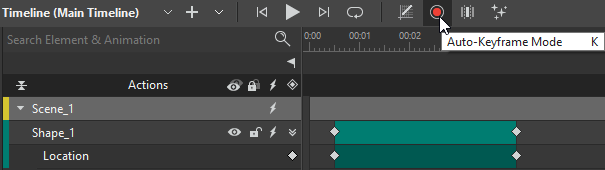
The third way to create animation keyframes is by using Auto-Keyframes. This way is extremely useful if you adjust the element right on the Canvas because Saola Animate automatically generates keyframes when you change the element properties. To turn this mode on, press K on the keyboard or click the Auto-Keyframe Mode button in the Timeline pane.
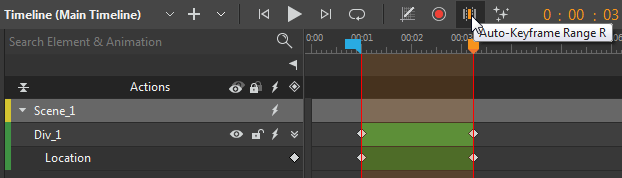
Besides, with the addition of the Auto-Keyframe Range feature in Saola Animate 3, it helps you create animation keyframes within a specific range effortlessly. To turn this mode on, press R on the keyboard or click the Auto-Keyframe Range button in the Timeline pane.
That’s how to add animation keyframes in Saola Animate. In the next tutorial, you will learn how to adjust, move, copy and remove animation keyframes. Download Saola Animate now and see how it can bring your content to life.
See Also: