Saola Animate 3 offers a vast number of element types which you can make use to create engaging and stunning animations. Let’s check them out in today’s tutorial. Moreover, you will find out how to work with elements such as renaming, searching, showing across scenes, and removing elements within a project.
In this tutorial:
- Insert Elements
- Search Elements
- Rename Elements
- Copy Elements
- Show Elements Across Scenes
- Remove Elements
Insert Elements
Insert Elements
You have more than one way to insert elements into a scene.
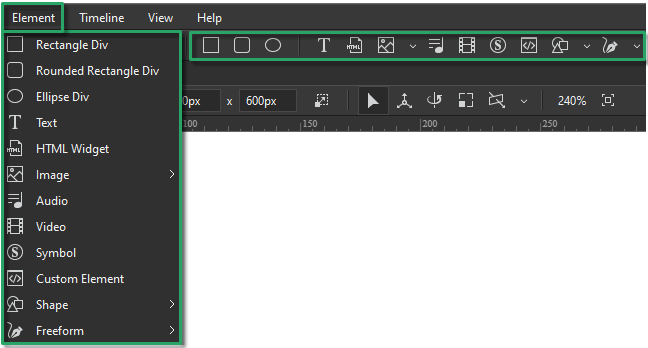
- Click the buttons on the Insert toolbar to insert the elements you want.
- Click the Element menu or right-click the Canvas > Element > select the elements you want.
- Directly drag or copy elements such as images, audio, videos, or symbols from your computer and paste them into the Canvas.
- Drag resources from the Resources pane onto the Canvas, or right-click resources > Add to Scene.
Elements Overview
Now, let’s grasp an overview of element types in Saola Animate 3. Elements are objects in scenes, including DIVs, text, HTML widgets, images, audio, videos, symbols, custom elements, shapes, and freeforms.
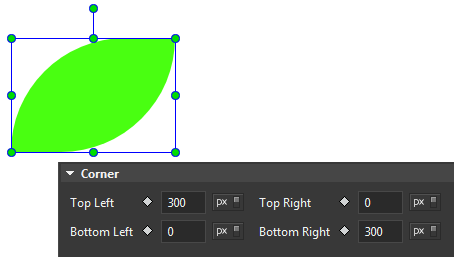
1. DIVs
DIV elements are displayed as HTML elements. They come in three predefined shapes, namely rectangle, rounded rectangle, and ellipse. You can adjust these shapes using the corner properties.
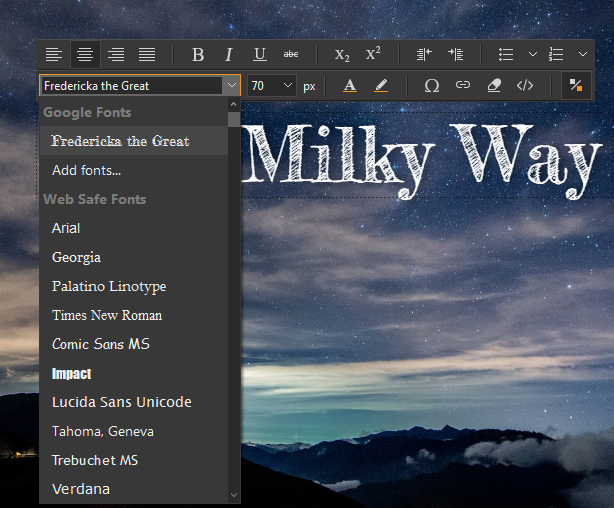
2. Text
Text elements display text in a scene. You can change the font, size, color, style, etc., or even edit the HTML for the text element. Besides, you can use Google fonts and web safe fonts for your text. Saola Animate also includes the option to embed system fonts in the HTML5 output. That way, text will maintain appearance no matter the font installation on viewers’ computers.
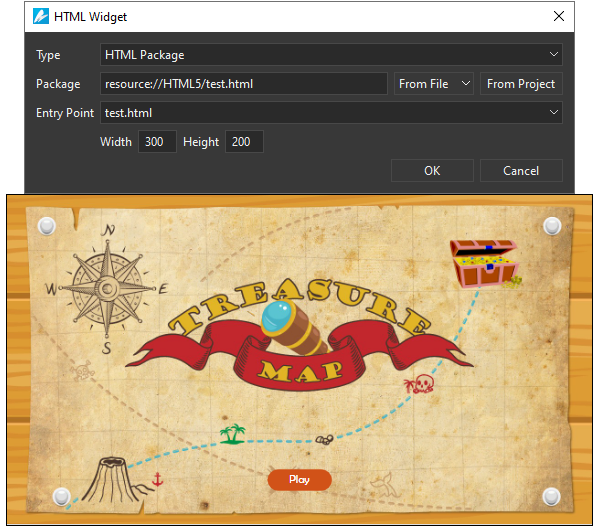
3. HTML Widget
Using HTML widgets is a good way to display a webpage, embedded HTML, or SVG images in a scene. From version 3, you can also embed HTML packages right within the app.
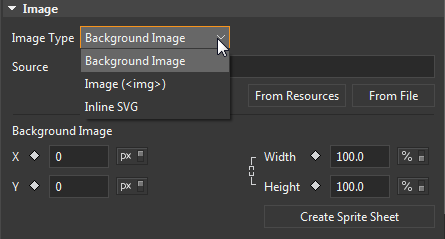
4. Image
Images are one of the most common forms of multimedia. You can import six image formats into Saola Animate, including JPG, JPEG, PNG, GIF, BMP, and SVG. Moreover, three image types, which are Background Image, Image (<img>) and Inline SVG, are available to make your content more stunning. The tool also allows creating sprite sheet animations from the Background Image type.
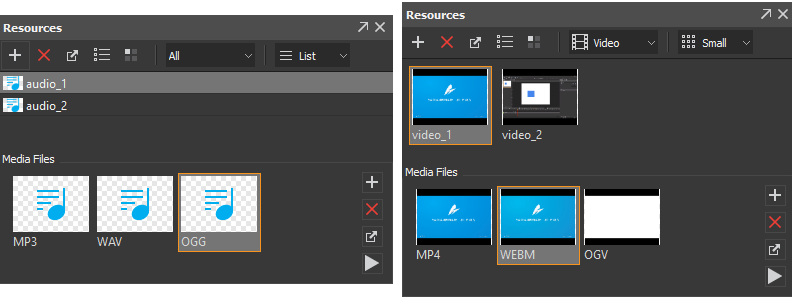
5. Audio and Video
Saola Animate supports the HTML5 audio and video elements. Each audio/video comes with an audio/video group to which you can add other formats. When you run the HTML5 output in a browser, the browser will download and play the single most suitable format while ignoring the rest.
You can import a wide variety of audio and video formats:
- Audio: MP3, WAV, M4A, AAC, OGA, OGG
- Video: MP4, M4V, WEBM, OGV
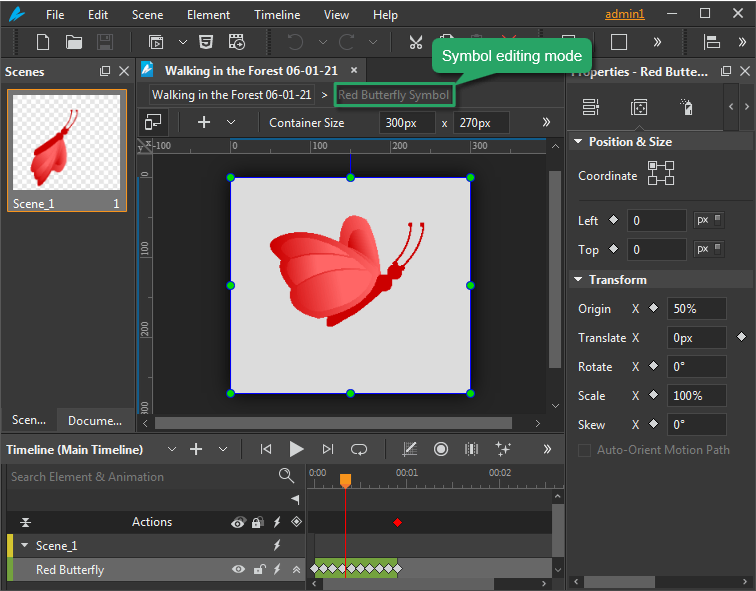
6. Symbol
Symbol element displays a symbol in a scene. A single symbol can be displayed by more than one symbol element. Using symbols allows you to share identical elements across scenes or at different positions in the same scene. In other words, an animation symbol is a reusable resource with independent timelines and interactive capabilities.
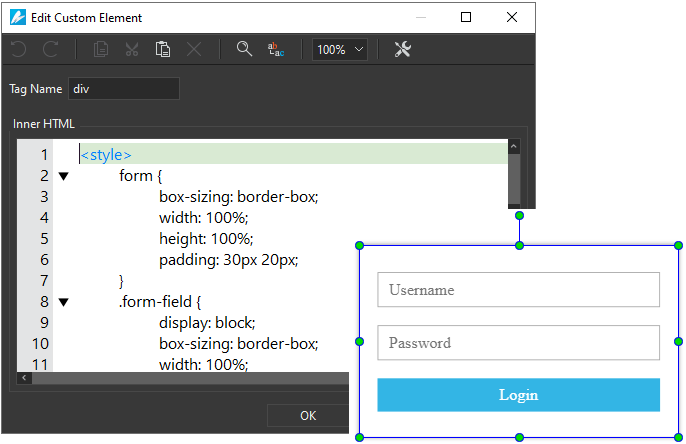
7. Custom Element
Custom elements come in handy when you want to create your own HTML tags.
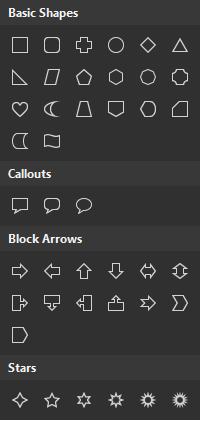
8. Shapes
Shape elements are the same as DIVs except that they have borders and backgrounds using SVG images. You can insert a wide variety of predefined types into a scene. The shapes are sorted into four groups: Basic Shapes, Callouts, Block Arrows, and Stars.
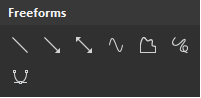
9. Freeforms
Apart from predefined shapes, you can also use the freeform drawing tools to draw straight lines, curves, or mimic hand-drawing using.
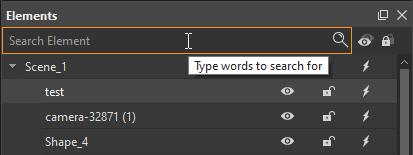
Search Elements
When a scene contains multiple elements, you may feel hard to find them. Fortunately, you now have a search elements function that helps you quickly find them within seconds. To search any element, animation, or group quickly, type its name in the Search Element box. This box can be found in the Timeline or the Elements pane.
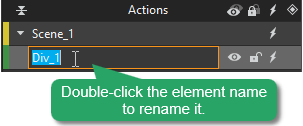
Rename Elements
After you insert elements, you may want to rename them. You can do either of the following to rename an element:
- Double-click the element name in the Timeline or the Elements pane to enter a new name.
- Right-click the element name in the Elements pane > Rename.
- Click the Properties pane > General > Name and rename the element.
Copy Elements
You can copy multiple elements within a scene or across scenes and documents. Use shortcuts to quickly copy and paste elements. After coping, just right-click anywhere on the Canvas. You will have three options to paste an element:
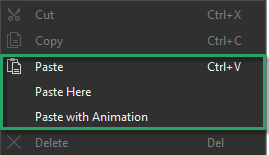
- Paste: Insert the copied elements without animations. New elements will be placed near the position of the original elements or in the center of the viewport (if the original elements are placed outside the viewport).
- Paste Here: Insert the copied elements at the position of the cursor.
- Paste with Animation: Insert the copied elements with their animations.
Show Elements Across Scenes
You might want to make a single element appear in all scenes. To do that, right-click the element > Show Across Scenes. Then, it will appear on the top layer – the Across-Scene Layer in the Timeline pane.
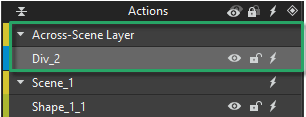
Note: In each scene, you can separately create different animations for that element. In case you want to show symbols or media (audio/ videos) across scenes, take note that its playback animation is not synchronized with the scene’s timeline.
In case you don’t want the element to be shown across scenes anymore, right-click it > Show in Current Scene. By doing so, the element will be shown in the selected scene only.
Remove Elements
Removing one or more elements is so easy by doing one of the following ways:
- Select element(s) on the Canvas or in the Timeline/Elements pane > press DELETE.
- Right-click element(s) on the Canvas or in the Timeline/Elements pane > choose DELETE from the context menu.
That’s an overview of elements and some techniques for working with elements in Saola Animate 3. Then, you can make use of these elements to create stunning HTML5 animations and interactive content. Don’t forget to visit our Tutorials page to get most out of Saola Animate 3. Feel free to ask us if you need any assistance.
Refer to these tutorials to know more about working with types of elements in details: