From the 2022 version, ActivePresenter comes with a brand-new tool integrated into Canvas Snapping mode – Grid and Guides. Together with Smart Guides, they help you align objects more effectively. So, let’s learn how to align objects using Canvas Snapping in today’s article.
Earlier versions of ActivePresenter provide you with two tools for aligning objects. One is Canvas Snapping, and the other is alignment commands. In ActivePresenter 9, Canvas Snapping now includes Gridlines, Guides, and Smart Guides which show up in the View tab. All help you to place objects precisely. In general, they are beneficial for arranging elements symmetrically.
Read on to find out how you can make use of these tools.
First of all, let’s explore the first part.
Use Grid and Guides
Enable Grid and Guides on the Canvas
There are three ways that ActivePresenter 9 can help you to enable Grid and Guides functions. Take either of the following ways to achieve that:
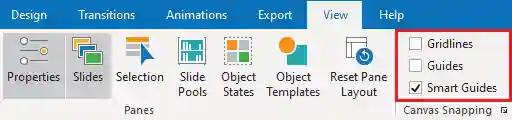
- Access the View tab > select Gridlines and/or Guides checkboxes.
- Open the View tab > click the arrow at the bottom-right corner of the Canvas Snapping section. Alternatively, right-click on the Canvas > choose Grid and Guides… Both ways open the Grid and Guides dialog.
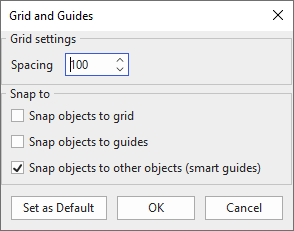
Here, you select the Snap objects to grid and/or Snap objects to guides checkbox to enable gridlines and/or guides on the Canvas respectively. Then click OK to save the adjustments to the current project.
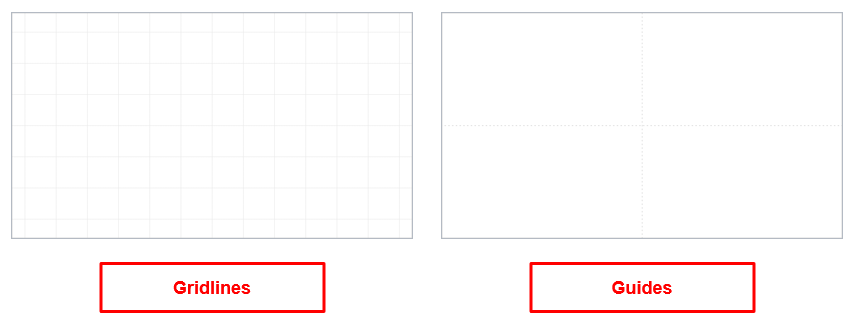
After that, dotted lines appear on the Canvas as gridlines as well as drawing guides. The guides appear as center horizontal and vertical lines of the Canvas and can float over objects. See the image below for more details:
Adjust Gridlines’ Spacing
In the Grid and Guides dialog above, you can customize the spacing between gridlines and save the changes to reuse later. Open the Grid and Guides dialog first and take a look at the Grid settings section. Just enter a new value into the Spacing box in the range of [10-10000] to change the horizontal and vertical dotted lines’ spacing.
To apply the changes you’ve made for the next projects, click the Set as Default button.
Customize Guides Properties
ActiverPresenter 9 also offers you additional functions to customize the properties of the guides:
- Add more vertical/horizontal guides: Right-click on either of the guides or anywhere on the Canvas. Then, select Add Vertical Guide or Add Horizontal Guide from the context menu. After that, the newly added guides will appear right at the mouse pointer position. This comes in handy when you draw shapes or reposition objects on the Canvas.
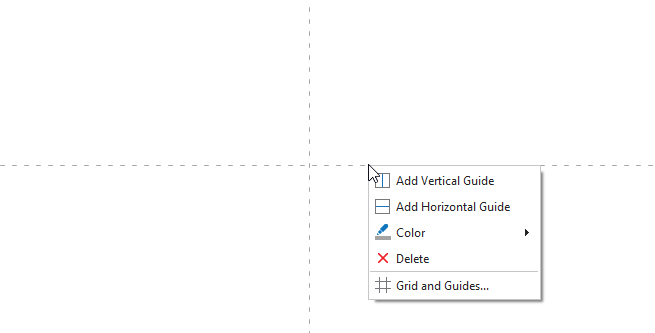
- Change the guides’ color: Select Color from the context menu and pick up one suitable one. This helps to recognize the guides with ease.
- Delete the guides: Select Delete from the context menu.
- Change spacing or reposition the guides: Move the mouse pointer to the guides until it turns into a bidirectional arrow. Next, drag the selected guide to any position on the Canvas.
Use Smart Guides
As mentioned before, the Smart Guides function is Canvas Snapping in the previous version of ActivePresenter. By default, this checkbox is ticked when the project launches. Whenever you drag objects, the smart guide will display orange lines (snapping lines). They are vertical or horizontal lines through the edge/center of an object or the Canvas. You can use them to align an object relative to another one. Or, aligning an object relative to the center/edge of a slide is also possible.
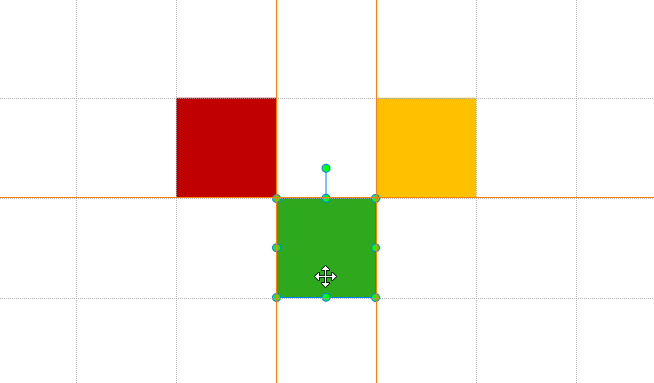
Note: Holding ALT while resizing or moving objects allows temporarily disabling this function.
Now, you know how to align objects using Canvas Snapping in ActivePresenter 9. Hope that it helps. Feel free to contact us if you have any questions.


Related Articles: