In this tutorial, you will learn how to set pass/fail conditions for lessons. When you are done building a question list, defining score and having a report slide at the end of your course, you now will need to set up conditions to determine whether learners will pass or fail the test. Follow the instructions below to set it up.
Set Test Duration and Pass Condition
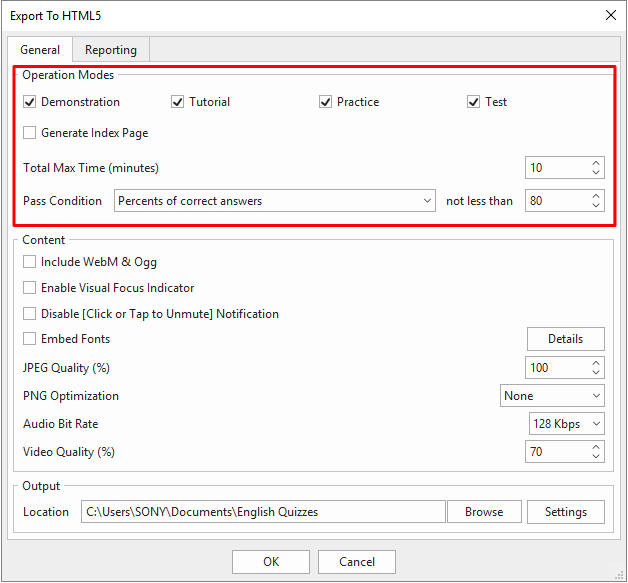
To set a test duration and pass condition, click the Export tab > HTML5. In the Export To HTML5 dialog that appears, focus on the Operation Modes section of the General tab.
You might want to take a look at the following tutorials:
1. Test Duration
In the Test mode, as you question learners on their knowledge and grade them, you should restrict the time allowed. The Total Max Time option is available for the Test mode only to set a time limit (in minutes) on an entire project. This is the total amount of time required for learners to complete the project.
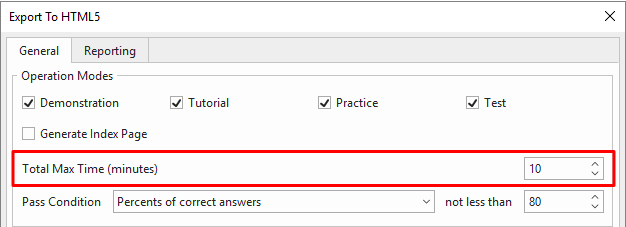
2. Pass Condition
Pass/fail conditions determine the status of the course is either passed or failed, which is usually essential for compliance courses or certification activities. When a learner meets the condition, he is marked as passed. Otherwise, he is marked as failed.
To set the pass/fail condition, take the following steps:
1. Choose one condition from the list (1).
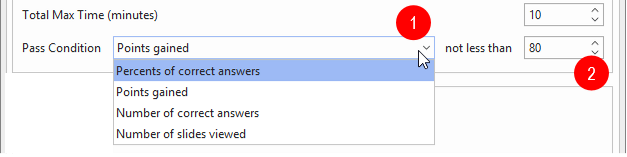
2. Type a numerical value that is less than or equal to 100 in the spin box (2).
Typical Example
Supposing that at the end of a lesson, you would like to have two options for learners, which are reviewing the course if they pass and trying again if they fail the test. In other words, the Review Course button and congratulation message will show up if learners pass the test. On the contrary, the message and Try Again button will show up and allow them to do the test one more time.
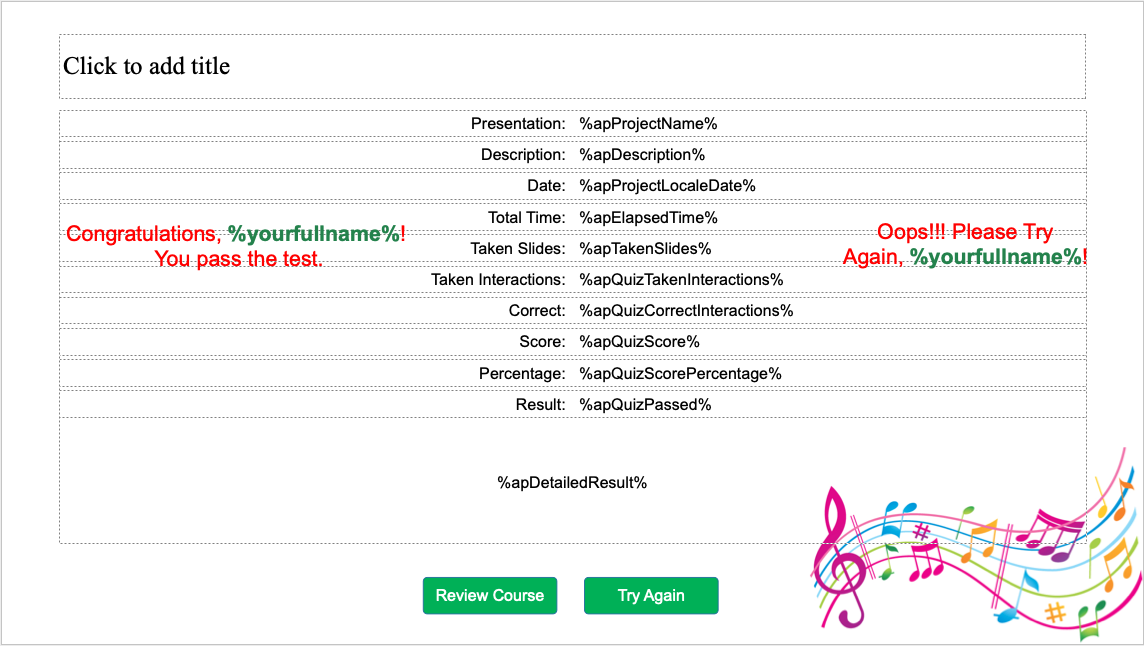
Add Buttons and Messages to the Report Slide
As the Review Course button is on this slide by default, you just need to insert another button and 2 text captions, then type text into them each.
Step 1: To add them, in the Insert tab, click Button/Text Caption.
Step 2 (optional): If you want learners’ names to be on the message board, you have to use a reference. Please refer to this tutorial for more information about how to use text variables.
Step 3: Hide these objects by right-clicking them, then select Initially Hidden.
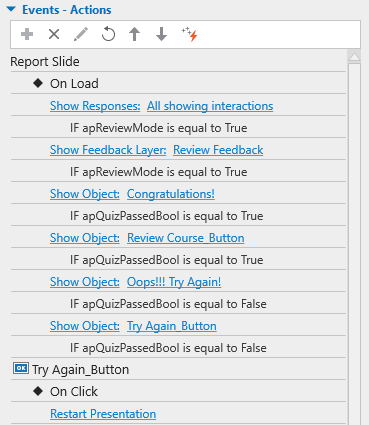
Step 4: Add Restart Presentation action to the Try Again button. See work with events-actions for more details.
Add Actions to the Report Slide
Now you need to add actions to show up buttons and messages, which have been set up above under the pass/fail conditions. We will use apQuizPassedBool variable in this circumstance.
For more information about adding events-actions, see this tutorial.
That’s how to set the pass/fail condition for lessons in ActivePresenter. Hopefully this will help you out.
See Also: