Needless to say, images in projects or courses play a vital role in attracting learners’ attention. That is, images can create more positive responses and keep them engaged instead of text-based content. In ActivePresenter 8, you are free to insert as many images as you want and this can be done in some simple steps. Now, let’s find out how to insert images in ActivePresenter 8.
In general, images are annotation objects. They may be screenshots of applications, drawings, or photos of persons, products, you name it. ActivePresenter lets you incorporate images into a project as backgrounds, logos, buttons, and more. There are multiple supported formats, including PNG, JPG, JPEG, BMP, GIF, and SVG.
Insert Images
Basically, ActivePresenter offers two ways to insert an image. Firstly, adding existing images to a project. Secondly, adding new images by taking screenshots.
Now, to add an image from your file system, do any of the following:
- Open the Insert tab > click Image
 .
. - Select an image from your file system. Then, drag and drop it into the Canvas.
Meanwhile, to add images by taking screenshots, see Taking Screenshots.
Change Added Images
After inserting an image into the project, it is possible to swap it with another. This is useful when you want to change the image but keep all existing animation effects.
To get it done, check out the steps below:
Step 1: Select the image.
Step 2: In the Properties pane > Size & Properties > Image. Then, click From Project…![]() or From File…
or From File…![]() to insert an image. Note that the former option allows you to add an image from the current project.
to insert an image. Note that the former option allows you to add an image from the current project.

Then, the newly added image replaces the old image at once.
Note: In case the new image size isn’t similar to the old image size, it will be resized to fit the old one. So, it’s better to replace the existing image with a new image of the same size.
Edit Images
Generally, ActivePresenter gives you a lot of options to edit an inserted image. Now, select the image, and then perform any of the following:
- To change the size and position of the image, do the same way as when you edit these properties of a shape. See Insert and Style a Shape to learn more.
- To format the image, use commands like Line and Shadow in the Format tab. Alternatively, work with the Style & Effects section in the Properties pane to get the same result. See Insert and Style a Shape.
- To adjust the opacity level of the image, go to the Properties pane > Size & Properties > Image. Next, drag the slider along the Opacity ruler or enter a number in the Opacity spin box.
- To add animation effects to the image, use the Animations tab. See Animating Objects for more details.
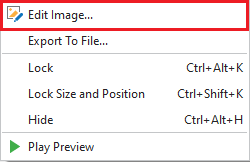
- To edit the imagemore professionally, work with the Image editor. To access this editor, right-click the image > Edit Image… The next steps are similar to when you edit background images.
Tip: When you’re done with editing the inserted image, if you wish to use it as a background image, right-click the image > Merge into Background. Then, the image will be merged into the background. However, the image’s time bar along with all relating animations (if any) will disappear.
It’s easy to insert an image in ActivePresenter 8, isn’t it? Remember to use images to bring visualization into your eLearning courses. Feel free to contact us if you need any support.
Related articles: