Saola Animate 3 brings your website to life with HTML5 animations and interactive web content. Today’s tutorial describes how to create motion paths to mimic real-life motions, giving objects the illusion of life.
This tutorial covers:
Create Motion Paths
Create Basic Motion Paths
Motion Path is the path to be followed by an animated object. Therefore, to create a motion path, you first need to create a basic path between two keyframes. To get it done, take the following steps:
1. Select an element.
2. In Timeline, place the Playhead at the timestamp you want the animation to start.

3. In the Properties pane > Position & Size tab > Transform section, click the Add Location Keyframe icon to insert the first location keyframe. A location keyframe is a special keyframe of two properties: Translate X and Translate Y.
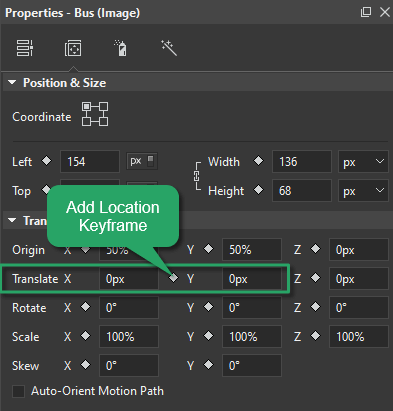
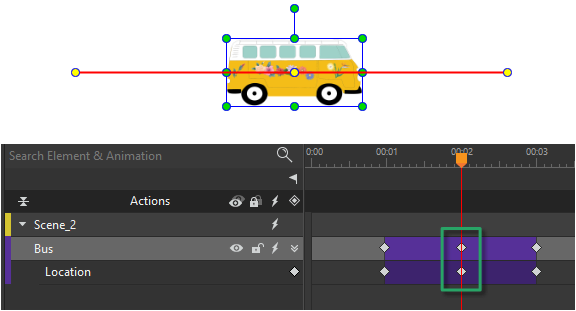
4. Drag the Playhead to the timestamp you want the animation to end (1). Then, add the ending location keyframe by clicking the Add Location Keyframe icon in the Properties pane or the Add Keyframe diamond (2).
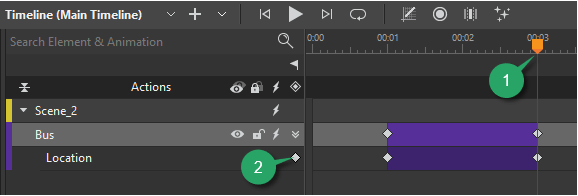
Tip: The best practice is to use the keyframe diamonds in the Properties pane to add the starting keyframes, then use the Add Keyframe diamonds in the Timeline pane for other keyframes of the same property.
5. On the Canvas, drag the element to a new position. This creates a red line indicating the path of the motion. The Location property value changes, thus animating the element along a motion path.

Repeat step 4 and 5 many times to create a motion path between many points.
With these steps above, you’ve done creating a straight motion path between points. Edit the motion path by adding and modifying its anchor points.
Note: Apart from creating motion paths manually, you can also use Auto-Keyframes to get the same results.
Create Motion Paths from Shapes and Freeforms
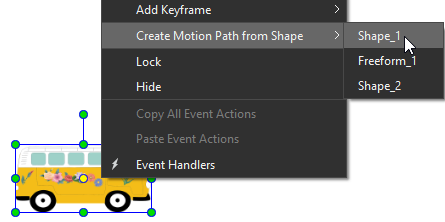
Saola Animate 3.0 allows you to create motion paths from any available shapes and freeforms on the Canvas. For that to happen, right-click an element > Create Motion Path from Shape > select one element from the list.
Create Motion Paths from Preset Motion Path Effects
Aside from shapes and freeforms, you can also create motion paths from numerous preset motion path effects with Saola Animate 3. To apply preset motion path effects, follow the steps below:
- Select an element.
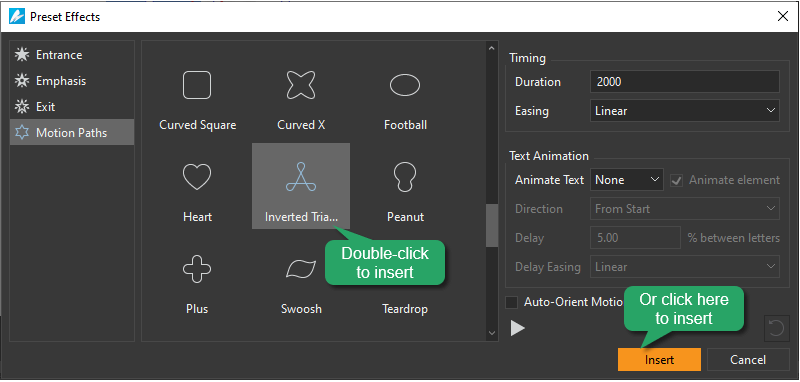
2. Open the Motion Paths category by accessing the Timeline menu > Effects or clicking the Effects button in the Timeline pane.

3. Double-click an available effect in the dialog, or select an effect then click Insert to apply it to an element.
Edit Motion Paths
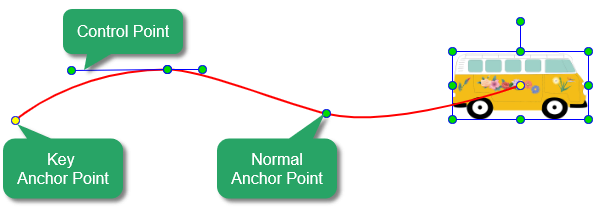
Editing a motion path is actually working with its anchor points. Anchor points are circle points on a motion path that define the path. There are two types of anchor points:
- Key anchor points: Yellow points that have associated Location keyframes on the Timeline.
- Normal anchor points: Green points with no associated keyframes on the Timeline. They define the path an element moves between two key anchor points. A normal anchor point has two blue handles with a control point at their ends.
Create Anchor Points
- Add a key anchor point: add a Location keyframe to a motion path at a desired point of time.
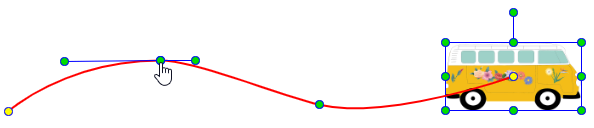
- Add a normal anchor point: hover over a motion path until the mouse pointer turns into a pointing hand. Then, click and drag the path as desired.
Note: When the Playhead is on a Location keyframe, an element is on a corresponding key anchor point. In that case, drag the element to change the shape of the path. On the other hand, when the Playhead isn’t on a Location keyframe, dragging the element is equal to dragging the entire path. The shape of the path remains the same.
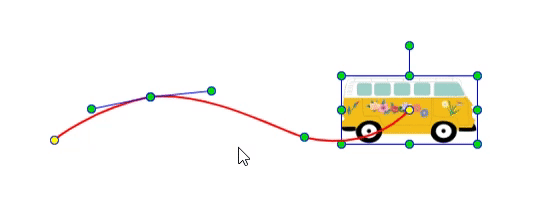
Adjust Control Points
With any anchor point selected, its control points appear to help adjust the path between two anchor points. Drag the control points to modify the path.
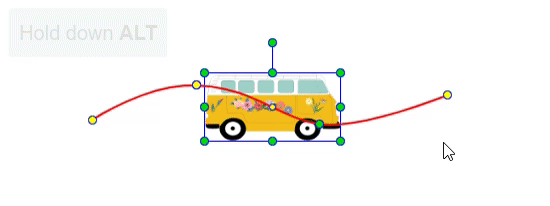
Note: When dragging a single control point, the remaining one will move to keep the angle between them unchanged. To change the selected control point only, hold down ALT and drag the point.
If a control point and an anchor point have the same position, clicking will select the anchor point. To select the control point, hold down ALT and click the mouse button.
Remove Anchor Points
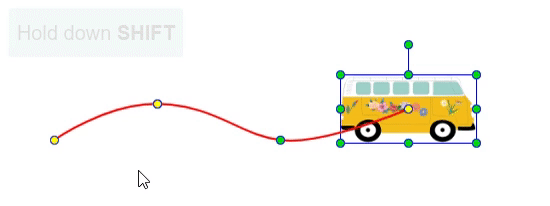
To remove an anchor point, click it while holding down SHIFT. If you are removing a key anchor point, one of the following cases happens:
(1) The key anchor point is the first/last point of the path AND there is no anchor point between this point and the next/previous key anchor point: The associated Location keyframe will be deleted.
In the example below, there is no anchor point between the first and the next key anchor point. Therefore, deleting the first key anchor point is equal to deleting the first keyframe.
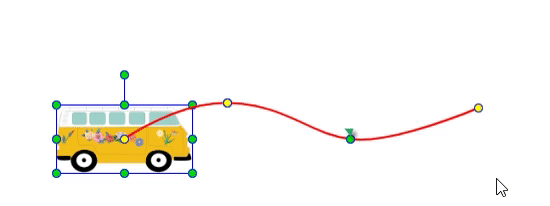
(2) The key anchor point is the first/last point of the path AND there is an anchor point between this point and the next/previous key anchor point: The next/previous anchor point will become the first/last key anchor point of the motion path.
In the example below, there is an anchor point between the last and the previous key anchor point. So, when you delete the last key anchor point, the anchor point becomes the last key anchor point of the path.
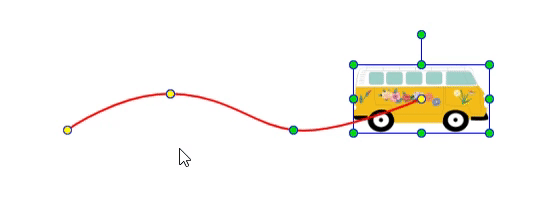
(3) The key anchor point is not the first/last point of the path: The associated Location keyframe will be deleted.
In the figure below, the key anchor point is neither the first nor the last key anchor point. Because of this, deleting it removes its associated keyframe.
Note: If you click an anchor point and press DELETE without holding down SHIFT, you will delete the element together with the entire motion path.
Rotate Motion Paths
It’s possible to rotate a motion path. Hold down ALT, then click and drag the path. The path will be rotated around the element’s transformation-origin point.
Move Motion Paths
You can move the path without changing the relative movement of an element. Hold down CTRL, then click and drag the path to move it.
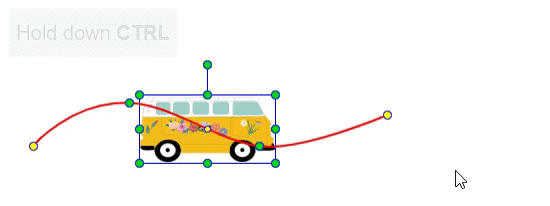
Note: As stated earlier, when the Playhead isn’t on a Location keyframe, dragging an element is equal to moving the entire path. The path’s shape stays unchanged.
Orient Elements to Paths
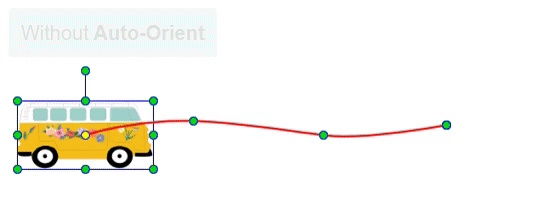
Imagine you want to animate a car to drive up a slope. As the slope is not a straight line, you need to use a motion path to move the car. However, even with a motion path, the car’s movement is still unnatural because the nose of the car doesn’t orient along the direction to which it is heading.
To solve this problem, use the Auto-Orient property to orient elements in relation to the direction of the motion path. The Auto-Orient Motion Path check box is enabled only if the element already has a motion path.
That’s all about creating motion paths in Saola Animate 3. Try Saola Animate today to build engaging HTML5 animations and interactive web content.
See also: