Let’s face it, the days of learners passively watching lengthy videos, often zoning out and losing focus, are numbered.
Have you ever noticed how platforms like Coursera and Udemy strategically embed quizzes directly within their video lessons? This isn’t just a random feature; it’s a powerful technique to keep learners actively engaged, prompting them to recall and summarize key information right as they learn it.
Interactive video quizzes are truly a game-changer in transforming monotonous viewing into dynamic learning experiences. If you’ve ever wanted to create such engaging content without getting bogged down in complex coding or technical setups, then ActivePresenter is your answer.
This intuitive eLearning authoring tool provides a seamless way to integrate interactive quizzes directly into your videos, making the creation process straightforward and efficient. Let’s explore how ActivePresenter can help you design captivating and effective interactive video quizzes.
Before that, make sure to download ActivePresenter for free & no sign in and follow our upcoming step-by-step guide to start building your own interactive video quizzes!

To create interactive video quizzes, please follow these steps:
- Use Slide Master to Create a Consistent Look for all Question Slides (Optional)
- Insert and Customize Interactive Questions
- Insert Video into Question Slides
- Adjust the Timestamp when the Questions Appear in the Video
- Export Project to HTML5
You can download the interactive video quizzes available in version 9.
Use Slide Master to Create a Consistent Look for All Question Slides
Using Slide Master is a great way if you want to maintain a consistent look for all question slides. It helps you quickly create, manage, and customize the look of all slides in your project.
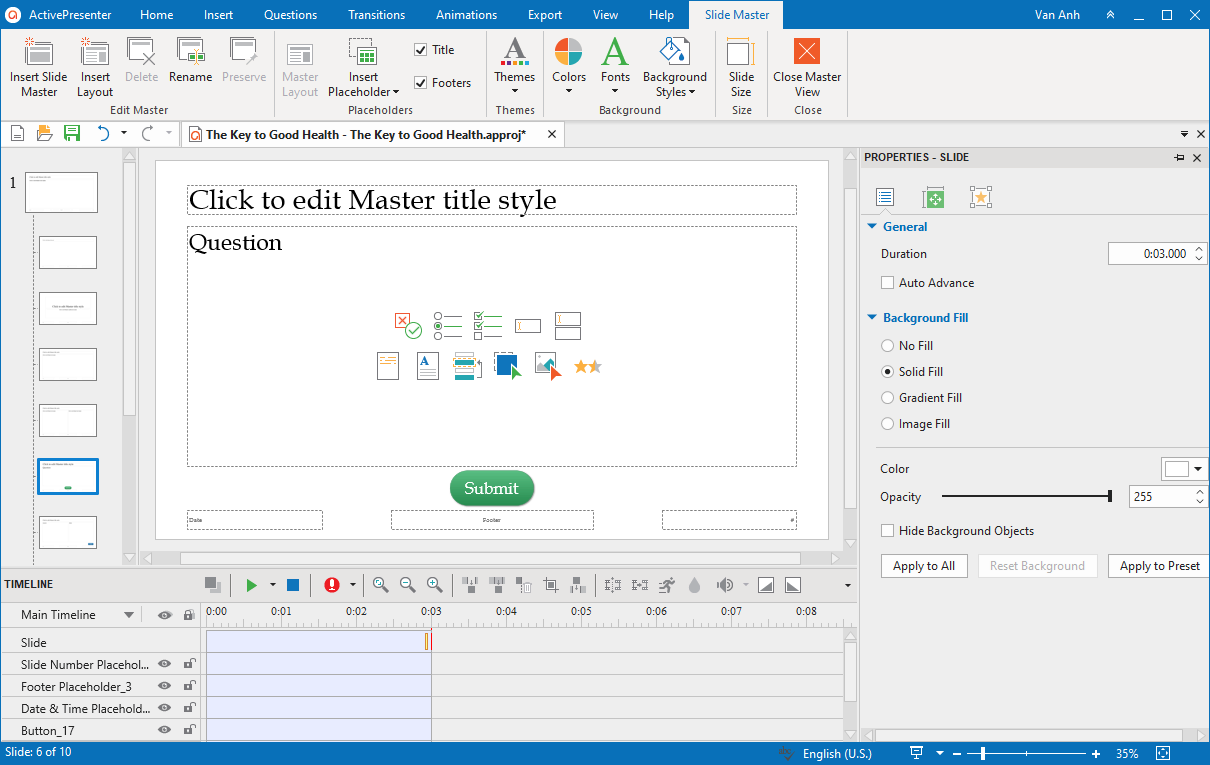
Therefore, if you want all of the questions in your project to have the same format, open the View tab > Slide Master > Question Layout > make any changes in this layout. For example, change the font size and customize the Submit button:
Please take a look at Slide Master for more information.
In case you want to customize each question slide separately, please ignore this step.
Insert and Customize Interactive Questions
Open the Questions tab, select the question types that you want to create:

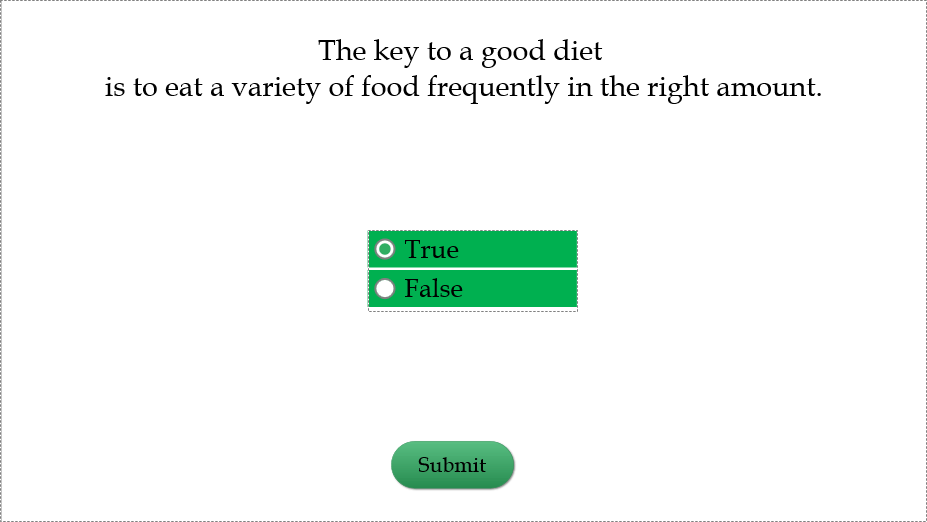
After that, the question slides will be inserted into your project. You’re free to customize them. For instance, you can add a question title, insert more answer options and enter text for them, change the checkbox style, set correct answers for the question, change the question layout, and more:
Refer to this article to get an overview of how to work with interactive questions in ActivePresenter.
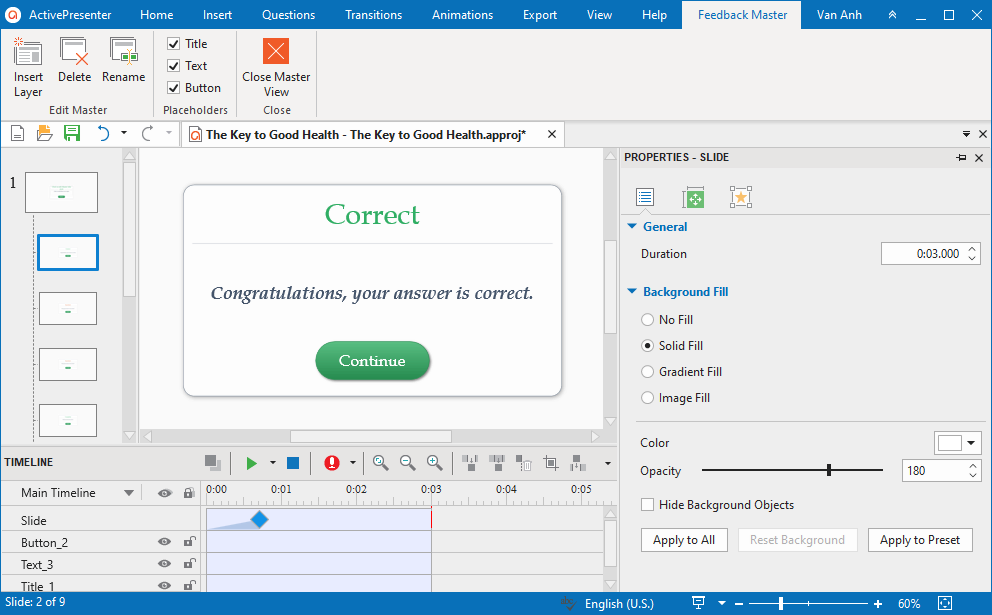
Note that you can use Feedback Master (access the View tab > Feedback Master) to create a consistent look for all feedback layers of all question slides. Similar to Slide Master, Feedback Master allows you to quickly edit the look of all feedback layers:
Insert Video into Question Slides
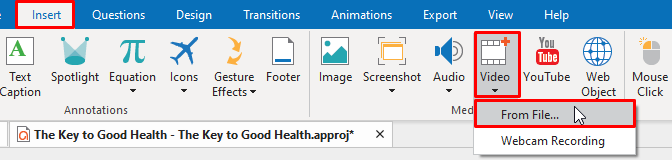
The next step is to insert the video into question slides. Open the Insert tab > Video > From File…> choose a video that you want to embed:
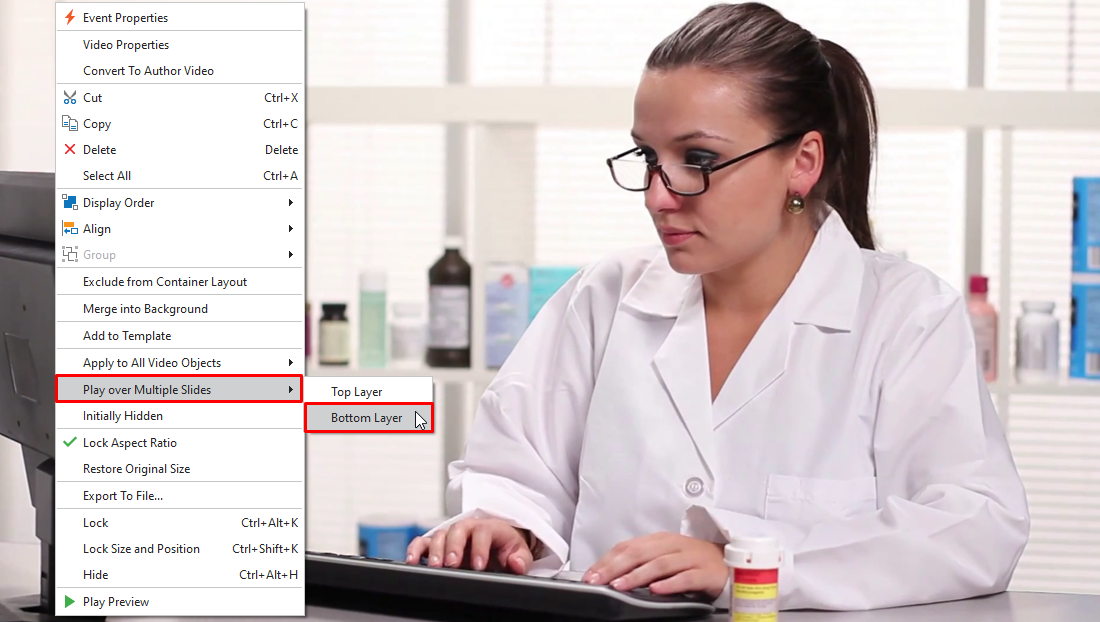
In addition, to make the video play over all question slides in your project and become the background of the question slides, right-click it > Play over Multiple Slides > Bottom Layer:
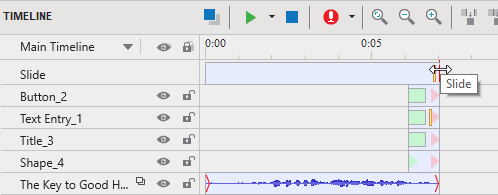
Then, you can edit the video duration in each question slide just by dragging the red stripe in the Timeline pane:
Adjust the Timestamp when the Interactive Questions Appear in the Video
In the Timeline pane, place the Playhead at the timestamp when you want the question to appear in the video. Select all components of the question (the question title, answer area, and Submit button) and drag them to the selected timestamp:

To make the question appear and disappear naturally in the video, you can add Entrance Effects and Exit Effects to it by opening the Animations tab and selecting suitable effects.
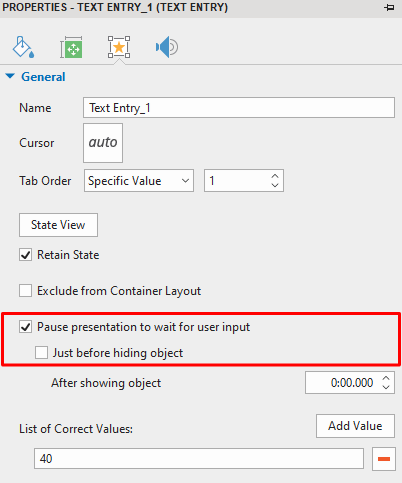
Besides, there is an important step that you need to do. That is, select the answer area of the question, in the Properties pane > Interactivity tab > make sure that the “Pause presentation to wait for user input” checkbox is selected. And, remember to deselect the “Just before hiding object” checkbox. This action will help to pause the video when learners are interacting with the question.
To make the video darker and the question easy to see, in the timestamp when the question appears, you should insert a shape to cover the video. To do that, open the Insert tab > Shape > select a shape > draw a rectangle to cover the video. Adjust its time in the Timeline pane and customize the shape (change its color, and opacity, send it to the backside by right-clicking it > Display Order > Send to Back).
Export Project to HTML5
The final step to create interactive video quizzes is to export your project to HTML5 so that learners can interact with the questions. If you export your project to video formats (MP4, MKV, AVI, WEBM, WMV), learners cannot interact with the questions because the interactivity is not supported in the video format due to its nature.
To export the project to HTML5, open the Export tab > HTML5.

Take a look at Export to HTML5 to learn more.
That’s all steps you need to follow to create interactive video quizzes in ActivePresenter 8. Now, it’s your turn.
Download ActivePresenter and try it yourself (available for Windows and macOS)
Below are related articles that you may want to take a look at: