Drop area is one of interaction objects in ActivePresenter 8. This object is useful in creating drag-n-drop interactions.
Let’s take a look at the below example of creating drag-n-drop interactions using a drop area:
In this tutorial, let’s learn how to work with a drop area object in ActivePresenter 8.
Insert Drop Areas
Do either of the following ways:
- Open the Insert tab > Drop Area.
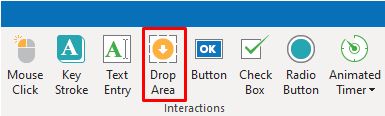
- Open the Home tab > Interactions > Drop Area.
By default, a drop area object consists of five components, including:
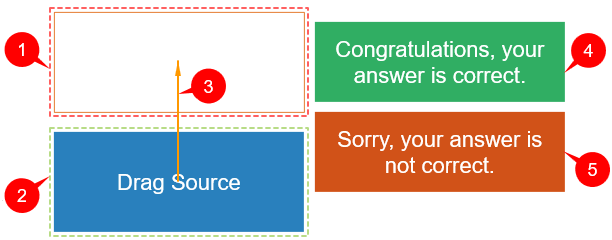
- (1) a drop area (with red dashed line): Each drop area object can have multiple drag sources but has only one drop area.
- (2) a drag source (with green dashed line): This is a default drag source. You can add more drag sources as you wish.
- (3) a drag-n-drop connector (an orange arrow): This connector denotes that dropping a drag source into a drop area is a correct action. Note that the drag-n-drop connector and the dashed lines will not appear in the output. You can make them visible or invisible in the Canvas by clicking on the Drag-n-Drop button in the View tab.
- (4) a Correct Message: A Correct Message will appear when learners drag a correct drag source into a drop area.
- (5) an Incorrect Message: An Incorrect Message will appear when learners drag a wrong drag source into a drop area.
Convert Objects into Drag Sources
As mentioned in the previous part, when you insert a drop area object into a slide, it has only one default drag source. However, you can add more drag sources as you wish.
To do that, you can easily convert different kinds of objects such as shapes, images, icons into drag sources by following the below steps:
Step 1: Select one or multiple objects. In the Properties pane > Interactivity tab > Drag-n-Drop > select Drag Source (6):
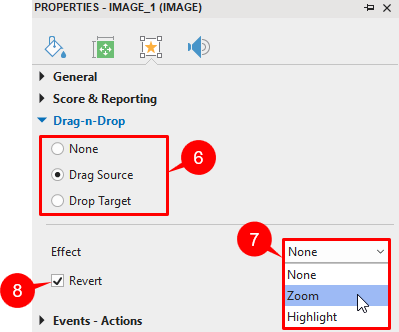
Step 2: Choose one effect from the Effect list (7):
- None: No effect happens when learners drag a drag source.
- Zoom: The drag source will be zoomed in when learners drag it.
- Highlight: The drag source will be highlighted when learners drag it.
Step 3: Select or deselect the Revert checkbox (8). By default, it is selected. That means a drag source will be sent back to its original position if learners drop it outside a drop area or if learners drag a wrong drag source into a drop area.
Tip:
- As ActivePresenter allows you to convert multiple objects into drag sources at once, you should insert all objects before converting.
- If you create multiple drag sources, you should rename them for easy identification. To do that, select a drag source, in the Properties pane > Interactivity tab > General > enter its new name.
Set Accepted Values and Correct Values for Drop Areas
Accepted values are drag sources that can be dropped into a drop area. Accepted values can be correct or wrong drag sources. Meanwhile, correct values are correct drag sources (correct answers).
To set accepted values and correct values, do as follows:
Step 1: Select a drop area. In the Properties pane > Interactivity tab > Drag-n-Drop > click on the Accept List button. Then, the following dialogue will appear:
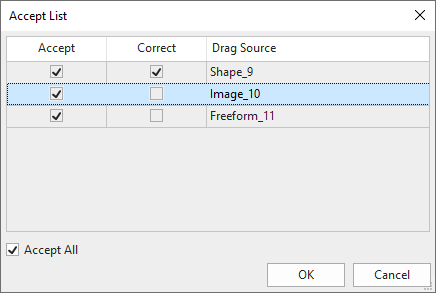
As you can see, this dialogue has three columns: the Accept column (allows you to set accepted values), the Correct column (allows you to set correct values), and the Drag Source column (displays names of drag sources).
Step 2:
- Select checkboxes in the Accept column to specify which drag sources can be dropped into a drop area. If you allow learners to drag all drag sources into it, select the Accept All checkbox.
- Select the checkboxes in the Correct column to specify which drag sources are correct values (correct answers).
Another way to set correct values is to use the drag-n-drop connector (3). Just click on the marker in the middle of a drag source and drag the mouse to a drop area. This drag-n-drop connector denotes that dropping a drag source into a drop area is a correct action.
Set Drop Areas Properties
To set up properties for a drop area, select it, in the Properties pane > Interactivity tab > Drag-n-Drop.
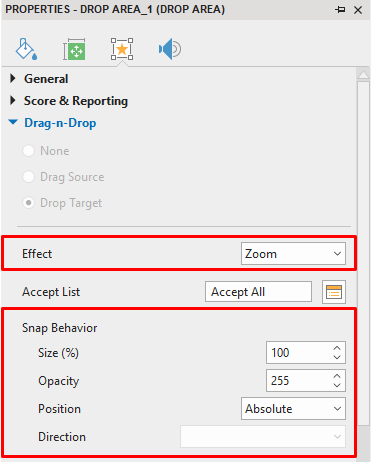
Effect: Choose one effect from the Effect list:
- None: No effect happens when learners drop a drag source into a drop area.
- Zoom: The drop area will be zoomed in when learners drop a drag source into it.
- Highlight: The drop area will be highlighted when learners drop a drag source into it.
Snap Behaviour: Edit properties of drag sources after learners drop them into a drop area.
- Size: Change the value to resize drag sources.
- Opacity: Set the opacity level from 0 to 255 for drag sources.
- Position: Define the location of drag sources with three options: Absolute (keep drag sources at the same position as where learners drop them), Anchor (snap a drag source to an anchor point of a drop area), Tile (arrange a drag source so that it lies on a drop area without covering each other).
Set Score and Reporting
A drop area object can not only validate learner’s actions but also give them points for correct actions. To set points for correct actions, see Set Score and Reporting for Interaction Objects in this tutorial.
Insert and Customize Feedback Messages
Apart from the default feedback messages, you can add four additional ones, including Timeout Message, Hint Message, Accept Message, and Reject Message:
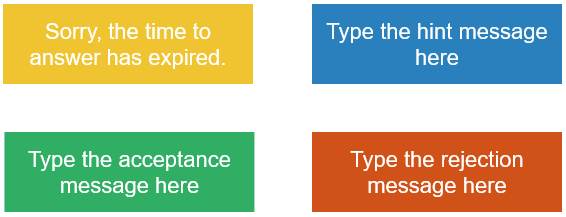
- Timeout Message will appear when learners don’t complete an action in the predefined time.
- Hint Message will show up when learners hover the mouse over a drop area.
- Accept Message will appear when learners drag any accepted drag source into a drop area.
- Reject Message will show up when learners drag any rejected drag source into a drop area.
To add those messages, open the Questions tab > Message. Or, right-click on the target area > Insert. Then, select a message from the list:

Then, you can customize feedback messages as you wish.
For more information, please refer to How to work with Feedback Messages.
Add Events – Actions
When you insert a drop area object, it has default events – actions as in the below image:

Except for those default events, you can add more additional ones, including On Accept, On Reject, On Drag Enter, On Drag Leave, On Roll Over, On Roll Out:
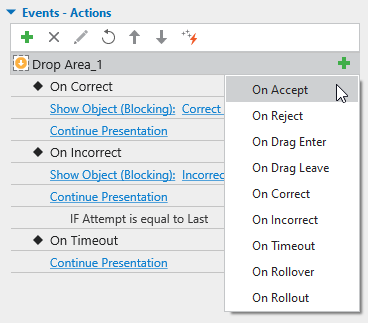
Below is the explanation for the meaning of each event:
- On Accept: Occur when learners drag any accepted drag source into a drop area.
- On Reject: Occur when learners drag any rejected drag source into a drop area.
- On Drag Enter: Occur when a drag source enters a drop area.
- On Drag Leave: Occur when a drag source leaves a drop area.
- On Correct: Occur when learners drag any correct drag source into a drop area.
- On Incorrect: Occur when learners drag any wrong drag source into a drop area.
- On Timeout: Occur when learners don’t respond within the specified time.
- On Rollover: Occur when the mouse rolls over the drop area.
- On Rollout: Occur when the mouse rolls out of the drop area.
After adding events, continue adding actions to events, and conditions to actions if necessary.
For more details, see Work with Events – Actions.
That’s how to work with a drop area object in ActivePresenter 8. Download ActivePresenter and make your course more interactive.
Related Articles: