When creating your projects, there is a high chance that you may want to zoom in on the objects of interest or pan from one object to another. You can do that within seconds by using the Zoom-n-Pan feature in ActivePresenter.
In general, the procedure of working with zoom-n-pan is inserting a zoom-n-pan object to zoom in on a particular part of the screen, then add another one to pan or zoom out. In this tutorial, you will learn how to zoom in, zoom out, pan out and delete zoom-n-pan. Please follow the below instructions to apply it.
Zoom In
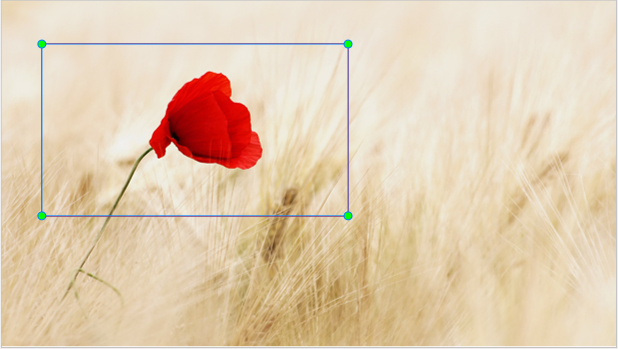
Step 1: Insert a zoom-n-pan object by clicking Zoom-n-Pan in the Insert tab.

Then, you will see the zoom-n-pan rectangle appear on the Canvas with four green handles.
Step 2: Change the zoom effect position by doing either of the following:
- Hover the mouse over the outline of the zoom rectangle and drag it to the position you want.
- In the Position & Zoom Scale section on the Properties pane, change the values in the Left (1) and Top spin box (2). This way provides more precise positions of the zoom effect on the slide, in which:
- Left: X position of the zoom rectangle from the left side.
- Top: Y position of the zoom rectangle from the top side.

Step 3: Change the zoom scale by doing one of the following:
- Hover the mouse over one of the four green handles until the mouse turns into a double-headed arrow, then drag the handle.
- In the Position & Zoom Scale section on the Properties pane, enter a value in the Zoom Scale spin box (3). Also, this way provides a more precise zoom scale.
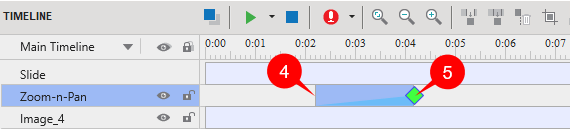
Step 4: Change the zoom effect start time.
The zoom effect will start to zoom in at the starting point of the object (4) and end at the green diamond (5). The light blue area inside the object Time Bar indicates the effect timing.
To change the start time of the zoom effect, do one of the following:
- Click the zoom effect object Time Bar in the Timeline pane, then the mouse turns to a four-way arrow, drag it to the left or right. Besides, you can drag the starting point (4) to change the effect start time. However, using this way will change the effect duration at the same time.
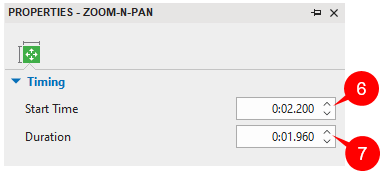
- In the Timing section of the Properties pane, enter a value in the Start Time spin box (6).
Step 5: Change the zoom effect duration.
By default, the duration of the zoom-n-pan effect is one second and you can change it to any other values you want. However, the effect duration shouldn’t be too short or too long as it might cause the zoom in and out to appear in a hurry or disjoint. Two or three seconds are good to go with since a smooth effect is better for viewers to follow.
To adjust the length of a zoom effect, do one of the two following ways:
- Drag the green diamond to the left or right to decrease or increase the duration, respectively.
- In the Timing section of the Properties pane, enter a value in the Duration spin box (7).
Pan Out
This is used to pan from one object to another continuously. To create a pan effect in ActivePresenter, just add multiple zoom regions to a slide. After inserting and customizing a zoom-n-pan object, insert another one at a specific timestamp, then change its position and scale as explained above. When the slide is displayed, you will see the effect like watching a camera showing the entire screen, then zoom in and simultaneously pan sideways to another area. Next, the camera will gradually move to the other part of the screen where you apply the other zoom effect (if any).
Note: You can add as many zoom-n-pan effects as you want to a project. You can also copy and paste a zoom-n-pan effect to a new position instead of inserting a new one from the Insert tab.
Zoom Out
The zoom-n-pan object has a one-way effect: When it ends, it does not restore the zoom back to normal. This means the project will keep displaying while zooming at the zoom region till the end of the slide. So, you have to insert another zoom-n-pan object to zoom back to normal view. It’s slightly different from inserting another zoom-n-pan object to zoom in another part of the screen.
Do as follow to zoom back to normal:
Step 1: Select the timestamp that you want to zoom back, then insert a zoom-n-pan object.
Step 2: Resize the zoom rectangle to cover the entire slide. Alternatively, you can let the value in the Zoom Scale spin box (3) be 100.
When the slide is displaying with the zoom effect, it will start to go back to the normal view when it reaches this zoom-n-pan object.
Delete Zoom-n-Pan
To delete the Zoom-n-Pan effect, just select the object (on the Canvas, Timeline pane, or Selection pane) and press the DELETE key on your keyboard.
Otherwise, you can right-click the zoom rectangle or zoom-n-pan object Time Bar and select Delete from the context menu.
So, that’s how to use the Zoom-n-Pan tool in ActivePresenter. Hopefully, this effect will help you create more beautiful and pro projects. Feel free to contact us if you need further help.
See Also: