Closed captions (so-called CCs) refer to the text version of the spoken part that you often see on TV series, movies, videos, or presentations. It can be more helpful when the content is conveyed in different languages other than just one language. That’s because multi-lingual closed captions make your content more accessible to everyone regardless of their languages. Viewers can toggle between languages based on their choice. So, in today’s tutorial, you will learn how to add further different languages for a closed caption in ActivePresenter 8.
This tutorial covers:
- Add Closed Captions
- Add Multiple Languages for Closed Captions
- Format Closed Captions
- Toggle the Closed Captions between Languages in the Player
Add Closed Captions
In ActivePresenter, to work with multiple languages of closed captions, you first have to insert closed captions to your project.
Click the Insert tab > Closed Caption. Or in the Timeline pane > Insert Caption.

Both ways insert one closed caption node (1) at the Playhead position. At the same time, on the Canvas, a closed caption editor (2) appears, allowing you to type the closed caption.
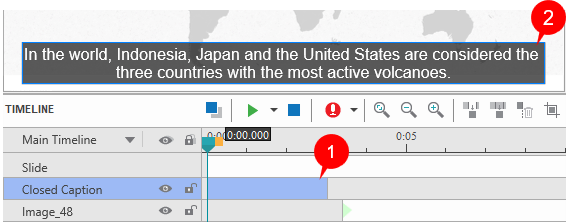
Then, type the closed caption in the editor.
For more details, let’s see How to Add Closed Captions.
Add Multiple Languages for Closed Captions
Add and Manage New Language
After inserting and typing the text of default language for closed captions, you can add further languages to them if needed. You just need to follow some very basic steps below:
Step 1: Select a CC node in the Timeline.
Step 2: Go to the Insert tab > click the drop-down arrow on the Closed Caption button > Multiple Languages.
Or in the Properties pane > Size & Properties > General > click the Edit Language ![]() button.
button.
Both ways open a dialog letting you add and edit any language you want.
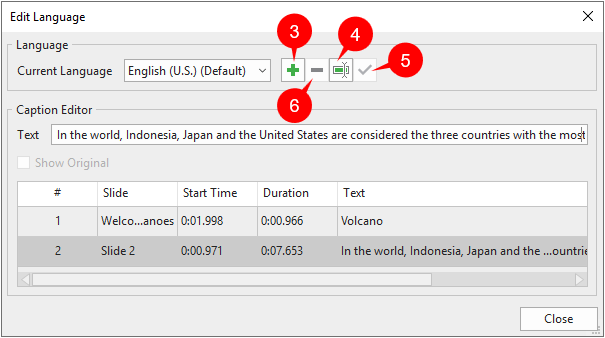
Step 3: Add a new language. In the Language section, click the plus button (3) to add a language.
Step 4: Select a language from the drop-down list in the Add Language dialog that pops up.
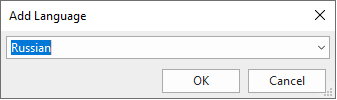
Step 5: Click OK to apply.
Then, you are free to rename (4), set as default language (5), or remove (6) this new language.
Edit New Language
To edit a new language, do as follows:
Step 1: Select a CC line in the dialog to add a new language to it.
Step 2: Type the text of the new language in the Text field.
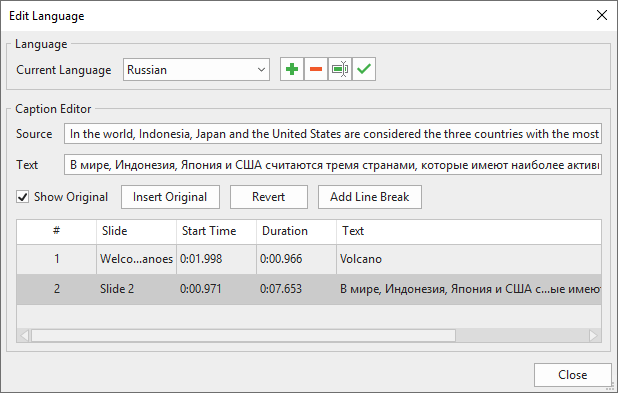
Besides, if you want to work along with the original text, you can:
- Show Original: Select this check box to show the source language.
- Insert Original: Insert the original language into the new language. Thereby, both of them will be simultaneously shown in the same CC.
- Add Line Break: Add the <br> tag to a text to break it into different lines.
- Revert: Revert the new language to the original one.
After that, the text of newly typed language will immediately appear in the existing selected CC as its another language.
Step 3: Click Close to apply.
Format Closed Captions
The style of all CCs can only be set globally in the project. This means you just need to set the style for one CC, the others will inherit visual properties from it.
To format a CC line, do the following:
Step 1: Makes the CC visible on the Canvas. For that to happen, in the timeline, place the Playhead at the timestamp that the CC appears.
Step 2: Edit the text or the fill style of the CC using commands and options available in the Home tab, Format tab, or the Properties pane.
Note: The style of a CC will be the same regardless of displaying in any language. If you want to preview text of multiple languages in the style you’ve set right inside the editor, you first select a CC node. Then, toggle between languages in the Properties pane > Size & Properties > General > Caption Language > choose any language from the drop-down list.
Toggle the Closed Captions between Languages in the Player
You can give viewers control over toggling between languages of closed captions. This can be done by using the CC button in the Player. To enable the CC button, first go to the Export tab > Player Settings to open the Player Settings dialog.
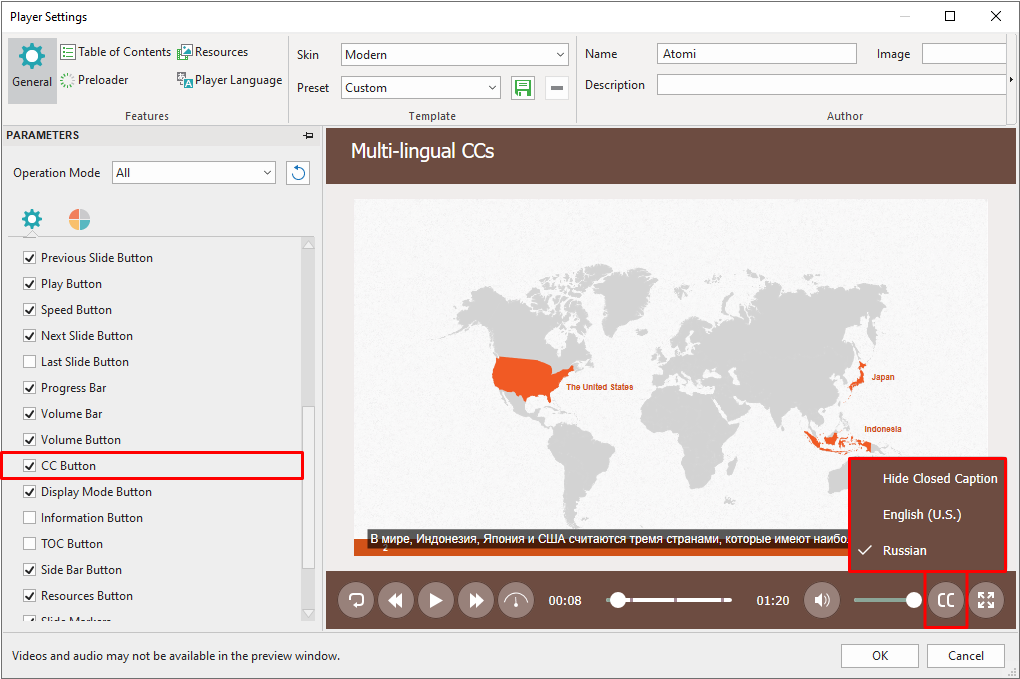
Then, in the General tab > General Parameters > Toolbar, select the CC Button check box. This button then appears in the right-bottom corner of the toolbar, which allows viewers to select a closed caption language they want to. In addition, viewers are able to hide closed captions if they don’t want to see. Lastly, don’t forget to click OK to save changes.
To see more about the player settings, see Customize HTML5 Player Settings.
So, you’ve learned the way to add and work with multiple-language closed captions. Don’t hesitate to download ActivePresenter 8 and give it a try now.
See also: