Saola Animate lets you add six image formats to a project. Supported formats include JPG, JPEG, PNG, BMP, SVG, and GIF. It means that you can use both static and animated images as well as both raster and vector files. For the vector image format, it’s also possible to use predefined shapes or draw freeform ones. Let’s learn how to add and edit image elements in Saola Animate 3.
This tutorial covers:
- Add Images Elements
- Rename Image Elements
- Resize Image Elements
- Replace Image Elements
- Remove Image Elements
Add Image Elements
There are many ways to import images into a project. You can do either of the following:
- Drag/ copy them from your computer or other applications and drop/ paste onto the Canvas.
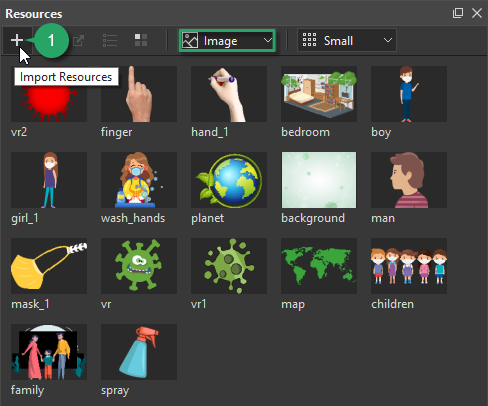
- Drag them from your computer into the Resources pane to store. Alternatively, click the Import Resources button (1):
When you want to use an image in the Resources pane, just drag it from the pane onto the Canvas or right-click it > Add to Scene.
- Click the Image button (2) in the dockable toolbar, select one or more images that you want to insert:
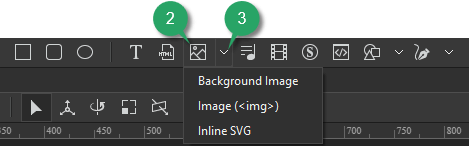
- Click the drop-down arrow (3), you can import them by one of three options: Background Image, Image (<img>), and Inline SVG.
Background Image
Select this image type when you want to:

- Create sprite sheet animations.
- Display a specific part of an image by changing its position (X, Y) and size (Width, Height).
- Animate the position and size of the embedded image.
- Use a high-res image as a background but can crop its unnecessary parts in small screen devices by changing its position and size.
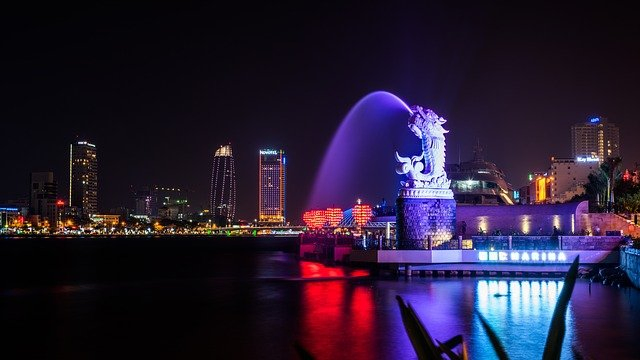
For example, let’s take a look at the image below:
By default, its X and Y values are in pixel while its width and height values are in percentage (4). When you resize the image, it will be scaled without changing its original proportion (5):

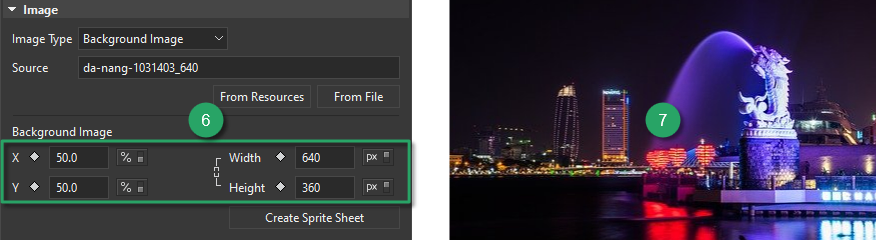
Now, let’s change the width and height values to pixel, then set the X and Y values in percentage (X=Y=50%) (6). When you resize it, it will be cropped to focus on the central part (7).
Note: When you import an image using the Image <img> or Inline SVG options, the Background Image section is not available.
Image (<img>)
The Image (<img>) option is used to embed an image in an HTML page. It helps to create a holding space for the referenced image. Using this option is the most straight-forward way of displaying a static image on a page. The Image <img> type should be used whenever an image is actually a part of the content (as opposed to using an image as part of a page’s design).
Inline SVG
SVG stands for Scalable Vector Graphics, used to define graphics for a web. The Inline SVG option is only available for SVG images (.sgv files). This option allows you to embed SVG images directly in an HTML page. Later, you can use JSS or Javascript to customize styles and properties of SVG elements in that image.
Note: You can switch the current type to another one. In the Image section, select another type from the drop-down list:

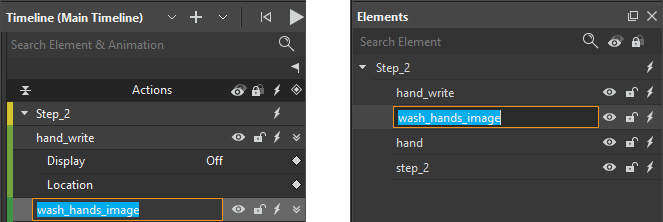
Rename Image Elements
After adding an image to a scene, you can rename it. Do one of the following:
- Double-click its name in the Timeline or Elements pane > enter a new name:
- In the Properties pane > General section > rename it in the Name box:

Resize Image Elements
To resize an image, simply select it and drag the resizing handles. Or, in the Properties pane > Position & Size section > change its width and height’s values.
Note: An image element maintains its aspect ratio by default, which keeps them proportional while being resized. To change the ratio, click the chain icon to clear the Link width to height checkbox:
While editing, chances are you want to revert them to their original size. Just right-click it on the Canvas and select Restore Original Size.
Replace Image Elements
Replacing image elements comes in handy when you want to change the image but maintain all existing animations you created. In the Image section of the Properties pane, click:

- From Resources (8): Select a new one from the Resources pane.
- From File (9): Select a new one from your computer.
In doing so, make sure the new image has the same size as the original one. Otherwise, it may be resized or look messy.
Remove Image Elements
To remove image elements, select it on the Canvas, in the Elements or Timeline pane and press DELETE.
Note: Even if you delete an image element on the Canvas, it still exists in the Resources pane. To completely remove an image, you must delete all image elements associated with it. Then, delete the image from the Resources pane later.
Related Articles:
| Introduction to Elements Add Texts Use Freeform Tools | Add Audio Add Videos Create Custom Elements | Add Shapes Add HTML Widgets Use Symbols to Reuse Animations |