Are you interested in creating Defuse The Bomb Game to boost your students’ concentration? Get your students ready to dive into learning by playing this game.
In this game, students have to answer trivia questions in a limited time to defuse the bomb. As soon as they answer a question incorrectly or the time runs out, the bomb will go off and the game will end. So, are you ready to explore how to create this game with ActivePresenter 8, our winning star eLearning authoring tool for teachers and trainers in a few minutes? Let’s get started.
The steps to create Defuse The Bomb Game includes:
1. Preparation Before Creating Defuse The Bomb Game
Before starting to create this game, you need to prepare two things. They are a list of trivia questions and media resources.
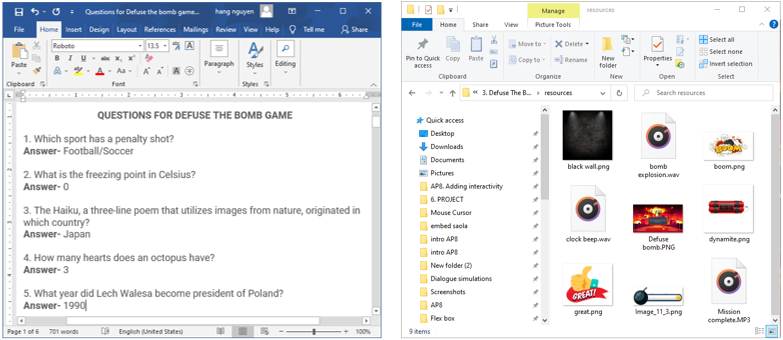
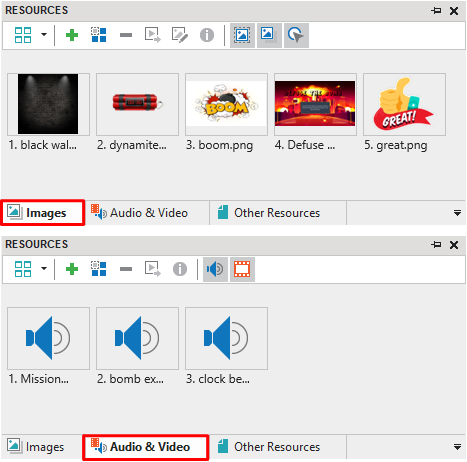
After that, you import those resources into ActivePresenter. To do that, in the View tab, click Resources. Then, drag and drop the resources from your computer into the Resources pane. This manipulation can help optimize your time creating the game. You can select the image and audio objects from the Resources pane instead of looking for them many times in the folder on your computer.
2. Customizing Layouts
This game includes three main parts: Welcome slide, Question slides, and Ending slide. Thus, we use Slide Master to create these layouts. To open Slide Master, in the View tab, click the Slide Master button.
- In the Master Layout, deselect the Auto Advance option so that a slide won’t jump to the next slide automatically when it is completed. (Properties pane > Slide Properties tab > General > Uncheck Auto Advance).
- In the Title Slide Layout, set a background image. (Properties pane > Slide Properties tab > Background Fill > Image Fill > Select a background image from project and choose an image from the Resources pane).
- In the Question Layout, you can freely set the background image, font, size, color, and so on for this layout. Also, add the On Click event and the Go Forward action to the Submit button. Then, create transition effects between question slides. (Transitions tab > Fade).
- In the Blank Layout, set a background image. You perform the same steps as for the Title Slide Layout.
- Close Master View to save the changes.
3. Creating Defuse The Bomb Game
In Normal View, you insert slides based on the layouts customized in Slide Master. Access the Home or the Insert tab > Click the arrow on the New Slide button to add seven slide layouts as follows:
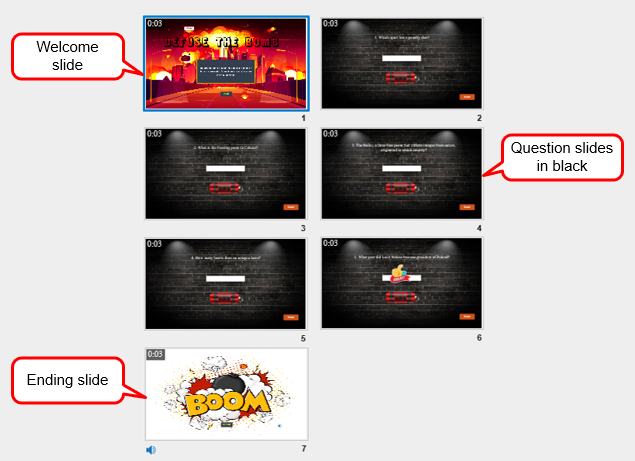
Slide 1: Welcome Slide
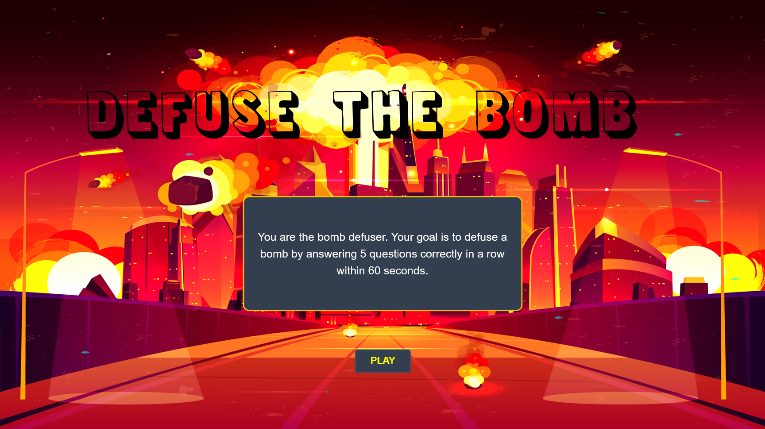
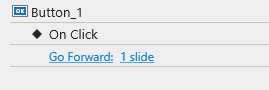
In this slide, you create a PLAY button. (Insert tab > Button). Then, add the On Click event and the Go Forward action to the PLAY button.
Slides 2 – 6: Question Slides
This game uses the Fill in Text Entry Question for all 5 question slides. You can also use other types of questions if you want as ActivePresenter offers you up to 11 types of questions.
See Create Fill in Text Entry Questions to know more.
Adjusting 5 Question Slides
Firstly, you adjust 5 question slides by adding questions and answers from the list of questions prepared at first.
- Add content to the question title.
- Add correct answers. (Select the answer area > Properties pane > Interactivity tab > General > Add Value. Deselect the Case Sensitive option).
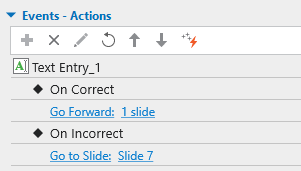
- Add events-actions to the Text Entry object as follows:
Add Timer to Slide 2
Secondly, you insert an animated timer to slide 2. In this game, students have only a limited amount of time to defuse the bomb. Therefore, you perform the following actions to add a timer to this slide. (Insert tab > Animated Timer > Timer).
- Style this object in the Format tab.
- Uncheck the Match Object Duration to add a new timer duration.
- Make this timer show over many slides by right-clicking it and selecting Show Over Multiple Slides > Top Layer and Show to the End of Project.
- Add the On Timer Complete event and Go to Slide 7 action to the Timer (Properties pane > Interactivity tab > Events – Actions).
Add Audio to Slide 2
Thirdly, you add an audio file that imitates the sound of the Timer to Slide 2.
- Drag an audio file from the Resources pane and then drop it into Canvas.
- Make this audio play over many slides by right-clicking it and selecting Play over Multiple Slides > Top Layer and Show to the End of Project.
- Set this audio as background music. (Properties pane > Media tab > Playback Options > Check the Loop, Autoplay, and Background Music options).
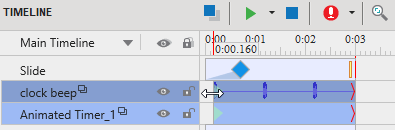
Shorten Timer and Audio’s Time Bar
Fourthly, you drag the time bar of the Timer and Audio objects in the Timeline pane a little bit shorter. This action will prevent these two objects from playing automatically when the first slide completes.
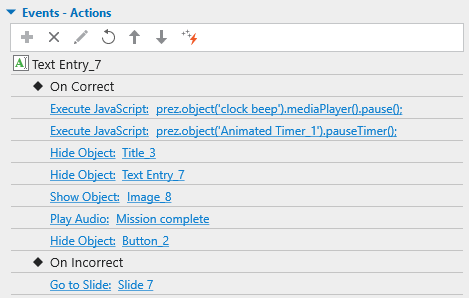
Adjust Actions on Slide 6
Lastly, you adjust actions on Slide 6. As this is the last question slide, you cannot set actions to move to the ending slide – Slide 7, if the answer is correct. So, you have to replace it with the following actions in the On Correct event:
- Pause timer and audio.
- Hide the question title and answer area.
- Show the Congratulation image (Image_8).
- Play the Congratulation audio (Mission complete).
- Hide the Submit button (Button_2).
Slide 7: Ending Slide
This ending slide includes three main actions as follows:
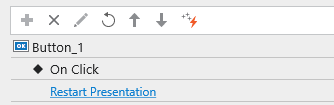
Replay Defuse The Bomb Game
In this slide, there is a button that allows students to replay the game when they click on it. To save time, you can copy the PLAY button from slide 1 and then paste it into this slide. After that, you give it a new name and add the following action to it:
Pause the Timer and Audio
When the game is over, the timer and audio stop. Since these two objects play over multiple slides, you have to add JavaScript actions to pause them.

Add the Bomb Explosion Audio
Finally, you insert an audio file that imitates the sound of the bomb explosion into this slide. Just drag an audio file from the Resources pane and then drop it into Canvas.
4. Publishing Defuse The Bomb Game
Now that you have created Defuse The Bomb Game. You can press F5 or click the HTML5 Preview button to preview the game. This helps you know how the game works. The game then operates in a web browser and you can interact with it as it has been published. Furthermore, this preview action allows you to detect if the game contains any mistakes that need to be fixed.
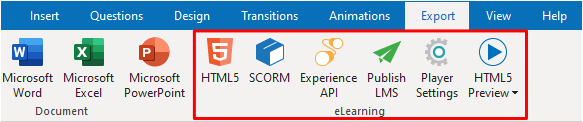
Finally, you can export the game to HTML5, SCORM, or xAPI package depending on your purposes. Or, you can also choose Publish LMS to upload it to our ActivePresenter Online.
That’s all about how to create Defuse The Bomb Game with ActivePresenter 8. Hopefully, this game will be helpful to you to make engaging eLearning courses. Don’t forget to subscribe and follow our YouTube channel to get the latest video tutorials.
You can download the sample project here.
See Also: