Many ActivePresenter users have been asking questions like “How will my students access the products I create with ActivePresenter Pro 8?” or “I have created a project and exported it in HTML5. So, I need to share this so that my students can access it.” These concerns are now addressed with Publish to LMS, a new feature in ActivePresenter version 8.1. It allows you to publish your HTML5 content directly to an LMS and share it with others easily. Let’s learn how to use this feature in today’s tutorial.
First of all, a learning management system (LMS) is a software program that helps you track and report your users’ activities, progresses, results when they interact with your content.
In order to publish your project to an LMS, open the Export tab, then click Publish LMS.

This opens the Publish to LMS dialog having two tabs, which are LMS and Options. We will get to know them each in the following parts.
Note:
- You can customize the settings for the Player Settings of the HTML5 output. This means you can change the skin of the player, the table of contents, output language, etc. Click the Player Settings button to access those settings. For more information, please refer to Customize HTML5 Player Settings.
- ActivePresenter allows you to preview the output before actually exporting it. Just click the HTML5 Preview button to do that. See Work with HTML5 Preview for more information.
LMS Tab
LMS Tab allows you to set information and publish the course with SCORM 2004 standard directly to ActivePresenter Online or other LMS sites, where learners can access and interact with the course content easily.
ActivePresenter Online is a learning management system (LMS) that allows educators to publish and share online courses with a focus on interaction and the ability to track the quiz takers’ results. Aside from ActivePresenter Online, you can also publish your course to another LMS site. We will talk about this in more detail later in this tutorial.
To publish a course on ActivePresenter Online (https://activepresenter.online/), you first need to sign up for an account.
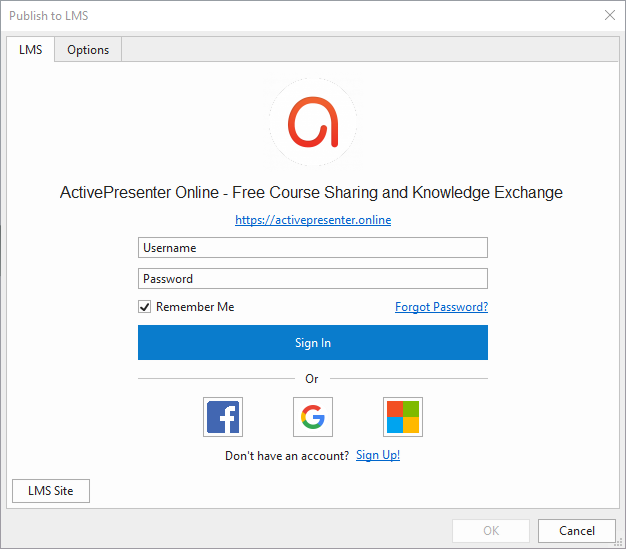
Once you have signed in for the ActivePresenter Online site, a dialog with course details will appear like this:
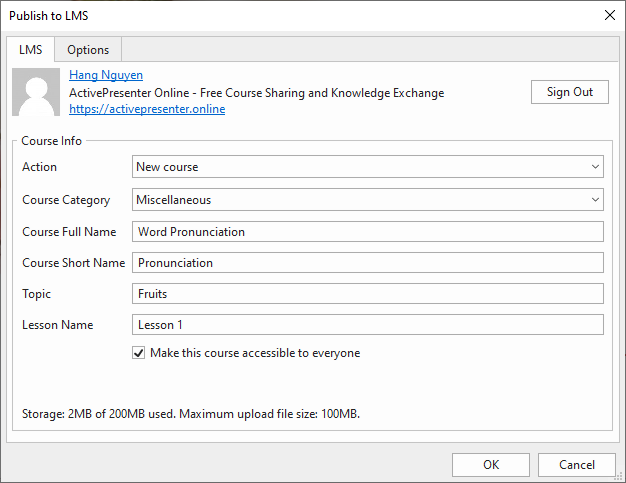
Course Info
This section will help you define general information of your courses such as category, name, topic, and more.
- Action: Select one option (New course, Update lesson in existing course, Add lesson to existing course) to publish your course.
- Course Category: Choose one subject that your course will be categorized from the list.
- Course Full Name: Put in the full name of your course here. It is displayed at the top of each course page and in the list of courses.
- Course Short Name: Put in the short name of your course here. It is displayed in the navigation and the subject line of course email messages.
- Topic: Type the topic of your course.
- Lesson Name: Type the lesson name.
- Make this course accessible to everyone: Tick this checkbox to allow everyone to access the course without logging in. Otherwise, only learners that are enrolling in or invited to the course can access it
- By default, each user has 200MB of personal storage space in ActivePresenter Online and a maximum of 100MB for each course uploaded.
Options Tab
This tab provides you with more settings for the final output. For example, you can select which operation mode to export to, define the total max time for the test, etc.
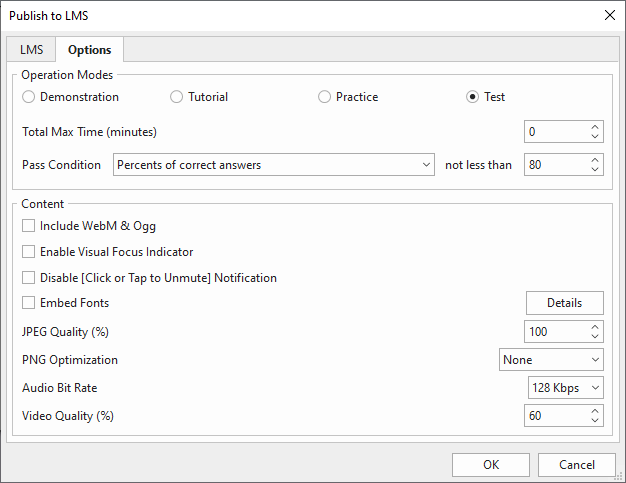
Operation Modes
- Four operation modes:
Select the mode that you want to export your project to among Demonstration, Tutorial, Practice, and Test. The selected modes will be available for users. Please refer to the tutorial Four Operation Modes for more information.
- Total Max Time (in minutes): This is the total time which is taken by all objects to complete their life cycles plus the time for students to answer. It also includes the pausing time of the presentation to wait for user answers. Set the value to 0 to disable this feature.
- Pass Condition: Determine the overall pass/fail result of students when they take a test. See Set Pass/Fail Conditions for Lessons for more information.
Content
The options in this section are applied to background images of slides.
- Include WebM & Ogg: Select this check box to allow viewing the HTML5 content on browsers that don’t support MP4 and MP3 but support WebM and Ogg.
- Enable Visual Focus Indicator: If you select this check box, the object that gains focus will have a dashed outline.
Note: If your projects have some accessibility methods, for example, Tab Order, you should select this option.
- Disable [Click or Tab to Unmute] Notification: Some browsers don’t allow content containing audio to play automatically without the user interaction. In that case, the HTML5 player will mute audio to enable autoplay. The player will display the message to notify users to click to unmute audio. Select this checkbox to hide the message.
- Embed Fonts: Embed fonts into output using CSS3 Web font specification. This makes the content look consistent between platforms and devices.
- JPEG Quality (%): This option only affects images in JPEG format.
- PNG Compression Level: These are relative compression levels. Note that the higher the compression level, the longer it takes to export.
- Audio Bit Rate: Specify the audio bit rate in the output if any. The higher the value, the higher the audio quality, and the larger output file size.
- Video Quality (%): Specify quality for videos in the output if any. The higher the value, the higher the video quality, and the larger output file size.
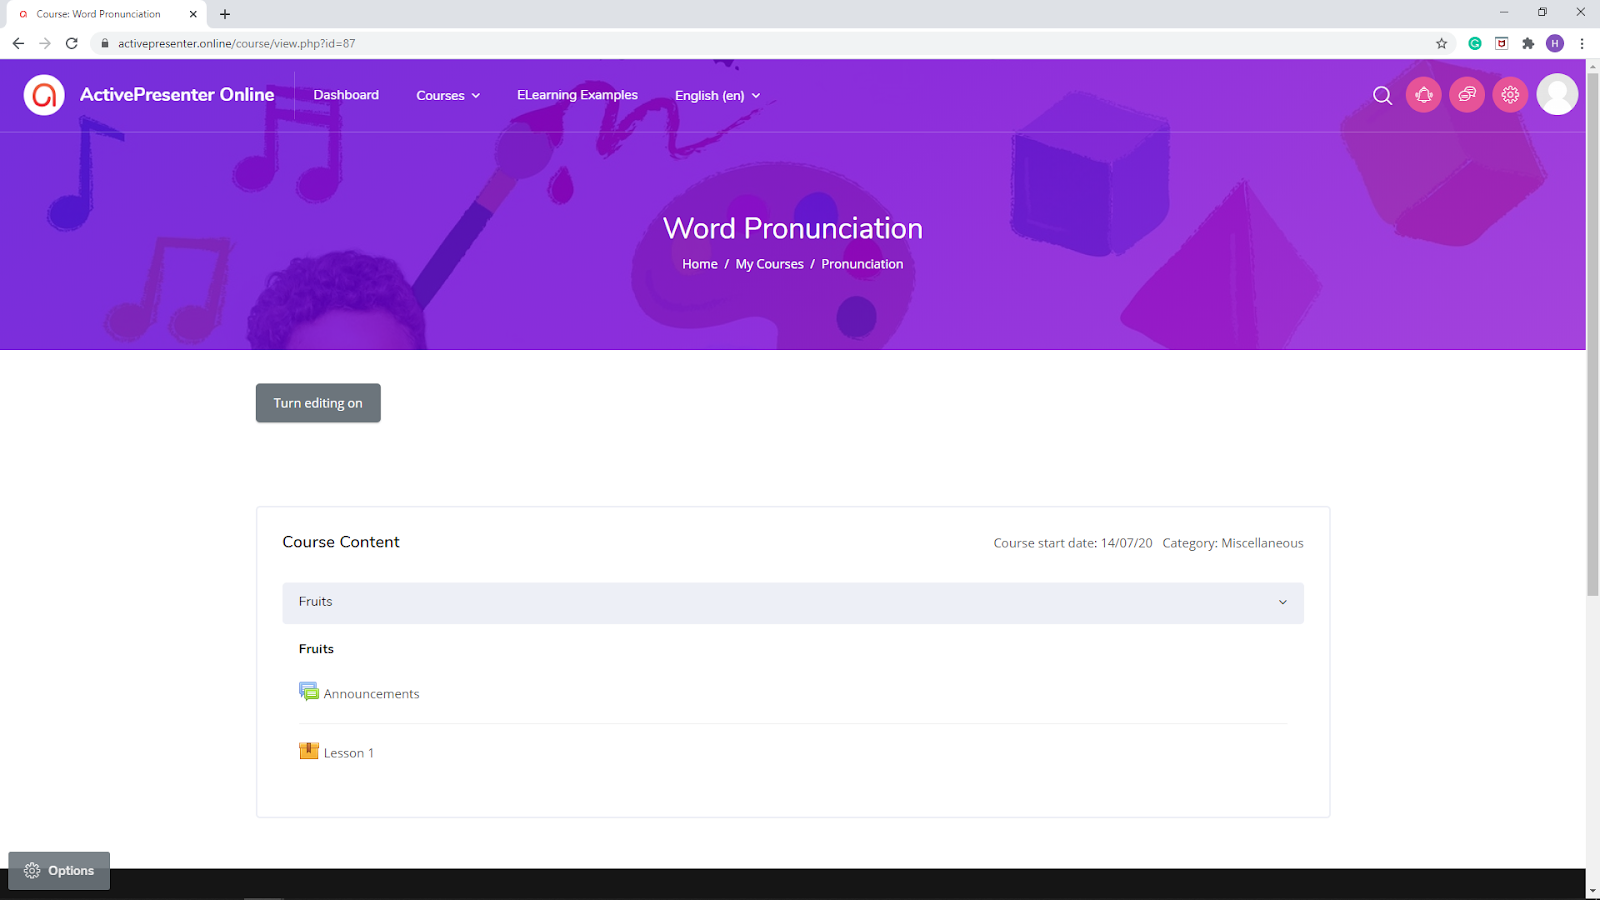
After specifying the course information, click OK to finish. Then, the course will be uploaded directly to ActivePresenter Online and the following dialog appears letting you View Course or View Lesson.
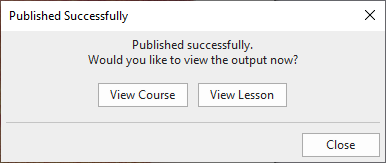
View Course: If you click this button, it will take you to the page where the course is located. This page shows general information such as course title, and course content. You can further edit the course if needed.
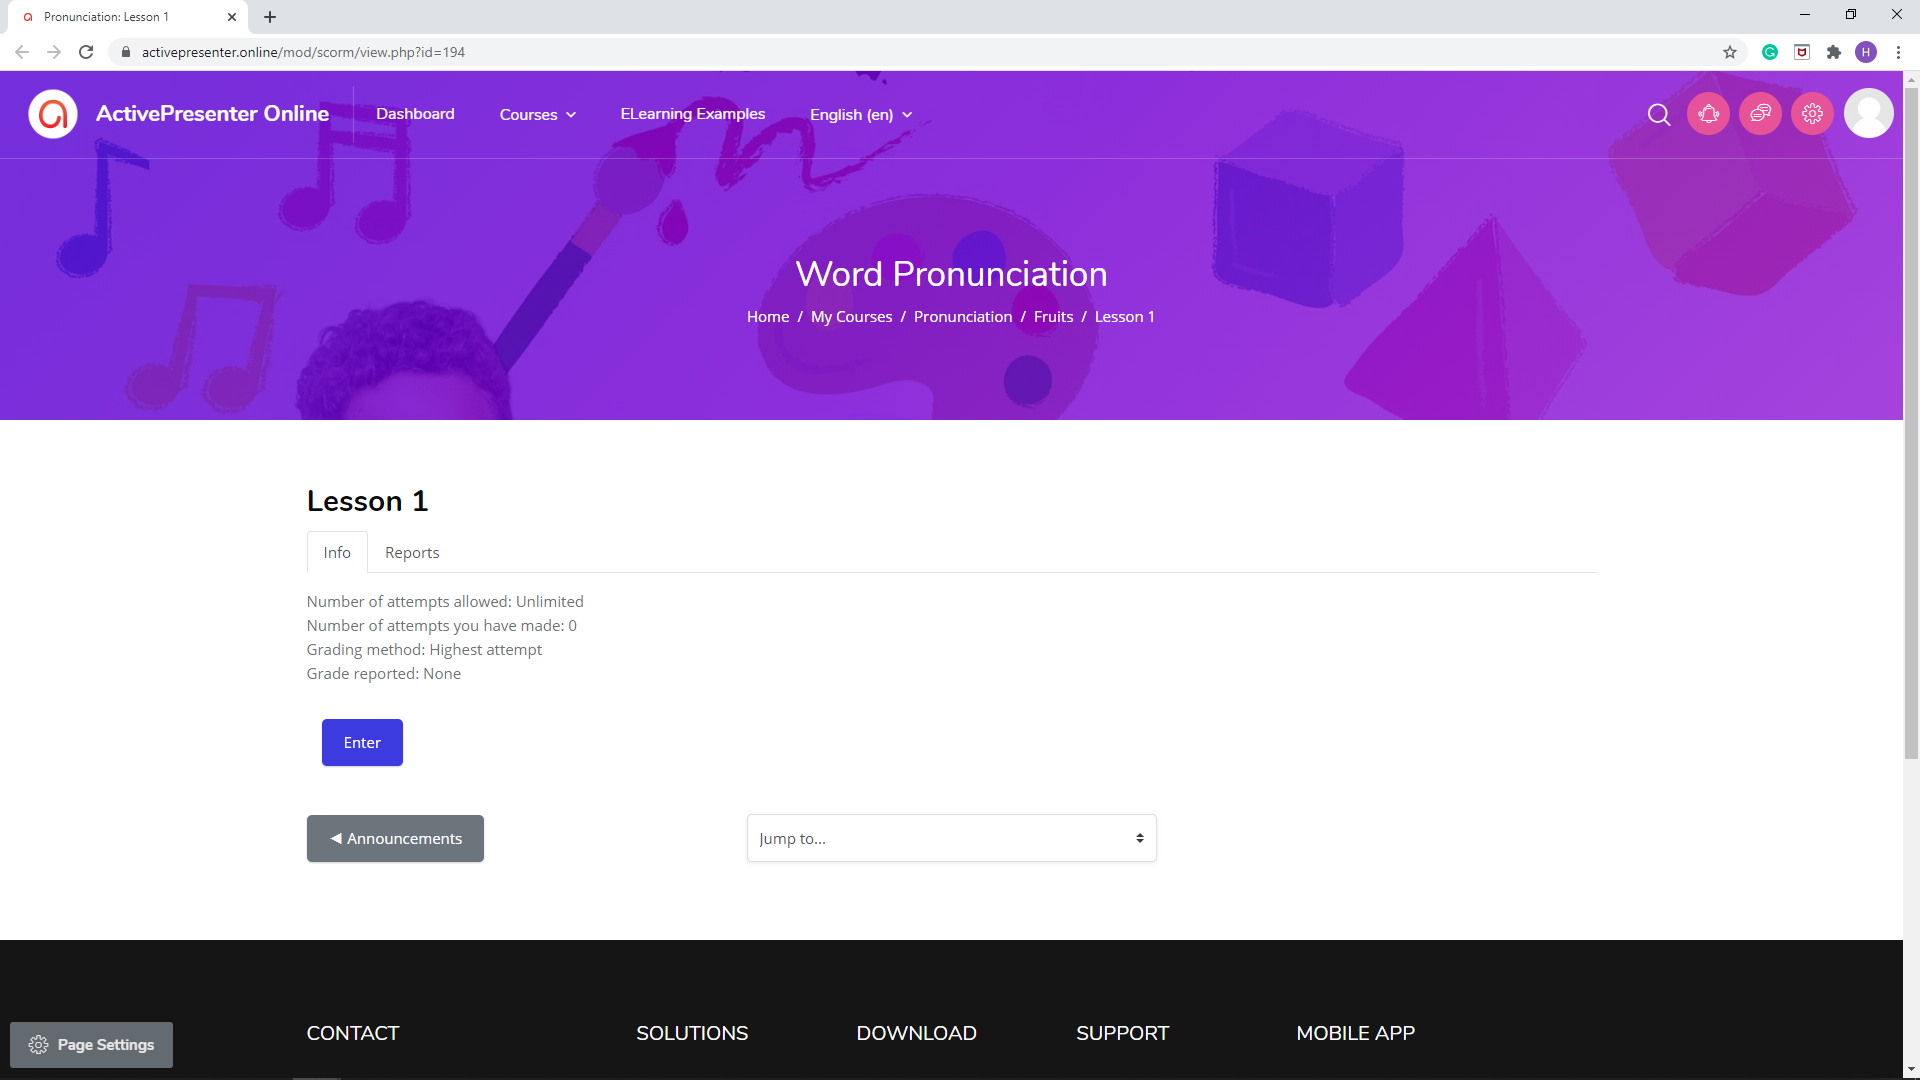
View Lesson: When selecting this button, you will see a course lesson with Info and Reports tabs. You can also try taking the course or customize it the way you want.
Publish Your Course to Other LMS Sites
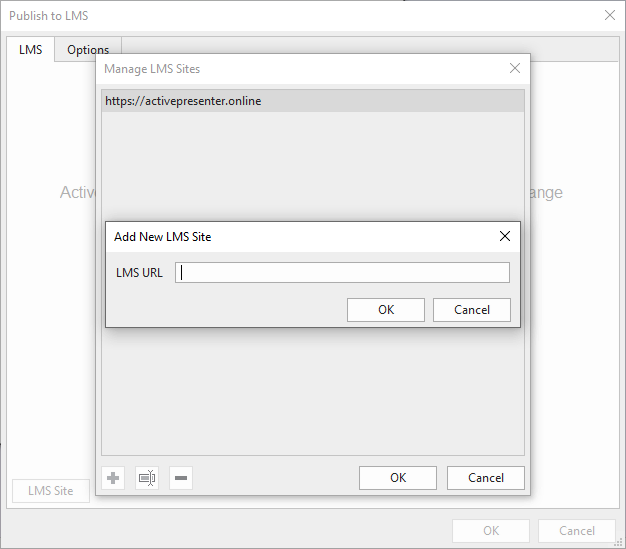
Apart from ActivePresenter Online, you can also publish your course to another LMS site that supports SCORM 2004 to host and manage it. To do that, follow the steps below:
Click the LMS Site button > Manage site… > Click the plus button to add a new site.
Please note that ActivePresenter can integrate with LMS using Moodle and you need to contact us for integration.
Note: Since the course is exported to SCORM 2004 standard, you can only upload it to the LMS site that supports this format. In case your LMS site doesn’t support SCORM 2004 standard, you can create a package that your LMS supports: SCORM 1.2, and Experience API, and then publish the course.
So, that’s how to publish projects to LMS in ActivePresenter 8.1. Try it today and don’t hesitate to contact us if you need support.