How to Customize the Tabbed Toolbar in ActivePresenter 8
Located at the top of the application window, the tabbed toolbar contains almost all the tools for creating and editing content. One of the most convenient features of ActivePresenter is the ability to customize the tabbed toolbar. This tutorial shows tips on tailoring the tabbed toolbar to satisfy your needs and tastes.
Where to Customize the Tabbed Toolbar?
You can customize the tabbed toolbar to improve the performance in editing. It can be done in the Preferences dialog.
To open this dialog, on the Start Page, click the gear button at the bottom-left corner. Alternatively, in the open project window, click the ActivePresenter button > Preferences. Then, in the dialog, open the Toolbar tab.

You can see the Choose Commands From section (the left box) contains all commands which are organized in groups. And the Customized Toolbar section (the right box) shows the structure of the current toolbar.
To work with tabs, groups and commands, simply click the plus or minus button to expand or collapse any node, respectively.
Here, you can:
- Reorder tabs, groups, and commands to suit your work style.
- Remove tabs and groups you rarely use and add them back after that.
- Create custom tabs and groups as you prefer.
- Rename tabs, groups, and commands as you wish.
Note: You cannot reorder the default commands, hide their names, or rename them.
Reorder Tabs, Groups and Commands
You can change the order of all tabs, groups, and commands but not the default commands. To do that, in the right box, select the tab, group, or command that you want to move. Then, click Move Up ![]() or Move Down
or Move Down ![]() until you get the order you want. Don’t forget to click Apply to save and see your changes.
until you get the order you want. Don’t forget to click Apply to save and see your changes.
Remove Tabs, Groups and Commands
In the right box, select the group (both default and custom) or tab/command (custom only) that you want to remove from the tabbed toolbar. Then, click Remove (1) to exclude it from view.
Note: To remove the default tabs or groups/commands like the Home or Insert tab, uncheck the relevant check box in the right box. Note that you cannot hide contextual tabs such as Format or Drawing.
Add Tabs and Groups Back to Your Toolbar
After removing a tab or group from view, you can still add it back to the tabbed toolbar by:
Step 1: In the left box, select the tab that you want to bring it back. In case you want to recover a group, you must select a tab in the right box to place it.
Step 2: Click Add (2) to retrieve the selected tab or group. After that, change the tab/group order if needed.
Step 3: Click Apply to save and see your changes.
Create Custom Tabs and Groups
ActivePresenter lets you add new tabs to the tabbed toolbar and add new groups to both default and custom tabs. Regarding commands, it only allows you to add commands to custom groups. The custom tabs and groups have the word (Custom) after their names, but the word (Custom) doesn’t appear in the tabbed toolbar.
To create custom tabs and groups, do the following (skip unnecessary steps, if any):
Step 1: In the right box, select the tab to which you want to add a new group. In case you want to create a tab, the new tab will be inserted below all other tabs or the selected one.
Step 2: Click New Tab…(3) or New Group… (4) to create a new tab or group, respectively.
Step 3: In the dialog, enter a name for the new tab or group and click OK.
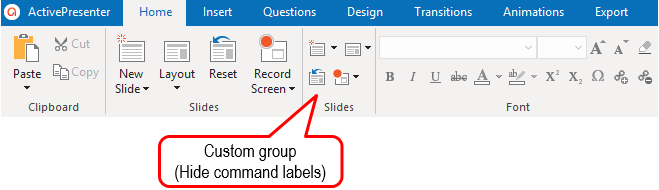
Step 4: For custom groups, select the Hide Command Labels check box (5) to hide the labels while showing the icons in a smaller size. That way, the command will look like this:
Step 5: In the main dialog, click Apply to save and see your changes.
After creating a custom group, you need to add commands to them. Use the Add button (2) to add commands from the left box.
Tip: You can do nothing with the commands in the default groups as they appear disabled. However, it’s all possible to make a custom group to replace the default one so that you can make changes to those commands included in it. To do that, create a custom group that resembles the default one and remove/hide the default group. Now, reorder commands, rename, or hide command labels as you wish.
Rename Tabs, Groups and Commands
To rename tabs, groups, and commands, do the following:
Step 1: In the right box, select the tab, group, or command that you want to rename. Note that you can rename only commands in custom groups.
Step 2: Click Rename… (6) In the dialog, enter a new name for the tab, group, or command and click OK.
Step 3: In the main dialog, click OK to save and see your changes.
Note: If you need to go back to all original settings, click Restore Defaults.
Show or Hide the Tabbed Toolbar
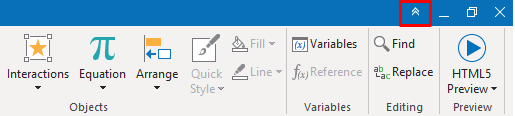
The Tabbed Toolbar is one of the main sections of the workspace, which is shown by default. However, you can hide/collapse it if you want to. For that to happen, simply click the Hide/Show Toolbar button (double arrow) at the top-right corner of the application window.
That’s it! Customizing the tabbed toolbar is a good way to help improve your editing performance. Also, ActivePresenter enables you to customize hotkeys as you prefer to speed up your work. Let’s create great things with ActivePresenter today.