How to Create Responsive Projects in ActivePresenter 8
Responsive design – one of the most important features in ActivePresenter 8 allows you to create a single project which displays perfectly on any devices with different screen sizes.
It’s critical especially in creating eLearning content since you can create a project with multiple layouts and let it play on various platforms. You don’t have to redo fixed desktop projects when they need to be done and viewable on the mobile device or so.
Let’s learn how to create a responsive project in ActivePresenter 8 step by step.
Create Responsive Project
There are two ways to create a responsive project:
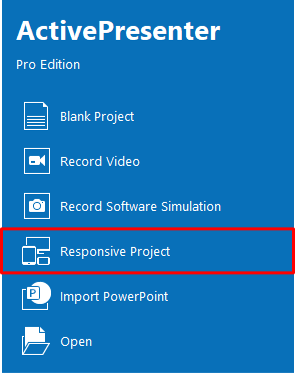
- Launch ActivePresenter, and select Responsive Project on the Start Page:
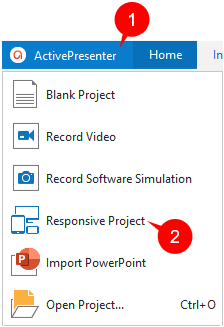
- In the editor, click the ActivePresenter button (1), and select Responsive Project (2):
ActivePresenter defines five default responsive layouts which correspond to most popular device screen sizes:

- Desktop with the viewport of 1280×620
- Tablet Landscape with the viewport of 1024×674
- Tablet Portrait with the viewport of 768×930
- Mobile Landscape with the viewport of 667×345
- Mobile Portrait with the viewport of 375×522
Note: The above layout sizes are not the device viewport sizes. They are chosen to make sure that the content displays best on popular devices. You can add a custom responsive layout to support a particular device if you want.
Besides, in the responsive mode, ActivePresenter 8 also supports a flexible layout for container containing objects. And offers a coordinate system with percentage, pixel, and auto units for objects as well. So the content still looks good with other screen sizes which are not in the list of responsive layouts of the project.
Manage Responsive Layout
Change Current Working Layout
To switch between layouts, you can click directly one of those layouts on the Responsive Bar. The currently selected layout is orange.
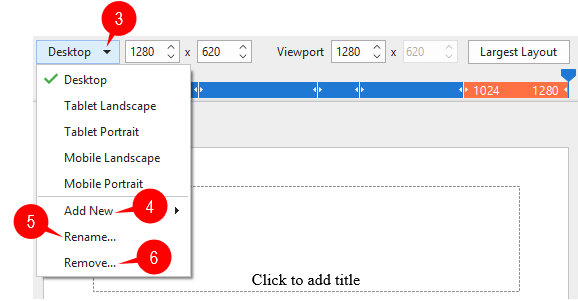
Or click the drop-down button (3) and select one layout from the menu.
Add Layout
ActivePresenter allows you to add new layouts to the project easily. Just click the drop-down button (3), and select Add New (4), and then choose one from two further choices:
- Select one of the preset layouts provided.
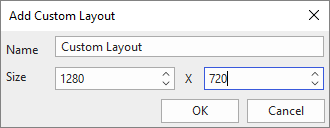
- Create a custom one by clicking Custom…. Name and adjust the size of the new layout, then click OK.
Change Layout Name
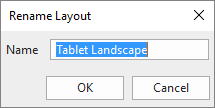
To change a layout name, click the drop-down button (3), and click Rename… (5), and then type a new name in the pop-up dialog, then click OK.
Remove Layout
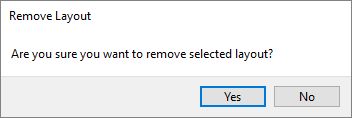
To remove any layout, click the drop-down button (3) and select Remove… (6), and select Yes from the pop-up dialog.
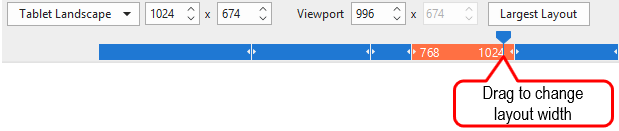
Change Layout Width
You can drag the handle on the Responsive Bar to the left or right to change the layout width, which is previewed in the Viewport.
However, the new width must be in the width range of the currently selected layout. This means if you are selecting the Tablet Landscape device layout, for example, you can only drag the slider within the width range of this layout.
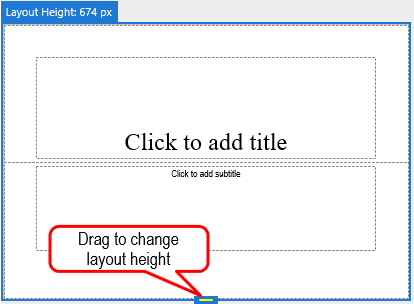
Change Layout Height
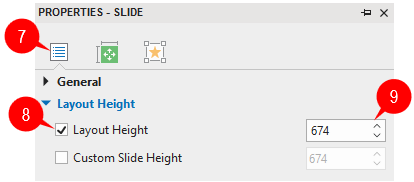
Changing the layout height can be done in the Properties pane or by dragging the Layout Height marker. Do the following:
Step 1: In the Properties pane, click the Slide Properties tab (7).
Step 2: Select the Layout Height check box (8) in the Layout Height section. This displays the Layout Height marker on the Canvas.
Step 3: Enter a new value in the Layout Height spin box (9).
Or you can drag the marker up or down to decrease or increase the height respectively.
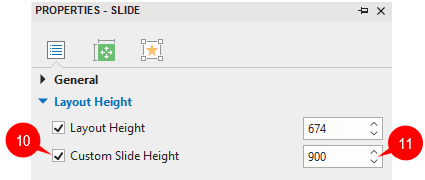
Change Slide Height
Normally, the slide height is defined when you create a new project, which is the same to the device height. Still, you can increase or decrease this value so that it can contain enough information.
If the slide height is bigger than the device layout height, end users can view the contents beyond the layout by scrolling the bar on their devices.
To change the slide height, you can also access the the Slide Properties tab (7) > Layout Height > select the Custom Slide Height check box (10). This enables the Custom Slide Height function. After that, you can enter a new value in the Custom Slide Height spin box (11).
Note: The slide width is always the same as the layout width.
Inherit Properties of Layouts
By default, a layout will inherit properties from a larger layout, which is called layout inheritance behavior in a responsive project. That is to say, properties of each layout will be the same since the smaller layout will inherit properties from its larger layout except for properties that you already changed in that smaller layout.
Note: Due to the layout inheritance, if you want to change any properties, you should make changes to the largest layout first. If you are satisfied with it, then just make changes to any smaller layouts if needed.
However, after making changes to these properties of a smaller layout, if you are not satisfied with these changes, you can reset it by selecting the container and right-clicking > Reset Layout Inheritance.
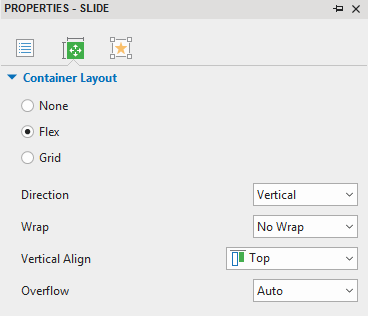
Change Slide Container Layout
ActivePresenter 8 supports the flex and grid layous for a slide. Objects inserted in a flex/grid container can be laid out and aligned automatically to adapt different viewport sizes. This allows you to manage layout and spacing consistently and efficiently, especially in a responsive project.
There are 2 main differences between 2 layouts:
- While the Flex layout is one-dimensional which aligns objects either horizontally or vertically, the Grid layout is two-dimensional, aligning object both horizontally and vertically.
- Objects in flex layout can have different sizes within a single row or single column but their sizes are predefined in grid layout. That’s why flex layout is more flexible than grid layout and also more complicated.
To switch between two layouts, select the slide and do the following:
Step 1: Click the Properties pane > Size & Properties > Container Layout.
Step 2: Choose either Flex or Grid.
Refer to Working with Flex Box and Working with Grid Box for more details.
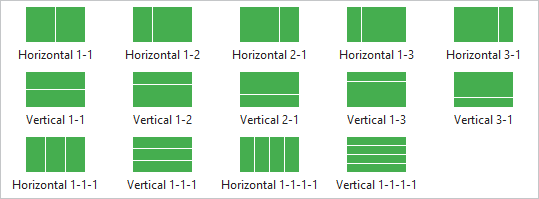
Tip: To save time when designing slide, you can use one out of 14 available preset slide layouts with default flex container layout. To use them, click the Insert tab > Container > Preset Slide Layouts. After that, you can change the layout for each container the way you want.
Change Object Position
Thanks to the flex/grid layout, objects can be laid out and aligned automatically across different viewport sizes. However, you are also able to change their positions manually with some values and properties that will be discussed below.
Change Object Position Mode
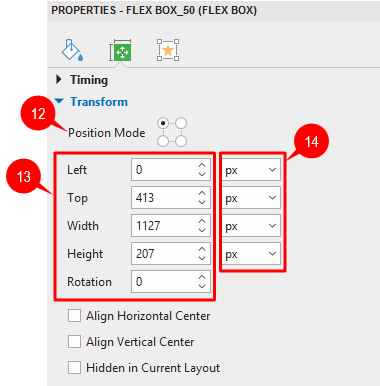
Position Mode is the exact specification of the object position in a slide of a project.
To change this value of an object, go to the Size & Properties tab > Transform > Position Mode (12) > select one from four modes (Top-Left, Top-Right, Bottom-Right, or Bottom-Left).
Change Object Position and Size
These values (Left, Top, Right, and Bottom) define the object position in a slide.
They display in this section depend on the Position Mode type you select. For example, if you select the Bottom-Right mode, this section will show Bottom and Right value instead of showing Top and Left value when you select the Top-Left mode.
To change those values, select the object and go to the Size & Properties tab > Transform > adjust values of Left, Top, Right, Bottom, Width, and Height (13) (in percentages or pixels).
Note: If you want to keep the height-to-width/ width-to-height ratio when changing the object width/height, select Auto in the Unit box next to the Height/Width spin box. This option automatically changes the height according to the width and vice versa.
To rotate the object, along with dragging the rotation handle of the object, you can enter a value in the Rotation spin box.
Change Object Position Value Unit
You can change the unit of object position value between percentages (%) and pixels (px).
Select the object and go to the Size & Properties tab > Transform > access the Unit drop-down lists (14) next to the Size spin boxes.
Then, select %, px, or Auto (for Width and Height unit).
- Choose the % unit if you want the object position to be a percentage of left/top/width/height.
- Select the px unit if you want the object position to be a number of pixels of left/top/width/height.
- Choose Auto in the Width/Height unit box to retain the aspect ratio.
Note: Either the unit you choose, the size and position of the object should remain unchanged.
Convert between Responsive and Non-Responsive Project
ActivePresenter allows you to convert from responsive projects to non-responsive projects, and vice versa.
To do that, click the ActivePresenter button > Project > do one of the following:
- Select Convert to Non-Responsive Project… if your current project is a responsive one.
- Select Convert to Responsive Project… if your current project is a non-responsive one.
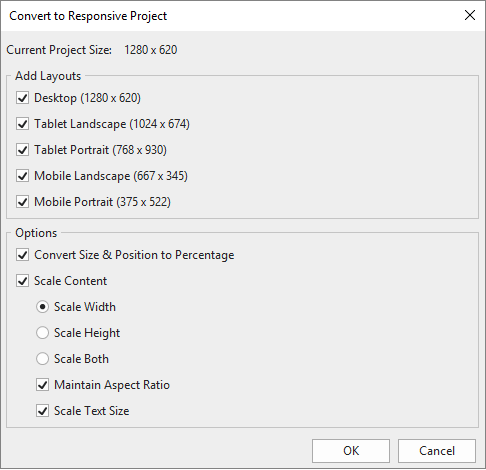
You can choose to convert the unit from pixels to percentages, scale the content in width, height or both dimensions. If you select the Maintain Aspect Ratio option, ActivePresenter will maintain the height-to-width ratio of the slide size and scale the contents.
That’s how to create a responsive project and how to manage its layout in ActivePresenter 8. Download ActivePresenter, try this useful feature and let us know if you need any help.
See also: