Using Variables 04: Do Math with Number Variables
This tutorial belongs to the Using Variables series. You’ll learn to perform basic calculations using number variables and actions.
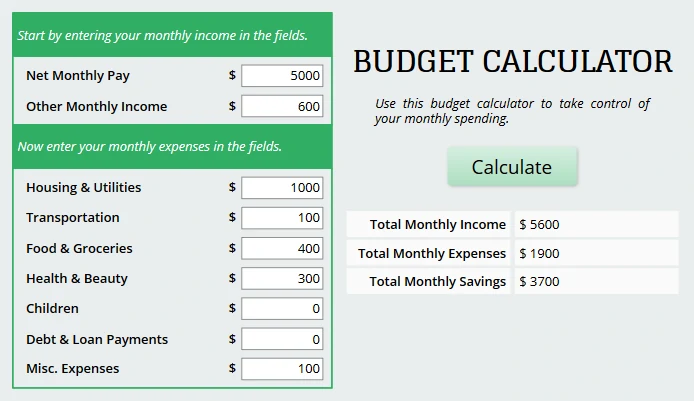
What we’re going to build?
In this simple example, you’ll build a monthly budget calculator which calculates monthly income, expenses, and savings. You’ll use text boxes associated with number variables to hold and keep track of the input. Then, you’ll use the Adjust Variable action to calculate the results which are shown using variable references.
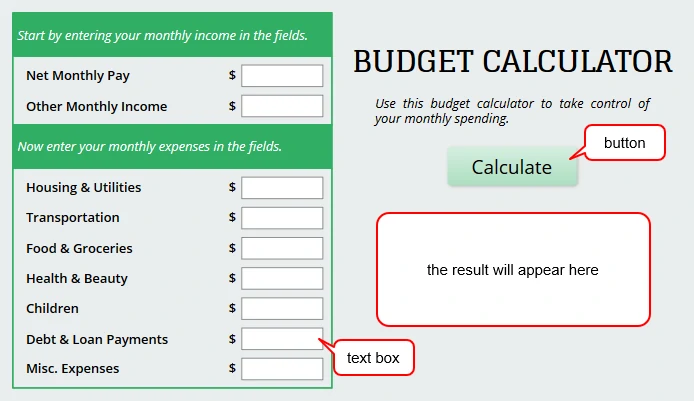
Step 1: Insert text boxes
The first step is to insert and organize objects (shapes, text captions, and a button). Specifically, insert nine text boxes (Interactions tab > Text Box) to collect information about income and expenses.
Step 2: Assign number variables to text boxes
For details about variables, see Understanding Variables and Adding and Using Variables.
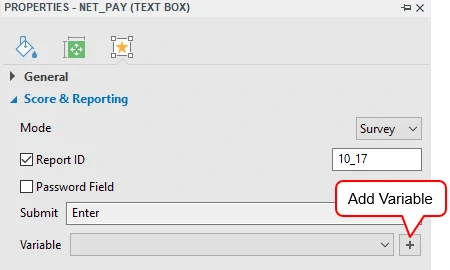
Select a text box and do the following:
- Click the Properties pane > Interactivity > Score & Reporting > Variable.
- Click the Add Variable button. A dialog appears allowing you to add and assign a number variable to the text box.
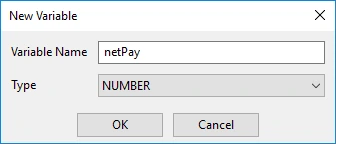
After that, assign number variables to the other eight text boxes.
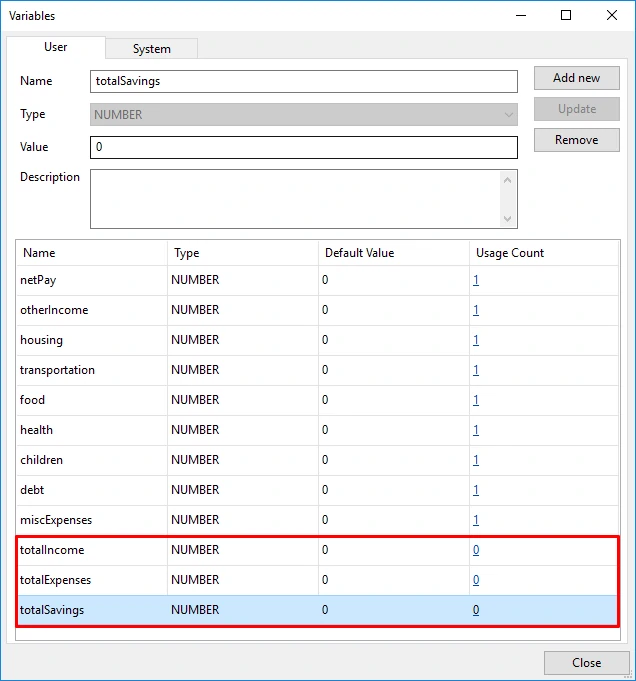
Step 3: Create other variables and insert variable references
First, you’ll create three remaining variables to hold the total income, total expenses, and total savings. In order to do so, click the Home tab > Variables to open the Variables dialog. The User tab of the dialog contains all user variables you’ve added. Now, create the totalIncome, totalExpenses, and totalSavings number variables.
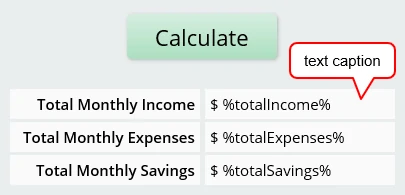
Next, use three text captions (Annotations tab > Text Caption) to display three variable references. Click inside a text caption and click the Home tab > Reference to add a reference. You can also type the variable name and put it between the % signs.
Step 4: Make the Calculate button work
For details about events and actions, see Working with Events – Actions.
To make the Calculate button work, click the Properties pane > Interactivity > Events – Actions. Then, you’ll add the On Click event to the Calculate button to handle a number of tasks as follows. Be aware that actions bound to the same event execute in the same order in which they appear in the Events – Actions section (top to bottom). Click and drag an action to change its order.
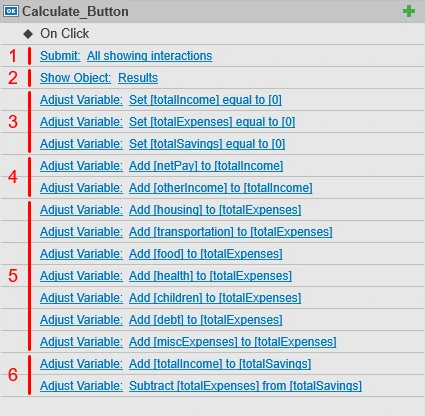
(1) Submit all input to the presentation using the Submit action.
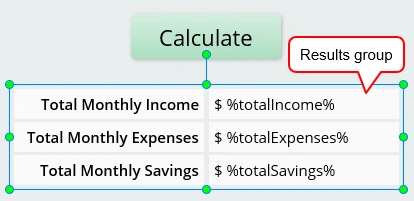
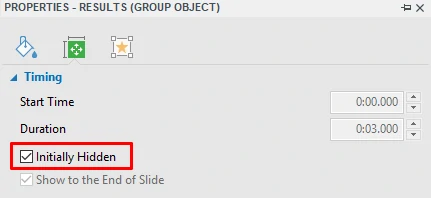
(2) Show the results using the Show Object action. For that to happen, you must group the results and hide the group beforehand (Properties pane > Size & Properties > Timing > Initially Hidden).
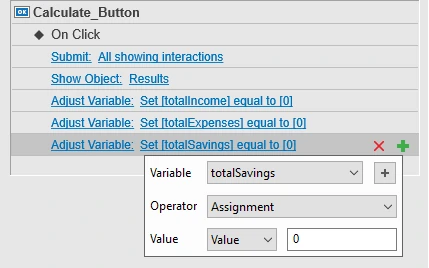
(3) Assign 0 to the value of the totalIncome, totalExpenses, and totalSavings variables so that the results will be re-calculated whenever you click the Calculate button.
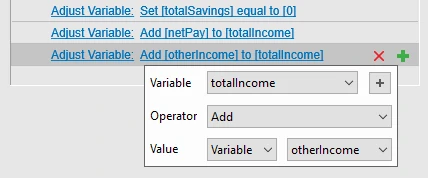
(4, 5) Calculate the total income and total expenses using the Adjust Variable action.
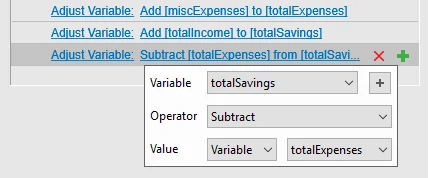
(6) Calculate the total savings. First, assign the value of the totalIncome to that of the totalSavings. Then, subtract the value of the totalExpenses from that of the totalSavings.
At this point, click the HTML5 Preview button (in the Home tab) to preview your calculator.
As you can see, it’s not hard to do math with number variables. But if your project requires more complicated calculations, consider using JavaScript. Should any questions arise, contact us so that we can help.