This article will show you how to blur objects in videos with the Blur effect in ActivePresenter 7. Blur effect is used for hiding private or sensitive information such as identity, email address, etc. You can also use this feature to blur moving objects in videos easily.
Insert Blur Areas/Keyframes
Insert Blur Areas
To insert blur areas into videos, do the following:
Step 1: Select the video object in the Timeline, Selection pane or Canvas.
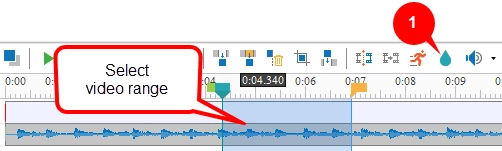
Step 2: In the Timeline pane, specify the video range that you want to apply the Blur effect. Drag the green and yellow marker along the Timeline Ruler to select the range.
Step 3: Click the Insert Blur Area button (1). Remember that this button is only activated when you select the video object.
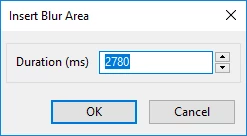
This opens the Insert Blur Area dialog which is used to specify the blur duration. You can also change this value later.
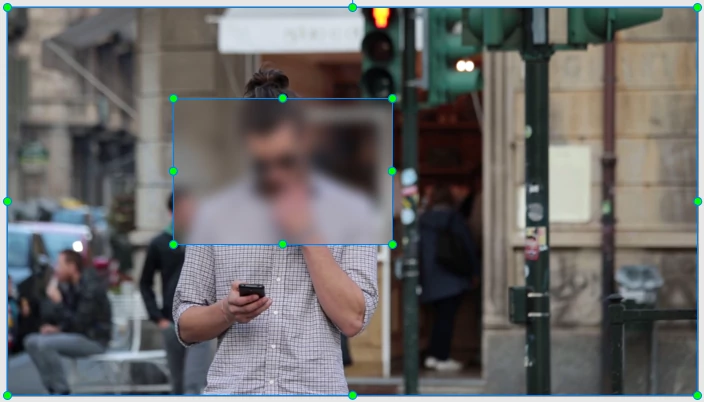
After that, you will see a blur object on the Canvas and an object Time Bar in the Timeline pane.
Step 4: Drag the green handles to adjust the size and the position of the blur to cover the video content you want.
Step 5 (Optional): Change the blur effect properties.
ActivePresenter allows you to change some properties of the Blur effect to have a better result.
To do that, select the effect Time Bar in the Timeline pane and then access the Blur Effect section in the Properties pane.
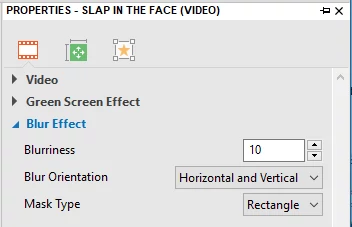
- Blurriness: The higher value, the less detail of contents.
- Blur Orientation: Select from Horizontal and Vertical, Horizontal, and Vertical.
- Mask Type: Set the form of the Blur area. Select from Rectangle and Ellipse.
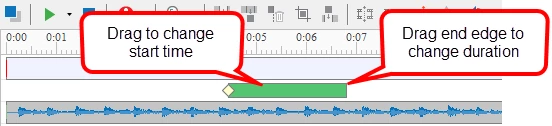
Step 6: Change the start time and duration of the Blur effect.
- To change the start time of the Blur effect, hover the mouse over the object Time Bar and drag it along the timeline.
- On the other hand, to change the effect duration, drag the end edge of the effect Time Bar to the left or right.
Note: You can insert more than one Blur effect into a video.
In case the target object maintains the same size and position, you only need to change the start time and duration of the Blur effect. Otherwise, if the target object is moving, you need to insert more keyframes to cover it more precisely. Keep reading to know how to do that.
Insert Keyframes
Each keyframe marks one specified area in the video. The size and the position of the Blur effect at any timestamp will be interpolated from the values of nearest keyframes on the left and right of the timestamp. The more keyframes you insert, the more exactly the Blur effect and the moving object path fit.
To add more keyframes, do the following:
Step 1: Seek the Playhead along the Timeline Ruler.
Step 2: Adjust the blur area size and position on the Canvas by dragging the Blur object’s handles. ActivePresenter will automatically insert a new keyframe each time you change the size.
You can also add new keyframes by clicking the Insert/Remove Keyframe button (2) in the Timeline pane.
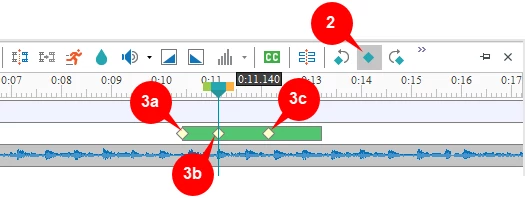
Keyframes which are represented in light yellow diamonds (3a, 3b, 3c) will appear on the Blur effect Time Bar.
From the position of the Playhead, to navigate between keyframes, click the Go to Next Keyframe ![]() or Go to Previous Keyframe button
or Go to Previous Keyframe button ![]() .
.
Delete Blur Effects/Keyframes
Delete Blur Effects
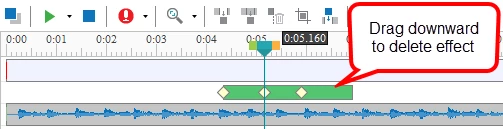
To delete the Blur effect, drag the effect Time Bar downward until it turns gray and release the mouse button.
Delete Keyframes
Similar to deleting the Blur effect, you can drag the keyframe downward until it turns gray and release the mouse button.
Alternatively, you can place the Playhead at the keyframe position and click the Add/Remove Keyframe button (2) to delete.
Tips: If you need to blur the entire video, just delete all of the keyframes.
That’s how to blur moving objects in videos with ActivePresenter. Feel free to access our blog or tutorial page to get more useful articles.