Custom Element is one of the new features offered in Saola Animate 3. It allows you to create your own elements with HTML tags. In this tutorial, you will learn how to:
Create Custom Elements
An element will be created and customized the way you want. To get it done, you can click the Custom Element button in the Insert toolbar.

Alternatively, open the Element menu or right-click anywhere on the Canvas > Element > Custom Element.
Then, you will see a dialog appears like this:
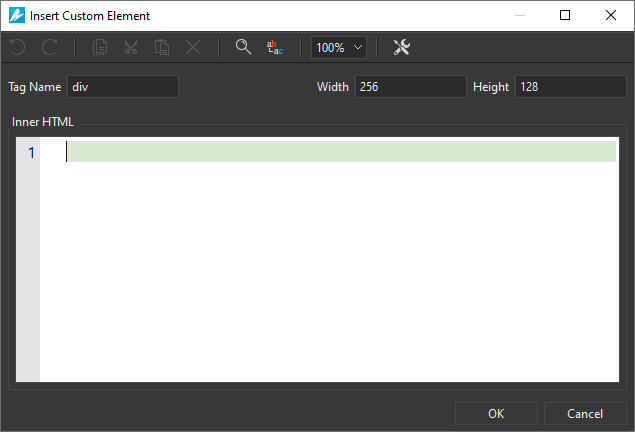
In which:
- Tag Name: HTML tags.
- Width, Height: Size of the new element.
Write Your Own Element
After the dialog above is shown, you are free to write your code to create an element of your own. Besides, if you want to edit it, Saola Animate offers you common editing commands at the top of the dialog as follows.
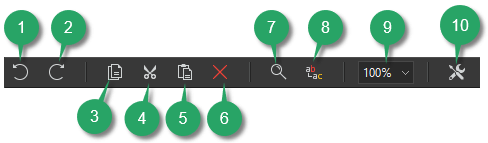
Undo (1): Revert to the last change made to the document. Click the Undo button or press CTRL+Z repeatedly if you want to undo multiple actions.
Redo (2): Redo the most recent action that you have already undone. Note that the Redo button is only available after you have undone an action. Click the Redo button or press CTRL+Y repeatedly if you want to redo multiple actions.
Copy (3): Copy the selected items onto the Clipboard. Keyboard shortcut: CTRL+C.
Cut (4): Remove the selected items and place them on the Clipboard. Keyboard shortcut: CTRL+X.
Paste (5): Insert the content of the Clipboard at the current location. Keyboard shortcut: CTRL+V.
Delete (6): Delete the currently selected items. Keyboard shortcut: DELETE.
Search (7): Display the Find search box where you can find specific text. Keyboard shortcut: CTRL+F.
Replace (8): Display the Find search box where you can replace specific text. Keyboard shortcut: CTRL+H.
Zoom In/Out (9): Expand/reduce the text size. Keyboard shortcut: CTRL+Mouse Wheel Up/Down.
Options (10): Show/hide editor features, including:
- Code Suggestion: Provide suggestions when you type into the editing area.
- Code Folding: Allow collapsing or folding the display of a block of code.
- Line Number: Display line numbers along the side of the code.
- Line Wrap: Wrap the code so that each line fits in the viewable window.
- Bracket Matching: Highlight matching sets of brackets.
In the Inner HTML box, enter your custom code. You can also copy and paste code into this box. Then, click OK to finish.
An Example of Custom Element
For example, you can copy the following lines of code and paste them into the Inner HTML box to create a login form with text input and button’s elements:
<style>
      form {
           box-sizing: border-box;
           width: 100%;
           height: 100%;
           padding: 30px 20px;
      }
      .form-field {
           display: block;
           box-sizing: border-box;
           width: 100%;
           margin: 0 0 20px;
           padding: 8px 12px;
           font-family: "Roboto";
           font-size: 18px;
           transition: 0.4s;
           outline: none;
       }
       .text-input {
           color: #444;
           border: 1px solid #aaa;
       }
       .text-input:focus {
           border-color: #33b5e5;
       }
       .button {
           cursor: pointer;
           color: white;
           background: #33b5e5;
           border: 0;
       }
       .button:hover {
           background: #178ab4;
       }
</style>
<form>
       <input type="text" placeholder="Username" class="text-input form-field">
       <input type="password" placeholder="Password" class="text-input form-field">
       <input type="button" value="Login" class="button form-field">
</form>
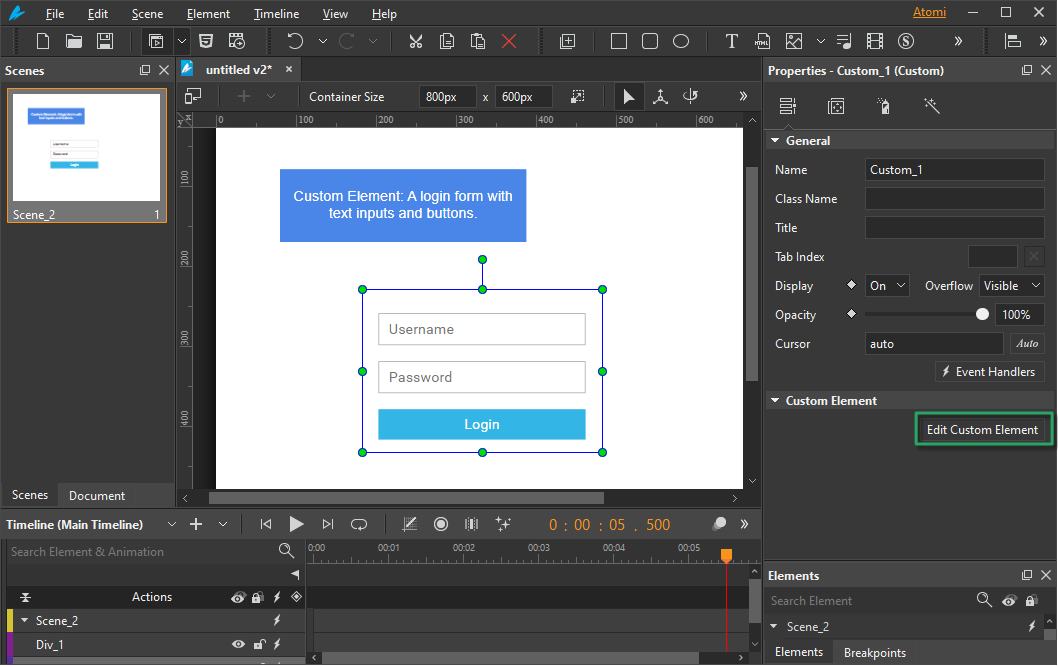
Here is what you get on the Canvas:
Edit Custom Elements
Once you have created your own element, do the following steps to edit it:
- Double-click it. Alternatively, you can select it > access the Properties pane> General > Custom Element > Edit Custom Element.
- Edit and click OK to finish.
Rename Custom Elements
You may want to rename your element after adding it to a scene. Do one of the following:
- Double-click its name in the Timeline or Elements pane. Then, enter a new name.
- Open the Properties pane > General > Name and rename the element.
Remove Custom Elements
There are many ways to delete an element. You can select it on the Canvas, in the Timeline pane, or the Elements pane, and press DELETE. Alternatively, you can right-click the element and choose DELETE from the context menu.
That’s all about how to use Custom Element in Saola Animate 3.0. Hopefully, it will help you create more beautiful elements.
See Also: