In the previous tutorial, you learned how to add and work with audio elements in Saola Animate 3. In today’s tutorial, we want to introduce you to the way to add and work with another type of media. That’s the video element. Basically, it shares the same things with those of audio elements.
This tutorial covers:
- Add Video Elements
- Rename Video Elements
- Control Video Playback
- Work with Resource Groups
- Remove Video Elements
Add Video Elements
Saola Animate supports importing video with the MP4, M4V, WEBM, and OGV extensions. Do one of the following to add videos:
- Directly drag videos from your computer onto the Canvas.
- Copy videos and paste them into the Canvas.
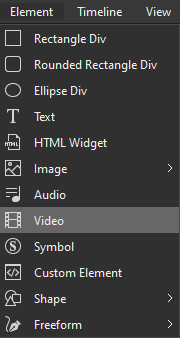
- Click the Video button in the Insert toolbar, then select one or more videos that you want.

- Click the Element menu > Video, or right-click the Canvas > Element > Video.
- Drag or import videos into the Resources pane to store and make them ready for use afterward. When you want to use a video, drag it from the Resources pane onto the Canvas or right-click it > Add to Scene.
Rename Video Elements
Sometimes, you may want to rename a video element after adding it to a scene. Do one of the following:
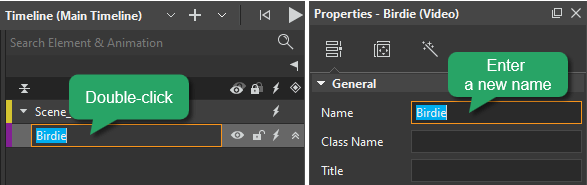
- Double-click the video element’s name in the Timeline or the Elements pane. Then, enter a new name.
- Open the Properties pane > General section > Name > rename the element.
Control Video Playback
Use Playback Option in the Properties Pane
You can control video playback in the Media section of the Properties pane.
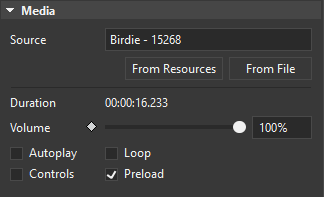
- Source: Display the video’s name.
- Duration: Show the duration of the video in milliseconds.
- Volume: Set the volume of the video in the range. This property is animatable.
- Autoplay: Allow the video to automatically play on the timeline and desktop browsers.
- Loop: Make the video replay automatically from the beginning after it finishes.
- Controls: Display the default player controls for the video.
- Preload: Preload the video before the document loads. This is selected by default.
Use Playback Option in the Timeline Pane
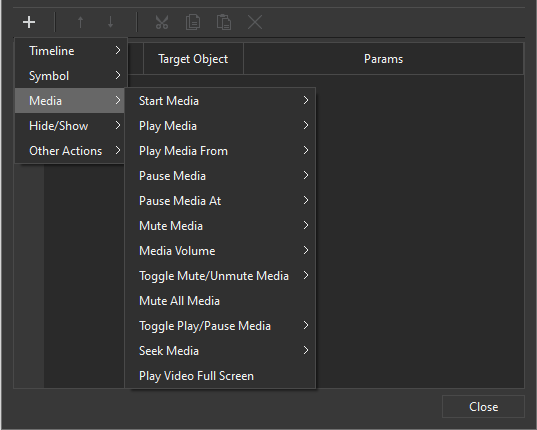
In the Timeline pane, Saola Animate also offers you the Playback option. Click the plus button (the Add Playback button) and you will see the following options:
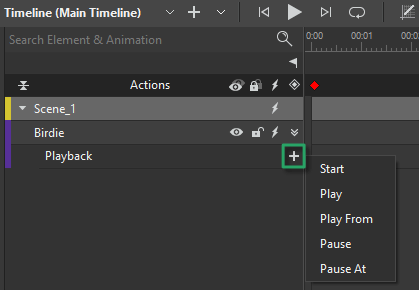
- Start: Play the video from the beginning.
- Play: Resume the video from the point where it has been paused.
- Play From: Resume the video from a specific time.
- Pause: Pause the video at the current time.
- Pause At: Jump to and pause at a specific time of the video.
Use Events – Actions and Triggers
Besides, you can use actions to control video playback through events and triggers. In the Event Handlers dialog or the Timeline Triggers dialog, there are many actions that you can use to control media.
See Use Timeline Triggers and Create Interactive HTML5 Content with Events and Actions for details.
Work with Resource Groups
Not all browsers can play all video formats. In fact, there are some video formats this browser supports but that browser does not. So, for the best cross-browser consistency, you should provide multiple formats of a single video so that the browser can select the most compatible format it can play.
After a video element has been inserted, it comes along with a group of resources which allows you to add, remove, export and preview formats. In the Resources pane, select a video and access the Media Files widget.
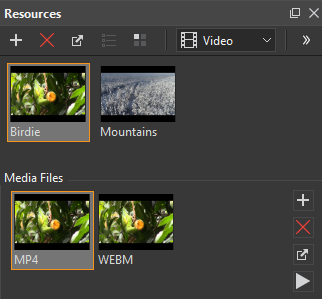
- Add formats to groups: Click Add . If the format has already existed, you will be asked to overwrite it.
- Remove formats from groups: Select a format and press DELETE, or click Delete . If a group contains only one format, you cannot remove it.
- Export formats: Select a format and click Export . Provide the name for the file before exporting.
- Preview formats: Double-click a format to preview it in the Preview window. Alternatively, click Preview in the toolbar or in the context menu.
For modern browsers supporting the HTML5 video, the video elements having just MP4 format is enough. But for the broadest browser compatibility, you should provide MP4 and WEBM files for each video group.
Tip: Get the latest information on browser compatibility on caniuse.com. For information on browser support for different video formats, please see Media formats for HTML video on MDN.
Remove Video Elements
In some cases, you no longer need a video element. To remove it, select it (on the Canvas, in the Timeline or Elements pane), then do one of the following:
- Press DELETE on the keyboard.
- Click the Delete button in the dockable toolbar.
- Right-click it > Delete.
Note: Even if you delete a video element on the Canvas, the corresponding video still remains in the Resources pane. To completely remove a video, you must delete all video elements associated with it. Then, delete the video from the Resources pane.
So, that’s how to add video elements to HTML5 animations. Hope that’ll help.
Related topics: