Transition effects help create a smooth and natural transformation from slide to slide. Compared to older versions, ActivePresenter 9 now offers up to 30 slide transitions for you to choose from. Let’s learn how to add and use them right now!
Slide transition effects indicate the end of one slide and the beginning of another. Using this feature, you will increase the appeal and engagement of your project. Also, avoid sudden transitions between slides. In ActivePresenter 9, you can control the style and speed of transition effects in one or many slides.
This tutorial covers:
- Add Transition Effects to One or More Slides
- Insert Transition Effect in Slide Master
- Adjust Transition Effect Duration
- Remove Transition Effects
Add Transition Effects to One or More Slides
To apply a slide transition effect, do as follows:
Step 1: Select one or more slides that you want to add a transition.
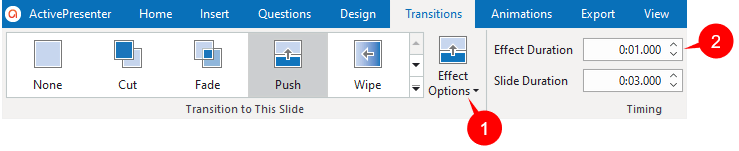
Step 2: Access the Transitions tab. Then, select one from the gallery.
Step 3: Set more effects for the selected transition by clicking the Effect Options button (1).
Note:
- Effect Options vary from effect to effect. For example, the Doors effect includes Vertical and Horizontal options. Meanwhile, the Shape effect includes 5 options which are Circle, Diamond, Plus, In, and Out.
- Transitions like Flash and Dissolve have no effect options. Therefore, you will see the Effect Options button appearing dimmed when selecting one of these two transition effects.
Insert Transition Effect in Slide Master
If you want to add a transition to a specific slide layout, or apply the same transition effect to all your slides, you can do it in only one place – the Slide Master. Do the following steps:
Step 1: Open the View tab and click Slide Master.

Step 2: Select the master layout or any custom layout that you want to apply transition effects. Then, in the Transitions tab, choose an effect from the gallery and its effect option (if any).
Note: When you edit the master layout, the changes will apply to all custom layouts that are based on that master, except for the layouts already having transitions.
Adjust Transition Effect Duration
After adding a transition effect, you can preview it by clicking the Play button in the Timeline. Or click HTML5 Preview to see it in the browser. Chances are you want the effect to be faster or slower, simply change its duration. Perform either of the following:
- Enter a value in the Effect Duration spin box (2) or click the up/down arrow to increase/decrease the value.
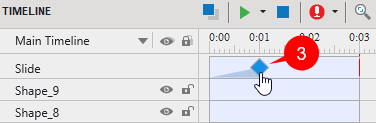
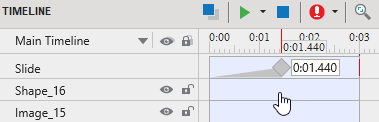
- Drag the blue diamond (3) to the left or right in the Timeline pane. The light blue area stretching from the starting point of the slide to the blue diamond indicates the duration of the effect. The longer it is, the slower the effect happens, and vice versa.
Note: The duration of the transition effect should be shorter than the slide duration.
Remove Transition Effects
If you no longer want to use transition effects for slides, you can easily remove them. Take either of the following ways:
- Select one or more slides. And choose None in the Transitions tab.
- Simply drag the blue diamond downward until the effect bar turns grey. Then, release the mouse button.
So you’ve learned the ways to add and adjust slide transition effects in ActivePresenter 9. Let’s download the app and use these delightful transitions to better engage viewers in your projects. Feel free to contact us at any time you need help.

See also: