Along with Entrance, Exit, and Emphasis, Motion Path is a type of animation effects that ActivePresenter provides users. Motion paths move objects in a slide along a predetermined path (like a line, circle, or a star), or move objects along your own custom path. They allow objects to display more engagingly.
For more information about how to animate objects, see How to Animate Objects.
Add Motion Paths
To add a motion path to objects, do the following:
Step 1: Select the object. Hold CTRL to select multiple of them.
Step 2: Open the Animations tab.
Step 3: Click the drop-down arrow to open the Emphasis & Motion Path gallery to choose one motion path effect (Lines, Arcs, Turns, Shapes, Loops, Stars, and Custom Path).
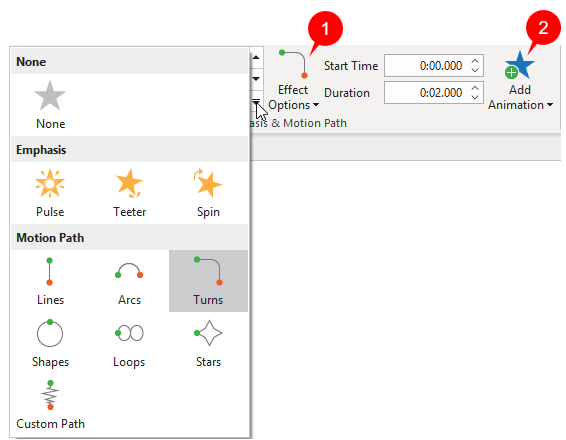
- If you choose a predefined path, the path will appear on the Canvas immediately.
- If you choose the Custom Path option, you will draw your own path. Drawing a custom path is the same as drawing a freeform shape.
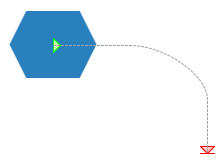
After choosing or drawing a path, you will see the Motion Path effect appear as a dotted line with a green and a red arrow on the Canvas. The green arrow indicates the path’s start while the red arrow indicates its end.
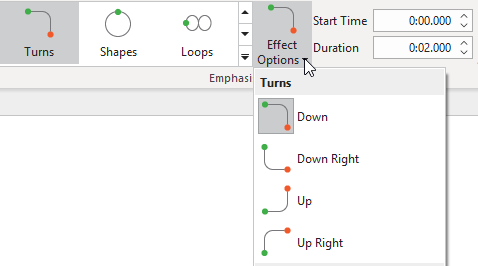
Step 4 (Optional): Define the Motion Path effect direction.
Just select the path and click Effect Options (1). Then, select one direction from the option list.
For example, you can choose to let the Turns path to go down, up, etc., depending on your need.
Note: You can add multiple motion path effects to an object, just click the Add Animation button (2) and choose the desired one. If you try to add more effects by using the emphasis & motion path gallery, you won’t add an additional effect. Instead, you’ll replace the existing effect with the one you’re adding.
Edit Motion Paths
When it comes to editing a motion path, you are free to resize it, move it to other places, and change its shape.
Change Motion Path Size and Position
Select the motion path of the object, then:
- Drag the path green handles to change its size.
- Drag the entire path to the position you want.
Change Motion Path Shape
Take the following steps to change the shape of the motion path:
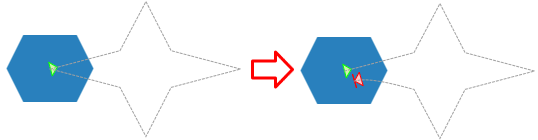
Step 1: Right-click the path and click Edit Points. Alternatively, click the Effect Options > Edit Points.
Step 2: Drag the black handle to move the portion of the path.
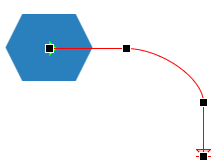
Editing points of the motion path is the same as editing freeform shape. Let’s take a look at Draw and Edit Freeform Shapes to learn more.
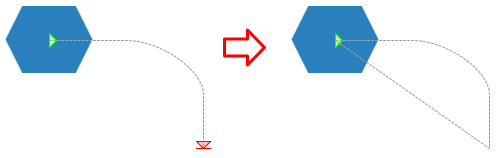
Step 3 (Optional): Close, open or reverse the path direction.
Motion paths can be classified as closed or open paths. With an open path, you can close it. On the other hand, you can open a closed path.
- For open paths like Lines, Arcs, and Turns, right-click the path and click Close Path to make the object return to its start point. A linear path is added from the previous end point to the start point.
- For closed paths like Shapes, Loops, and Stars, right-click the path and click Open Path to separate the start and end point.
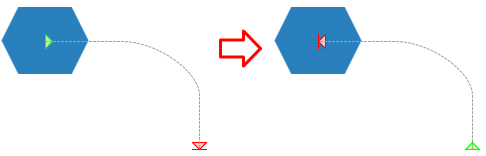
- In order to reverse the path direction, right-click the path or go to the Effect Options > Reverse Path Direction.
Lock and Unlock Paths
For easily editing, ActivePresenter allows you to lock or unlock the path of objects. To do that, click the Effect Options button and select Locked/Unlocked.
- Locked: The path remains its position when you move the object.
- Unlocked: The path will follow the object when you move it.
Edit Timing
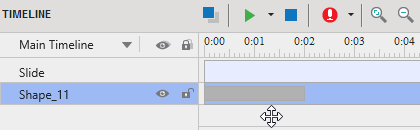
As said in the previous tutorial, the motion path effects are presented as yellow bars in the Timeline pane.
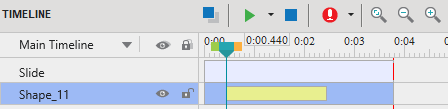
You can adjust the start time and duration of the motion path effects in the same way with other types of animation effects. For better understanding, please refer to Edit Animation Effects.
Delete Motion Paths
To delete a Motion Path effect, just select it on the Canvas and then press the DELETE key on your keyboard.
Besides, you can drag the Motion Path effect time bar as a yellow bar in the Timeline pane downward until it turns gray and then release the mouse button.
So, you’ve walked through the ways to add and edit motion paths for objects. Try to use motion paths to make objects more engaging. Feel free to contact us if you need help.
Related articles: