Interactive buttons are useful in creating interactive contents. Buttons allow you to redirect the viewers to specific contents when they click them. More interestingly, ActivePresenter 7 introduces a new feature called Object States. You can let a button have multiple states which control their appearance when users interact with them.
This article will show you how to insert buttons into slides in projects, and then, how to make them interactive.
Inserting Buttons
In general, inserting buttons is similar to inserting other kinds of interactive objects into a project. However, if your project has more than one slide and you want to insert buttons into all of them, you should use Slide Masters. Using Slide Masters also helps you keep the style consistency throughout slides.
Now, take the following steps to insert buttons:
Step 1: Open the Slide Master view.
Using Slide Masters when inserting button will save you tons of time. You just need to insert buttons into a slide master, then they will be automatically inserted into other corresponding slides of that slide master.
To view Slide Master, open the View tab and click Slide Master ![]() . See Using Slide Masters for more information.
. See Using Slide Masters for more information.
Step 2: Insert buttons in Slide Masters.
Choose one of the following two ways to insert buttons:
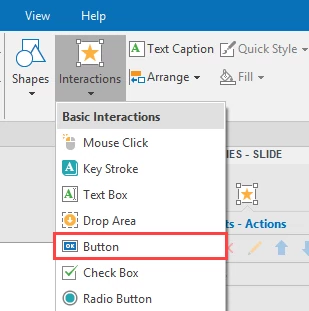
- In the Interactions tab, click Button.

- In the Home tab, click Interactions and select Button.
Step 3: Rename buttons.
The inserted button has a default name (Button). You should change it to a more meaningful name. For example, if you need a button so that when learners click it, the presentation goes back to previous slides, you should name it Back/Previous, or things like that.
Working with Multiple-State Buttons
Buttons come with four prebuilt states (Normal, Hover, Clicked, and Disabled) which control their appearance when users interact with them. You can modify the prebuilt states or create additional states if needed.

- Normal: The state of buttons when users don’t interact with them. By default, it’s the initial state of an object when it first appears in the output. You can change this initial state if you want but can’t delete it.
- Hover: The state of buttons when users hover over it.
- Clicked: The state of buttons when users click it.
- Disabled: A disabled object is still visible to viewers, but it won’t respond when being hovered or clicked.
For more details about states, see Object States.
Adding Events – Actions to Buttons
Except the Submit button automatically included in questions, inserted buttons don’t have preset events – actions. This means that by default, buttons don’t trigger any action when learners interact with them. So, you have to add events – actions to buttons to make them interactive.
Bear in mind that if you insert buttons in Slide Master, adding events – actions to them also has to be done in Slide Master.
Take the following steps to add events – actions to buttons:
Step 1: Select the button.
Step 2: Open the Interactivity tab (1) of the Properties pane.
Step 3: In the Events – Actions section, hover over the button name entry and click Add Event (2).
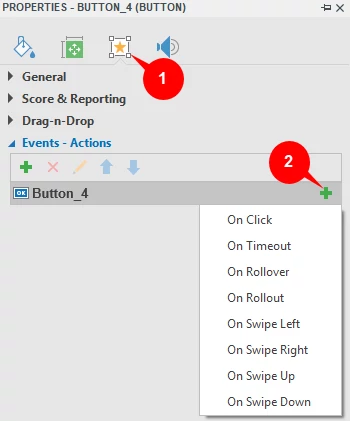
A button may have up to eight events:
- On Click: Occur when users click it.
- On Timeout: Occur when viewers don’t respond within the specified time.
- On Rollover: Occur when the mouse rolls over the button.
- On Rollout: Occur when the mouse rolls out of the button.
- On Swipe Left: Occur when users swipe across the button to the left on the touch screen.
- On Swipe Right: Occur when users swipe across the button to the right on the touch screen.
- On Swipe Up: Occur when users swipe across the button to the top on the touch screen.
- On Swipe Down: Occur when users swipe across the button to the bottom on the touch screen.
Step 4: Add actions to events.
Also in the Events – Actions section, hover the mouse over the event entry and then click Add Actions (3).
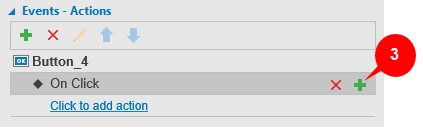
Alternatively, you can click the action entry (Click to add action) to open the Action list, and then select one action to add. Each event of a button can have more than one action.
Step 5 (Optional): Add conditions to actions.
See Working with Events – Actions for more information.
So, you’ve learned how to insert buttons, change their multiple states, and make them interactive in ActivePresenter 7. Visit the following links if you want to learn more about how to work with other types of interactive objects in ActivePresenter:
Working with Mouse Clicks
Working with Key Strokes
Working with Text Boxes
Working with Drop Area
Working with Check Boxes and Radio Buttons
Working with Animated Timer