Scenes in Saola Animate are similar to slides in Microsoft PowerPoint. Each contains elements and timelines. They help separate content and control the flow of animations. This tutorial will give you a deeper understanding of how to work with scenes in Saola Animate 3.
This tutorial covers:
Manage Scenes
A document can have one or multiple scenes managed in the Scenes pane. You can manage them to control the flow of your animations to create amazing visual experiences.
Insert Scenes
Inserting scenes is a basic step when working with Saola Animate. There are several ways to insert scenes into a project: adding blank scenes, duplicating scenes, and copying scenes from other projects.
Add Blank Scenes
To add a blank scene, do one of the following:
- Click Blank Scene
 in the main toolbar.
 - Right-click a scene > Blank Scene.
- Open the Scene menu > Blank Scene.
The new scene will be inserted below the last selected scene. It inherits the size and background property from that scene.
Duplicate Scenes
Another way to insert a scene is by duplicating. Duplicating a scene is making a copy of it. The duplicate one will appear below the scene you select to duplicate. You can only create a duplicate scene inside the current project.
To insert a duplicate scene, do the same as the last two ways as adding blank scenes:
- Right-click a scene > Duplicate Scene.
- Open the Scene menu > Duplicate Scene.
Copy Scenes
As mentioned above, duplicating scenes allows you to make copies of scenes in the current project. Meanwhile, copying scenes makes it possible to copy and paste scenes inside the current project and across other projects.
To copy scenes, you can use the Copy ![]() commands in the menu toolbar, right-click the scene you want to copy > Copy, or press Ctrl+C on the keyboard. A copied scene will copy all resources and user-defined functions used in the original scene when doing that across projects.
commands in the menu toolbar, right-click the scene you want to copy > Copy, or press Ctrl+C on the keyboard. A copied scene will copy all resources and user-defined functions used in the original scene when doing that across projects.
Moreover, after inserting scenes, you can change the properties of these newly inserted scenes. Keep reading to know how to do that in the next part of this tutorial.
Display Scene Thumbnails
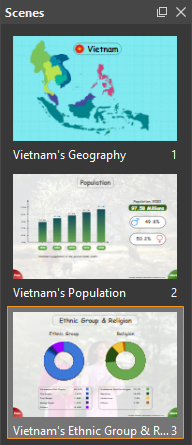
The scene thumbnail is a small image representation of a scene that we work with. Setting up the display of scene thumbnails is up to you, making you feel at ease when working with scenes. There are two modes that Saola Animate provides to display scene thumbnails, namely Show in Column and Show in Grid. Right-click a scene or the Scenes pane, and select either of the modes:
- Show in Column: Scene thumbnails expand their size to fit into the available width.
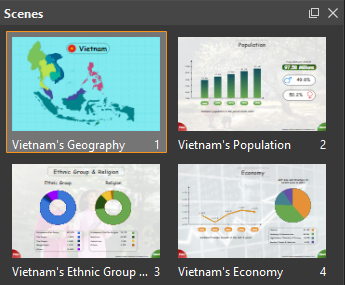
- Show in Grid: Scene thumbnails are uniformly sized and displayed in grid.
Remove Scenes
If you no longer need a scene or multiple scenes, delete them by selecting them first and doing one of the following:
- Press the DELETE key on the keyboard.
- Right-click the scene and select Delete.
- Click the Delete
 command in the menu toolbar.
Customize Scene Properties
After inserting new scenes, it’s possible to customize their properties depending on your design purposes. You can edit their name, size, overflow, and transition to the next scene (Properties pane > Scene tab).
Note: You can edit properties of multiple scenes simultaneously except their name.
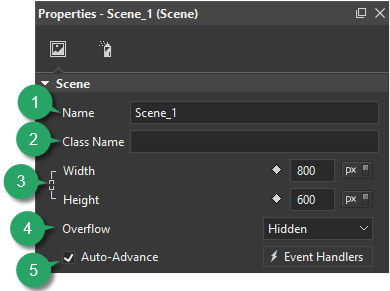
Set up Scene Name
Besides scene thumbnails, their names also help you manage and work with scenes more easily. So, you should set up each scene with a unique name to avoid confusion.
- Name (1): Enter the scene name. Alternatively, you can name a scene by double-clicking the scene name in the Timeline or Elements pane and enter a new name.
- Class Name (2): Enter the class name of the scene.
Change Scene Width/Height
To change the scene’s size, change the Width/Height (3) value. The value can be in pixels or percentages.
- When you set the size value in pixels (px), it can be a fixed-sized unit that’s not scalable to be self-aligned with the container size. It means that the scene does not change its size when you adjust the container size in the Responsive toolbar, like this:
- When you set the size value in percentages (%), it can be relative to the container size. In this case, Saola Animate automatically considers the container size as 100% and converts scene size values in pixels to corresponding percentages. Hence, once you adjust the container size, it will create a flexible layout.
When you duplicate or copy a scene, the new one will inherit the size property. Therefore, if you want to change the size, you should change it first. Thanks to that, you can save so much time.
Note: To maintain the aspect ratio while editing, select the Link width to height check box (the chain icon).
Customize Scene’s Overflow
The Overflow (4) property specifies how scene content displays if it extends beyond the bounds of the scene. There are four modes of overflow property:
- Visible: The overflow renders outside the scene’s box. This mode is on by default.
- Hidden: It clips the overflowing content that extends beyond the scene.
- Scroll: It hides the overflowing content, and a scroll bar is added to view the rest of the content.
- Auto: If the overflow is clipped, a scroll bar is added to view the rest of the content.
Look at the example below, the palm tree element is bigger than the scene and overflows the scene’s boundary. By default, the overflow is visible when previewing in the browser or exporting to HTML5.
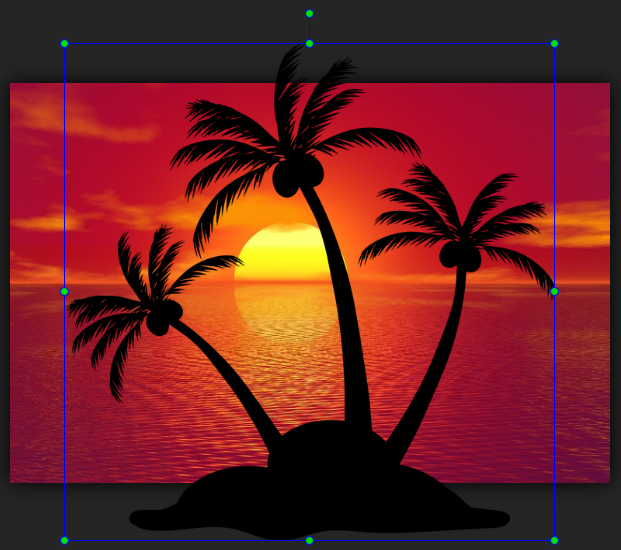
To make the scene looks more natural, you can hide the overflow:
- Select the scene.
- Select Hidden in the Overflow (4) drop-down list (Properties pane > Scene tab > Scene section).
- Preview in the browser to see how the overflow is hidden.

Advance Scenes
When creating a multiple-scene document, an essential part you should not miss is the transition between scenes. By default, Saola Animate switches on the Auto-Advance feature (5). With this feature on, the scene automatically moves to the next one after the current one ends. However, this can be a sudden transition. Therefore, you can add transition effects to advance scenes more smoothly and appealing. Do as follows to add transition effects to scenes:
Step 1: Select one or multiple scenes that you want to add a transition effect.
Step 2: Customize the transition effect. Just navigate to the Properties pane > Scene tab > Transition Effects section.
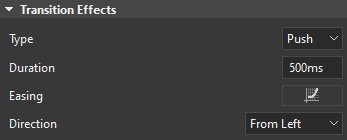
- Type: Type of the transition effect. Saola Animate offers two types: Fade and Push.
- Duration: The time in milliseconds that the transition effect lasts.
- Easing: The timing function updates the transition by time. For more dynamic movements, Saola Animate offers up to 40 timing functions.
- Direction: Direction of the Push transition effect. There are four options available: From Left, From Top, From Right, From Bottom.
Step 3: Preview in the browser ![]() to see how the transition effect looks.
to see how the transition effect looks.
Note: If you don’t want to set the automatic transition to the next scene, disable this feature, remove the transition effect, and then use events – actions to play scenes.
All things considered. Let’s create stunning visual scenes and add animations to them now. Try it and let us know if you need any help.
Related articles: