Timeline labels serve as bookmarks to which you can refer later. You can create a timeline label to mark a specific point in the Timeline pane. Then, use the label to play or pause a timeline at that point using events – actions or triggers.
This tutorial covers:
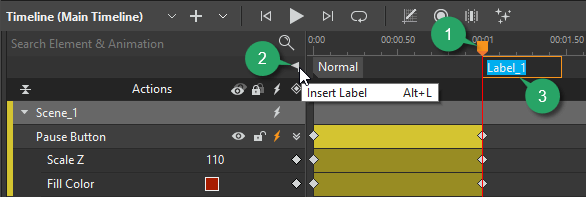
Insert Timeline Labels
To insert a timeline label in Saola Animate 3, follow these steps:
- Move the Playhead (1) to a specific point in the Timeline pane.
- Click the Insert Label button (2) or press ALT+L to insert a timeline label.
- When a new label appears at the Playhead position (3), give it a meaningful name. If you don’t name the label, it will use the default name such as Label_1, Label_2…
Edit Timeline Labels
After inserting a label, you can do one of the following to edit it:
- Rename labels: Double-click a label to enter a new name. Then, press Enter or click elsewhere outside to apply the new name.
- Move labels: Click and drag a label to move it along the Timeline pane.
- Cut labels: Select a label and press CTRL+X. Or, right-click it and select Cut from the label context menu. Move the Playhead to a specific point in the Timeline pane and press CTRL+V to insert the cut label into the current Playhead position:
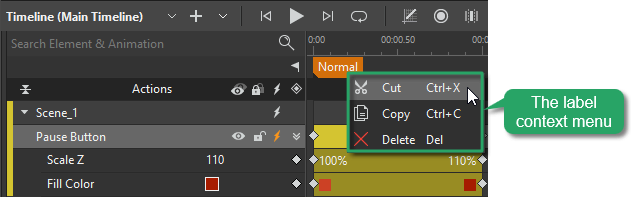
- Copy labels: Click a label and press CTRL+C. Or, select Copy from the label context menu. Move the Playhead to a specific point in the Timeline pane and press CTRL+V to paste the copied label into the current Playhead position.
- Delete labels: Select a label and press DELETE. Alternatively, select Delete from the label context menu.
Use TimeLine Labels
As mentioned in the beginning of the tutorial, you can use timeline labels to play or pause a timeline at a specific point using events – actions or triggers. Let’s take a look at the following example:
To create a hover effect for a button, let’s insert two timeline labels and name it, for instance, Normal and Hover:
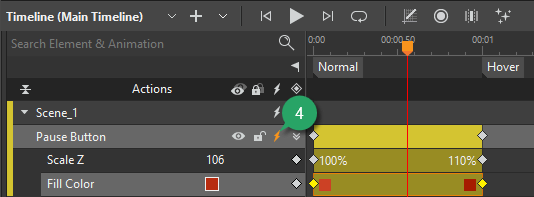
Then, you click the Event Handlers button (4) to insert events – actions for that button:
- Select Mouse Enter event > click the Add Action button (5) > Timeline > Pause Timeline At > Main Timeline > double-click the Params cell > Label > Hover:
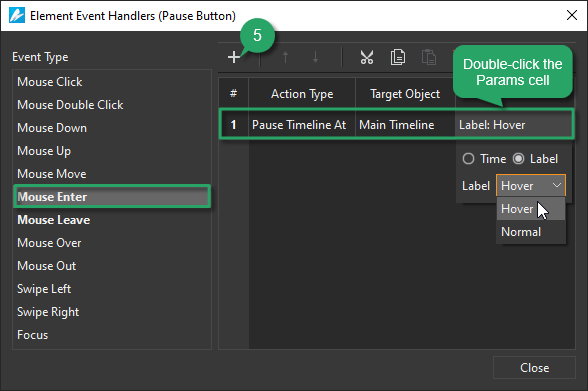
This Mouse Enter event helps pause the main timeline at the Hovel label. When users hover the mouse over the button, its color is changed, creating the hover effect.
- Select Mouse Leave event > click the Add Action button > Timeline > Pause Timeline At > Main Timeline > double-click the Params cell > Label > Normal:
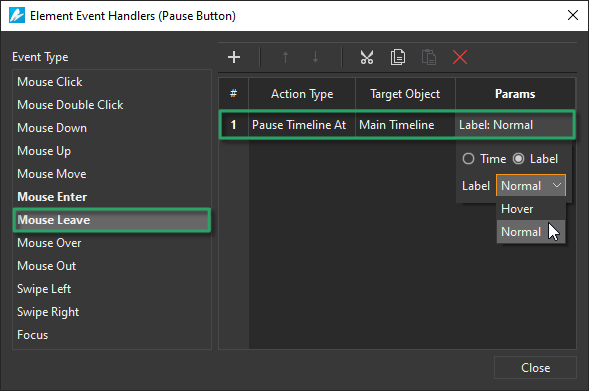
This Mouse Leave event helps pause the main timeline at the Normal label. When users move the mouse out of the button, it will return to its original color.
As a result, you can create hover effects for buttons as in this example:
That’s all about creating timeline labels in Saola Animate 3. For more detailed information about creating hover effects and working with the Timeline pane, you can refer to the related articles below: