Localizing Projects
Localizing Projects is the process of adapting your projects for use in a specific country, a region with a particular language and culture. If you are creating a demonstration or simulation of a certain application that supports multiple languages, you may need to localize your project for each language. This article will show you how to do that with ActivePresenter – Best screen recorder and video editor for screencast and elearning purpose. Check out unique features here before we start.
In general, the localizing process has five big steps which I’m going to list below. In each of them, I’ll describe in more details with smaller steps so you can carry out with ease. Before getting started to localize your project, make sure that you have finished editing the original project.
1. Export text from your project to XLIFF format.
Step 1: Open the Localize tab. (1)
Step 2: Click Export to XLIFF. (2)

Step 3: Select types of text which you want to export for translation in the Export Options section (3) of the Export to XLIFF window appears.
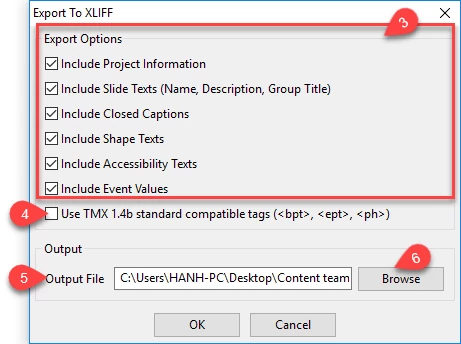
Step 4: Select Use TMX 1.4b standard compatible tags (4) if your translation tool doesn’t support <g> and <x/> tag.
Step 5: Name your Output File (5) and choose the location to save it (6).
Step 6: Click OK to start exporting.
2. Translate text in the exported XLIFF file using any tool that supports XLIFF 1.2.
3. Replace the original slide backgrounds with the new ones that are captured in the new language.
You should not do the localization directly in your original project but in a copy of it. Take further steps as below:
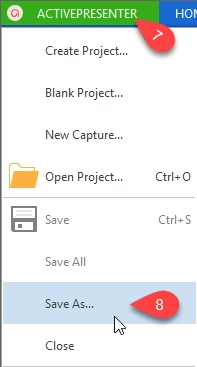
Step 7: Create a copy of the original project for the new language.
Access ActivePresenter menu (7), select Save As (8) and give your copied project a meaningful name.
Step 8: Capture new project for the new language.
- Change language preferences and settings for the captured application. Remember to use the same project size as the original project. (width x height)
- Use the Smart Capture profile for capturing.
- Name your new captured project.
Step 9: Replace slide backgrounds in the copied project by the newly captured project.
- Open the copied project.
- Under the Localize tab (1), click Replace Slide Backgrounds (9).
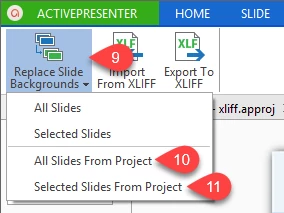
Choose All Slides From Project (10) if you want to replace all slides or Selected Slides From Project (11) if you want to replace some slides, then browse the newly captured project.
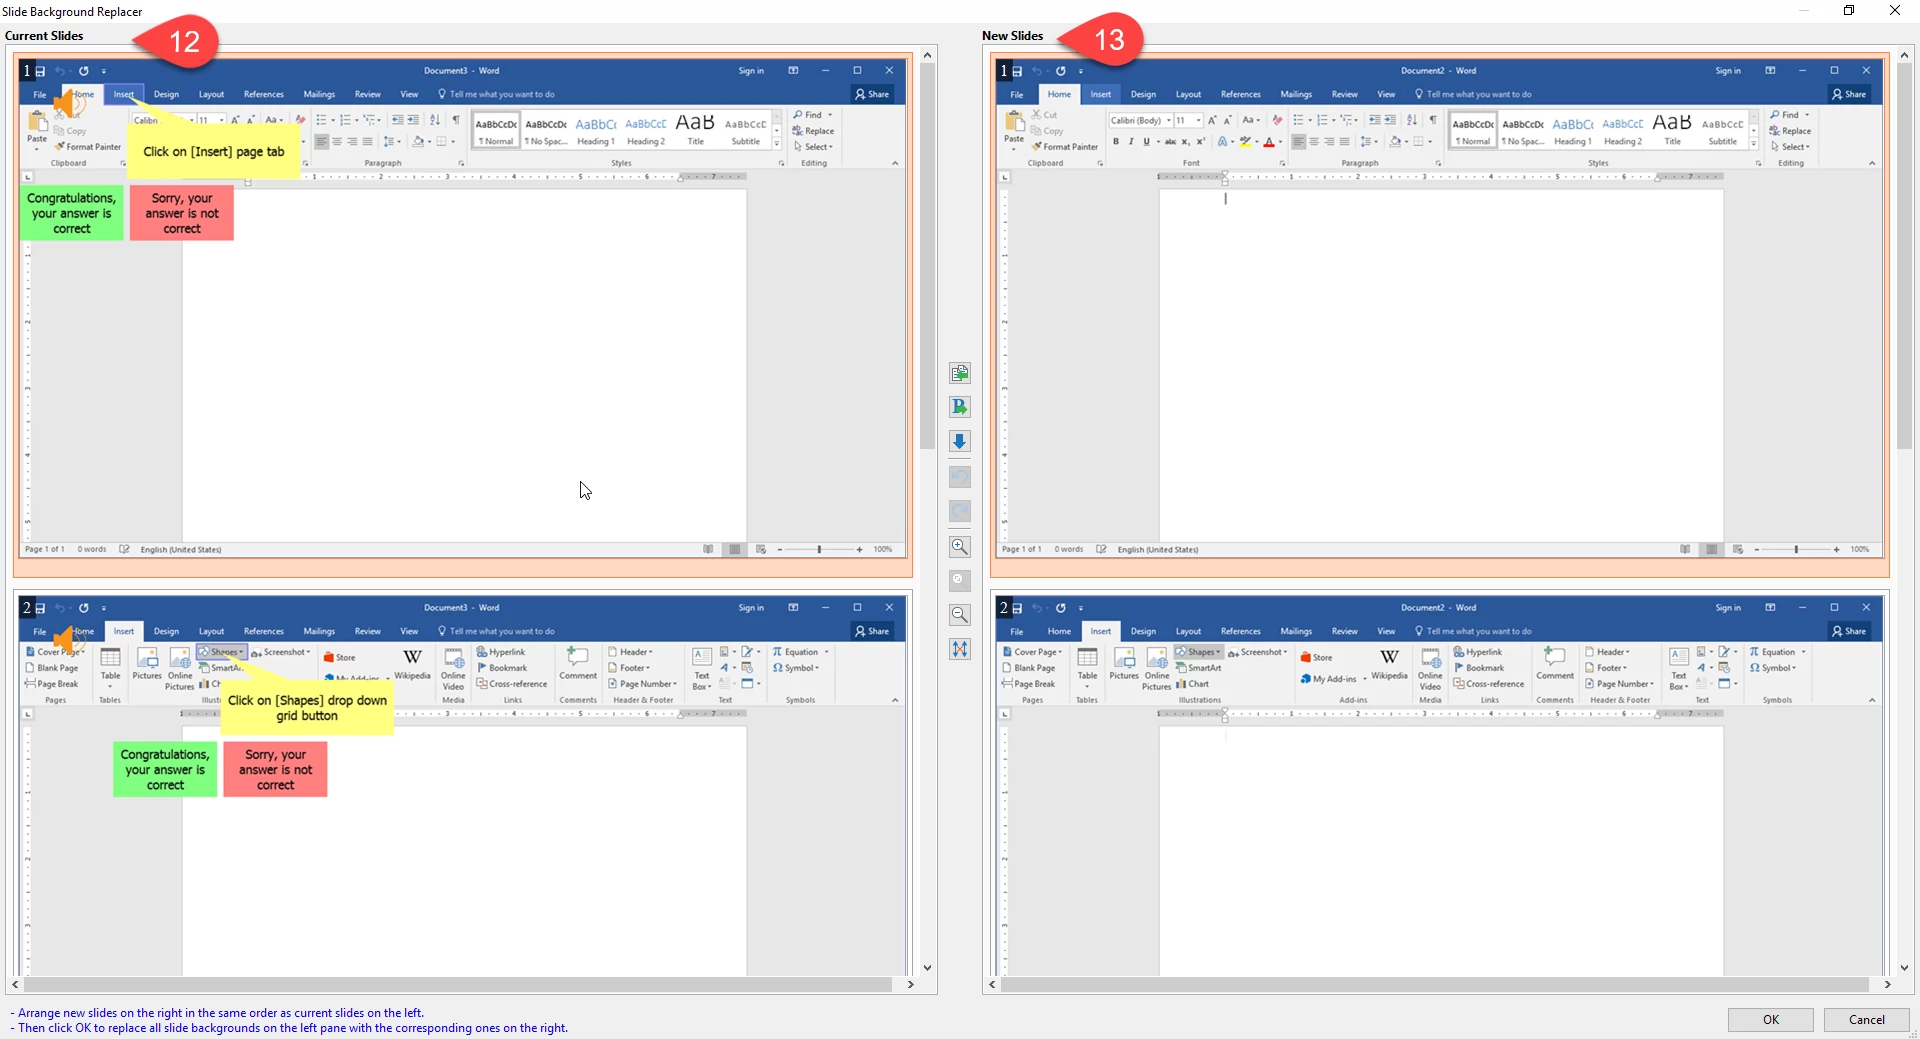
Step 10: Arrange New Slides (13) on the right in the same order as Current Slides (12) on the left in the Slide Background Replacer window by dragging them or using right-click menu. Then click OK to replace slide backgrounds.
4. Import the translated XLIFF file into the project.
After translating and replacing slide backgrounds, you need to import the XLIFF file back to the project that its slide backgrounds are replaced. ActivePresenter will replace current texts in your project with corresponding texts in the translated XLIFF file.
Take some final steps below to do that:
Step 11: Open the project that has been replaced slide backgrounds.
Step 12: Click Import From XLIFF (14) on the Localize tab (1).

Step 13: Browse the XLIFF file that you have translated for the project.
Step 14: Verify imported text on each slide and adjust object position and size if necessary.
5. Test the localized version of your project, make sure all screenshot images are replaced, all texts are properly translated and displayed.
That’s how to localize your projects, especially simulations or demonstrations of a software supporting multiple languages in ActivePresenter. Hope that it helps. Give it a try and feel free to email us if you have something to share.