Exporting and Importing Preferences
When working with a team, you may want to export your own ActivePresenter project preferences, and then share with other colleagues. After recording, editing procedure, you will need to save/ export your work, right. In that way, all of the members can import a set of common standards about configurations to their software without spending too much time on setting it over and over again. Let’s take a look at these tools in this tutorial.
Exporting Preferences
ActivePresenter offers several different options to customize settings for your projects, such as Interaction, Annotation, and Auto Annotation Text. Please go to our Support site if you want to find out more information about them.
After finishing this task, you can export those configurations to a file in the .APSETTINGS format by doing the following steps:
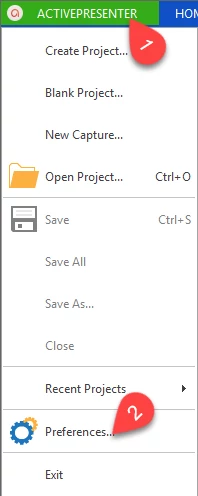
Step 1: Click the ActivePresenter button (1), and click Preferences (2).
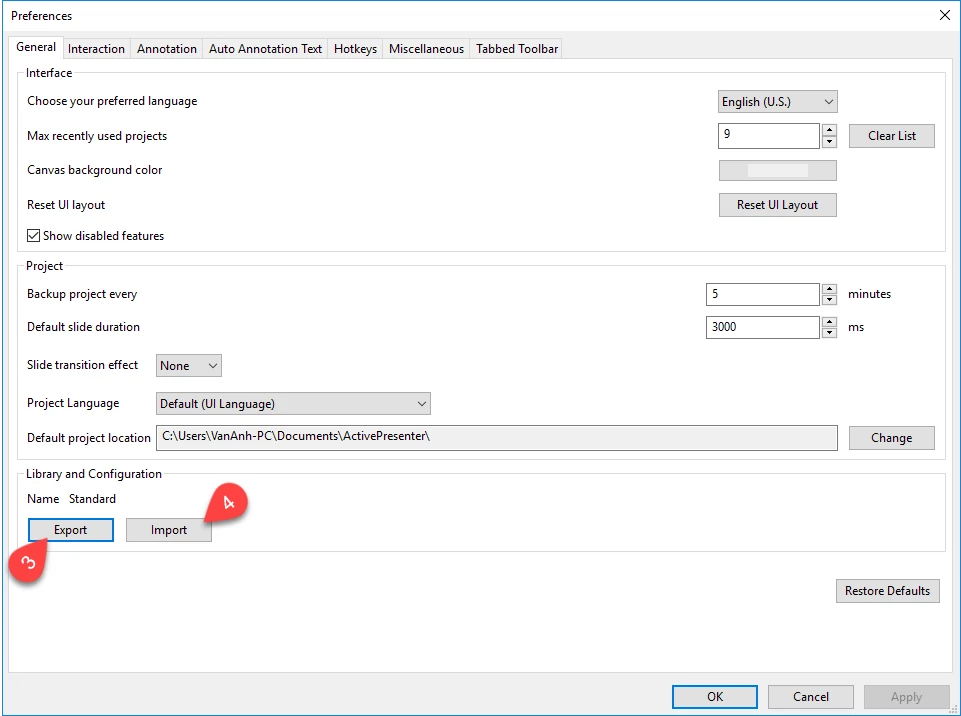
Step 2: Go to the Library and Configuration section in the Preference pop-up window, and click Export (3).
By default, the name of the output file is called “Standard.apsettings”, but you can change it according to your purpose.
Another key point to remember is that this feature does not export all of ActivePresenter preferences in your current project, just only support some elements below:
- All the audio, video and images in the Library.
- Settings in Interactions, Annotations, and Auto Annotation Text tab of the Preferences
- The translation in Output Language Editor used in HTML5 Simulation.
- Four types of Capture Profiles: Record Software Demonstration, Record Movie/Streaming Video, Smart Capture and Smart Capture with Auto FMR.
Importing Preferences
The Importing Preferences feature allows you to reuse library resources and configurations that you or other people modified before. As a result, you can save a great deal of time as well as improve your working performance effectively.
To upload an ActivePresenter setting file to a project that you are working with, take the next actions below:
Step 1: From Welcome Screen, click the ActivePresenter button.
Step 2: Click Preferences.
Step 3: In the Preferences dialog box, click Import (4).
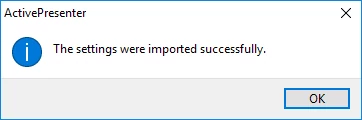
If the changes are applied successfully, a notification as you can see in the picture below appears on the screen.
After that, all preferences in your working project will be changed according to those settings in the imported preferences file.
Remember that you have to close all opening projects before performing this task.
Now, you have a clearer understanding about how to export and import preferences in ActivePresenter. Try it today, and feel free to email us if you need any help.