Export ActivePresenter Projects to Document Formats
Along with videos, HTML5, images, ActivePresenter allows you to export your projects to many different kinds of document formats such as PDF, Microsoft Word, Excel and PowerPoint. They are popular document formats which are widely used by many people. In this tutorial, we will learn how to export projects to those kinds of outputs. Just in case, keep informed about latest updated features about Screen recorer – Screencast video editor – interactive elearning authoring tool here.
Carry out following steps to export your projects:
Step 1: Open Export tab. (1)
Step 2: Select one document output. (2)

As you can see, ActivePresenter offers four document output types which are PDF, Microsoft Word, Excel Worksheet, and PowerPoint Presentation. In this article context, I’m going to choose PDF format to export my project and you can do the same for other kinds of document.
Whenever you select one of the four formats, ActivePresenter will launch you the corresponding dialog for further adjustments. Let’s go ahead to better understand it!
The General Tab
This tab brings you four options in terms of rendering, layout, image and output.
The Rendering Options
You can choose which properties to render in the output by clicking the checkboxes.
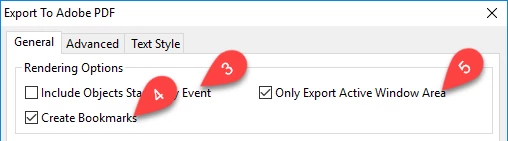
Include Objects Started by Event (3): Include objects which are only triggered by events.
Create Bookmarks (4): Allow you to create bookmarks from the slide name and link them to the corresponding slide images.
Only Export Active Window Area (5): Export the Active Window area and slide objects selected to export only. If you want to know in details of Active Window, please refer to Working with Active Window article.
The Layout Options
Under the Layout Section, you can have more settings in terms of the document layout.
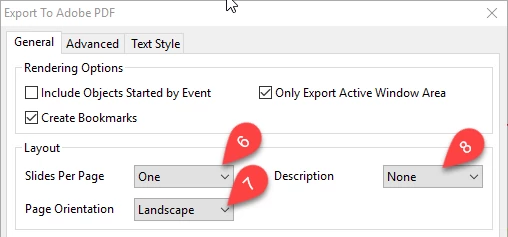
Slide Per Page (6): Define the number of slides on each page.
- One: One slide per page.
- Two: Two slides per page.
- Contiguous: Slides are written contiguously on a page until there is not enough space, then it will move to the next page.
- Compact: Only the screen of the first slide in each group is exported. From the second slide on, it only exports the slide name and slide description.
Description (7): Define the slide description and which side of the generated document it will be placed.
Page Orientation (8): Choose the orientation for exported page.
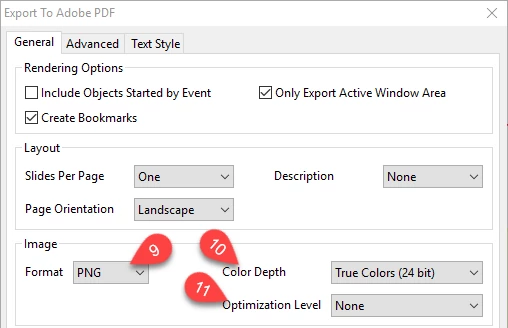
Image Options
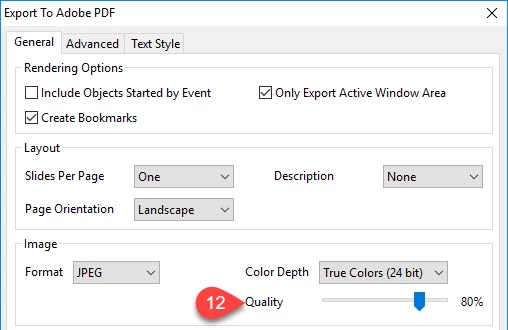
Format (9): Choose from JPEG which is lossy or PNG which is lossless type.
Color Depth (10): Higher color depth makes your outputs look more stunning but also increases the file size.
Optimization Level (11): Select the compression levels. Similar to Color Depth, the higher compression level, the larger file size. This option is shown when you select PNG type.
Quality (12): Define the quality of the image in the range of 1-100. This Option is only activated when you choose JPEG type.
Output Options
The Output Options section (13) is where you can choose the file path and name.

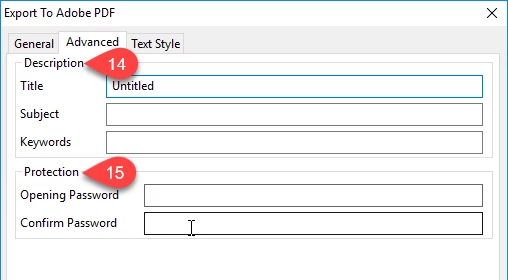
The Advanced Tab
This tab allows you to have options in terms of:
- Descriptions (14) such as title, subject and keywords.
- Protection (15) such as opening password and confirm password.
The Text Style Tab
You can have control over the text in the generated PDF file.
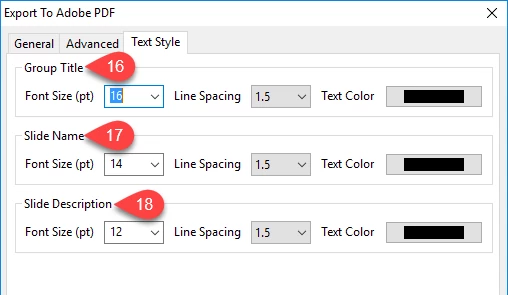
Group Title (16), Slide Name (17) and Slide Description (18): Define the text style in the title, the name of the slide and the slide description respectively.
Finally, click OK to start exporting your project to the PDF file.
So, you have gone through how to export ActivePresenter projects to popular document outputs. Let’s try it today and let us know if you have any obstacle.