The HTML5 Simulation output uses the HTML5 standards that allows learners to view and interact the content on various devices or platforms. The content can run on any HTML5 supported browsers without using the plug-in. In this article, I will get you through how to export your ActivePresenter project to HTML5 Simulation step by step.
To export the project to HTML5 Simulation, do as followings:
Step 1: Open the EXPORT tab. (1)
Step 2: Click the HTML5 Simulation icon. (2)

You will see the Export to HTML5 Simulation dialog pops up having two tabs which are the General and Reporting tab. Take further steps from this dialog to customize your HTML5 Simulation output.
General Options:
First, we will go in details the General tab’s settings.
Step 3: Access and select one template from the Template Section. (3)
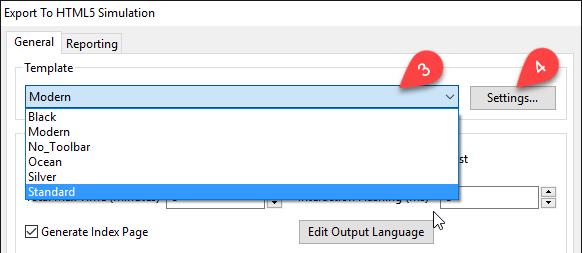
Template is the appearance of the control toolbar provided at the bottom of the screen allowing users to control the presentation, such as show or hide Closed Captions, change volume, etc.
Otherwise, if you don’t want to provide any control to users select No_Toolbar.
Step 4: Click the Settings… button to have more adjustments for the template you choose. (4)
You will see the Template Parameters dialog appears and you can define the exported project layout in more details:
- Presets (i): Allows customizing all the settings then saving it as a preset template. This new template will appear in the Preset drop-down list from here on.
- Parameter (ii): Allows selecting and changing any value to customize your template.
- Explanation (iii): Shows the very short explanation for each parameter.
- Preview (iv): Previews all your customization, how it looks like.
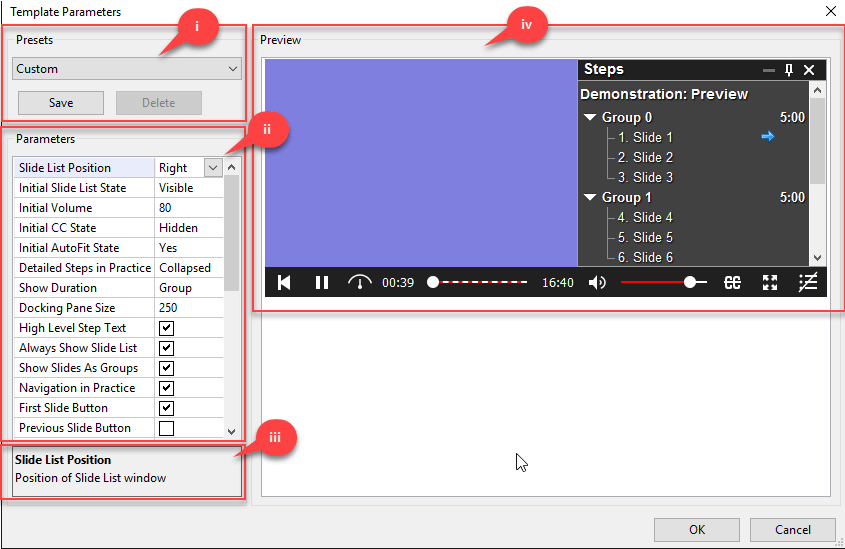
Click OK if you are satisfied with your settings.
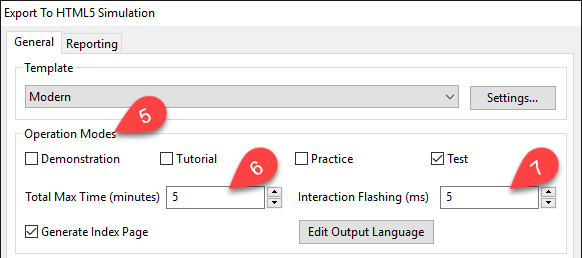
Step 5: Choose the mode(s) to export your project in the Operation Modes. (5)
Step 6: Define the maximum of time in which all objects complete their lifecycle in the Total Max Time (6).
Step 7 (Optional): Defining the speed that the interaction will flash in the Interaction Flashing section (7). This helps to attract learners.
Step 8: Specify properties for background images of slides in the Content. (8)
From here you can have the settings in terms of Format, Color Depth and Quality or Optimization Level. Normally, the higher these values are the more stunning output looks like and the bigger file size is.
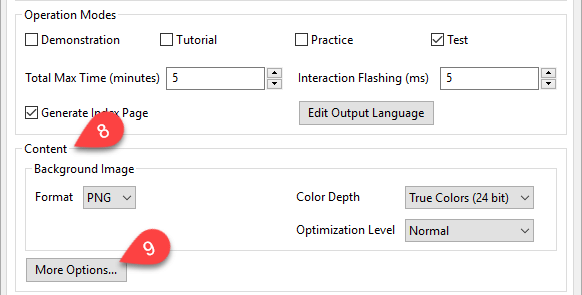
Step 9: Click More Options… button. (9)
And you will have further settings for Object Content and Accessibility as bellow:
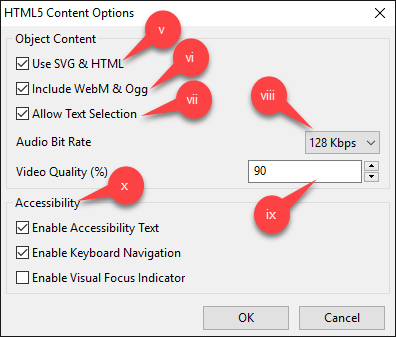
- Select the Use SVG and HTML checkbox. (v)
It’s recommended that you should select this one because ActivePresenter will use SVG and HTML to display shapes and texts inside. So, the content appearance will be clear and sharp.
- Select the Include WebM and Ogg checkbox if you want your output can be viewed on browsers that don’t support MP4 and MP3. (vi)
- Click the Allow Text Selection checkbox if you want to allow users to select text inside shapes. (vii)
- Choose the bit rate for your audio file (if any) in the Audio Bit Rate. (viii)
- Specify the video quality (ix).
- The Accessibility (x) gives you control over enabling some properties of the output, such as Text accessibility and Keyboard Navigation.
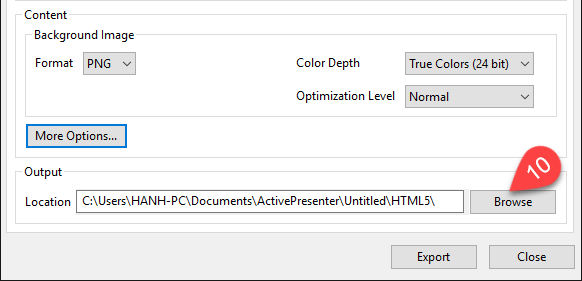
Step 10: Choose the place to save your output by clicking Browse button (10) and select location.
Reporting Options
Now, we will go in details the Reporting tab’ settings.
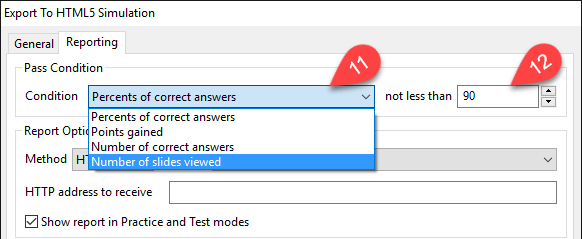
Step 11: Set the pass condition of users in the Pass Condition section.
- Select one condition from the drop-down list. (11)
- Enter number in the Not less than box (12). It’s the minimum score users have to gain to pass the test.
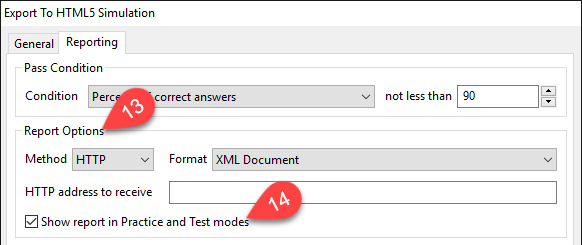
Step 12: Define how to report the test results taken by students in the Report section. (13)
Click the Show report in Practice and Test modes button (14) if you want the report to be shown at the end of the presentation.
Step 13: Access the LMS drop-down list (15) in the eLearning Options section.

- Select No if you don’t want to export your project to any LMS package.
- Select SCORM 1.2 or SCORM 2004 or Tin Can API to export it to a learning management system package for uploading later.
If you choose to export your project to one of LMS packages, take more steps (optional) in the eLearning Options section as below:

- Define the Identifier of your package. (xi)
- Define the Version of your package. (xii)
- Type Title in the Organization Title. (xii)
- Type Item Title. (xiv)
- Click the Report the score in percentage button (xv) if you want to report the result in percentage. This could make it’s easier for learners to assess and track their result.
- Select the Export each operation mode to a separated package button (xvi) to pack each mode to one package separately. Otherwise, all of the operation modes will be packed into one package.
Step 14: Finally, export your projects when everything is done.
So, we have walked through a step-by-step article showing how to export ActivePresenter projects to HTML5 Simulation. Hope that it brings you some useful tips for your work. Try it today and don’t hesitate to contact us if you need more support.