Report Slide lets learners track and review all their interactions, for example, exam results like quizzes’ scores and pass/fail conditions. At the end of the course, you can add a Report Slide if you want to summarize learner performance.
In this tutorial, you will learn how to:
Insert Report Slide
To insert a report slide, do either of the following:
- In the Home or Insert tab > click the drop-down arrow on the New Slide button > Others section > Report Slide.
- In the Questions tab > Report Slide.

Then, you will see a Report Slide inserted into your project like this:
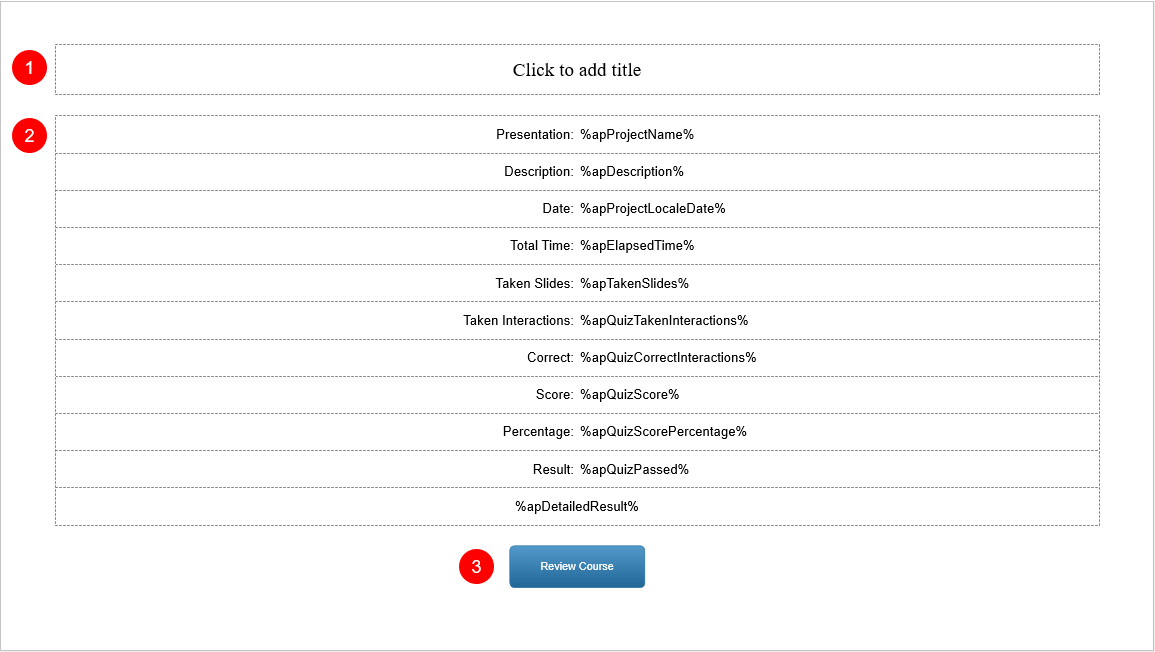
As you can see, a Report Slide contains three parts:
- The top text box to add the slide title (1).
- The default parameters (2).
- The Review Course button (3).
Customize Report Slide
The Report Slide contains all the report information that you want to display. It could be the default report or the customized one.
Show/Hide Default Parameters
There are 11 default parameters on a Report Slide. You can show/hide them by performing the following steps:
- Select the default parameters section (2).
- Navigate to the Properties pane > Interactivity tab > Report Display section.
- Tick/Untick the parameter boxes that you wish to show/hide on the Report Slide.
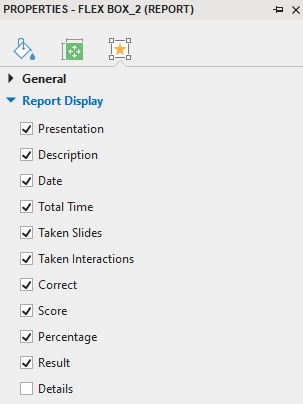
- Presentation: The project name.
- Description: The project description.
- Date: The current date in the format of the project language.
- Total Time: The elapsed time in the format hh:mm:ss since the presentation started playing.
- Taken Slides: The number of taken slides in the project.
- Taken Interactions: The number of taken interactions in the project.
- Correct: The number of correct interactions in the project.
- Score: The total score.
- Percentage: The total score as a percentage.
- Result: The result of the quiz (passed or failed).
- Details: The detailed report.

The detailed report includes:
- Slide Index: The index of the slide which contains the interaction (starting from 1).
- ID: The ReportID of the interaction.
- Attempts: The number of actions that users have tried.
- Score: The total score that learners get from graded interactions.
- Max Score: The maximum score learners can get if all graded interactions are correct.
- Result: A string represented in the output language of the presentation. It can be one of the following values: Correct, Incorrect, Incomplete, (Empty).
- Learner Response: Type of the interaction represented in the output language of the presentation.
Note: There are some slight differences between the Score, Max Score, and Result of questions setting partial score and of questions not setting partial score.
For example, in a Multiple Response Question that sets partial scores, learners don’t select all the correct options but still get points if they select some of the correct options. In this case, the result of the question is still counted as Incorrect.
For more information, please see How to Work with Partial Score in Different Question Types.
Add Customized Parameters
Aside from the 11 default parameters above, you can also add customized ones by using text-based objects and variable references.
To insert a reference into a text-based object, do the following:
- Click the text area of the text-based object to open the inline text editor.
- Click the Home tab > Reference.
- In the System tab of the Variables dialog, select a variable that you would like to add.
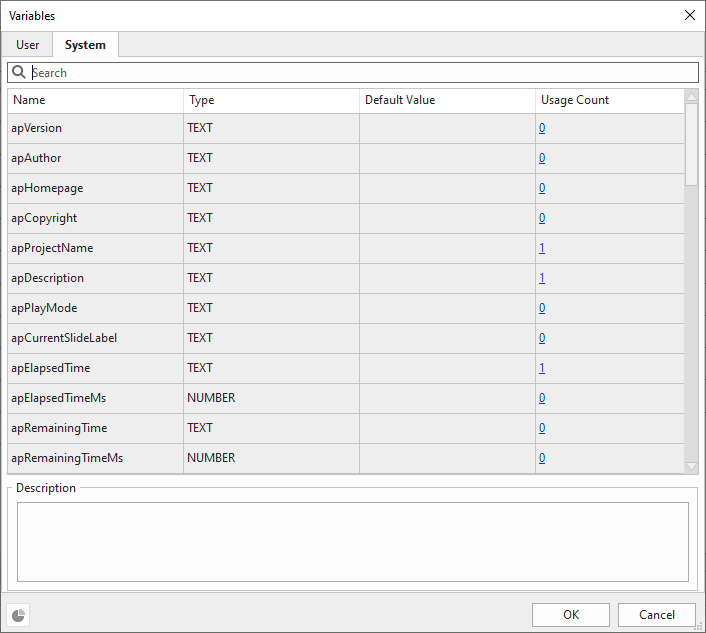
For more information about system variables in ActivePresenter, please see the User Manual (pages 251 – 254).
Another common example of using customized parameters is to set pass/fail conditions for a course. If learners pass the course, the Review Course button will appear and allow them to review it. On the contrary, if learners fail the course, the Try Again button will show up and allow them to take the course again. See Set Pass/Fail Conditions for Lessons for more information.
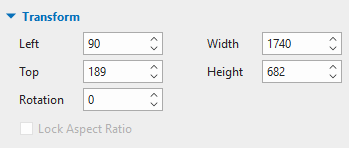
Resize the Title and Default Parameters Sections
You can resize these sections by selecting them and dragging the resizing handles. Or, select them, then navigate to the Properties pane > Size & Properties tab > Transform section to adjust or type the value in the Width and Height combo box:
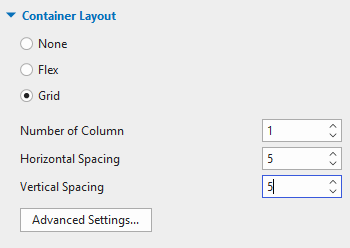
Change the Container Layout
The Container Layout of the Parameters section is Flex by default. However, you can switch to another layout if you want.
To change the container layout, access the Properties pane > Size & Properties tab > Container Layout section. In this section, ActivePresenter 8 offers you three options: None, Flex, or Grid. Select the layout mode that you want. Then, you can customize its properties.
See Container Layouts of Questions for more details.
The Review Course button allows you to review the quiz in the review mode. For more information, please see How to Review a Course.
Note: To modify the look of the Report Slide, open the Slide Master View and modify the Report Slide layout. For more information, see How to Use Slide Masters.
That’s all about how to use Report Slide in ActivePresenter 8. Feel free to download the app and try every feature inside it.
See Also: