ActivePresenter offers two recording modes: Record Video and Record Software Simulation. After recording, you’ll get a video or a slide-based project respectively. Also, the app automatically transfers these recorded projects into the editing screen. From here, you’re free to edit them the way you want.
The below tutorial will walk you through techniques to edit software simulations. If you want to edit a recorded video, see Edit Recorded Videos.
First, there are some important things you need to bear in mind:
- As said earlier, after recording a software simulation, you’ll receive a project containing a series of slides. They can be normal or video slides. In the capturing phase, whenever you scroll the mouse or carry a drag-n-drop action, ActivePresenter automatically switches to the Full Motion Recording mode (Video) to capture it. Otherwise, the app switches back to the previous capture mode (Slide).
- ActivePresenter can automatically create slide names, smart annotations, cursor paths, mouse clicks, key strokes, text boxes, and feedback messages. Thus you can save yourself a lot of time and effort in the editing phase.
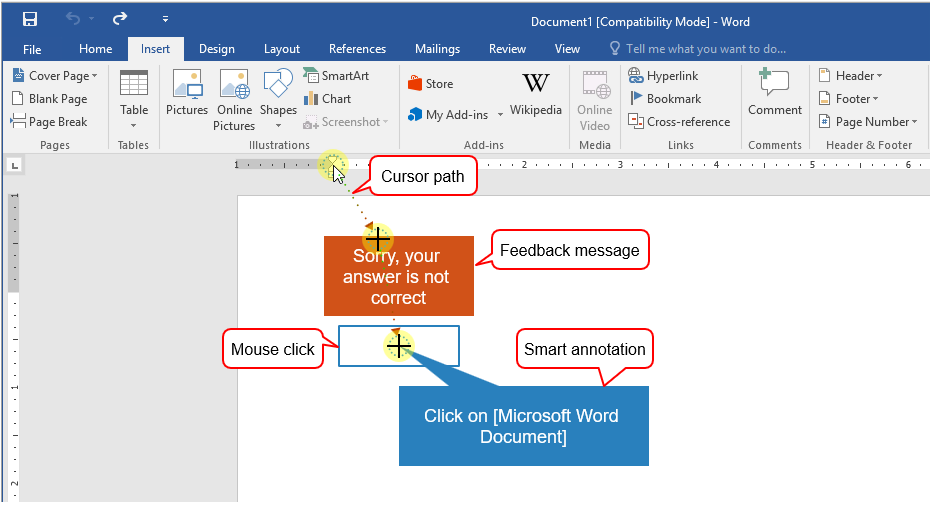
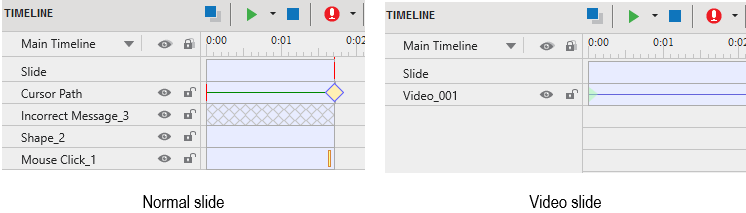
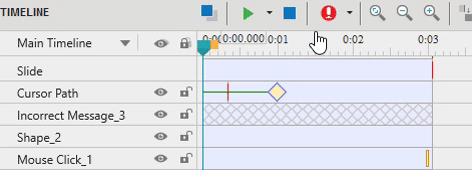
- In the normal slides, you may get the following objects: cursor path, incorrect messages, shape, and mouse click. But in the video slides, there is only one video object.
As mentioned before, your software simulations can include normal slides and video slides. In terms of video slides, you can edit them as the way you edit recorded videos. Editing normal slides will be discussed in the following parts of this tutorial.
Add and Delete Slides
When recording a software simulation, chances are you capture unwanted contents. This leads to the fact that your slide-based project may include redundant slides. But don’t worry since ActivePresenter lets you remove these slides in a few clicks. Just select one or more slides you don’t want, and press DELETE. See Copy, Cut, and Delete Slides for more details.
Besides, you can split/merge slides, change slide numbers, etc. Refer to the Tutorial page for more useful tutorials.
Edit Slide Names and Slide Descriptions
Slide names and slide descriptions are useful when you wish to export software simulations to HTML5 or document outputs. Recall that ActivePresenter offers auto-created slide names. These names are generated based on what you do with the captured application. You can edit the slide names easily in the editing phase. Also, you can add slide descriptions to give more information about any procedure.

To edit slide names and insert slide descriptions, go to the Properties pane > Slide Properties. Then, work with the Name and Description boxes. See Add Slide Names and Numbers to learn more.
Add Slide Transition Effects and Timing
If you plan to export the simulation to video or HTML5, think about slide transition. In a word, slide transition is the effect of the slide changing process, which makes your simulation more appealing and engaging.
In ActivePresenter, you’re given a lot of slide transition effects. They are available in the Transitions tab. Just access the tab and select any effect you want. Then, customize its style and speed. You can even apply different effects to different slides.

See Add Slide Transition Effects to get more details.
Edit Cursor Paths
Cursor paths let you simulate mouse movements and clicks. By default, ActivePresenter creates realistic and natural cursor paths on slides. But sometimes, you may want to change some paths to straight or curved ones and add mouse click effects so that can be clearer to users. Fortunately, the app allows you to perform all of these tasks without any trouble.
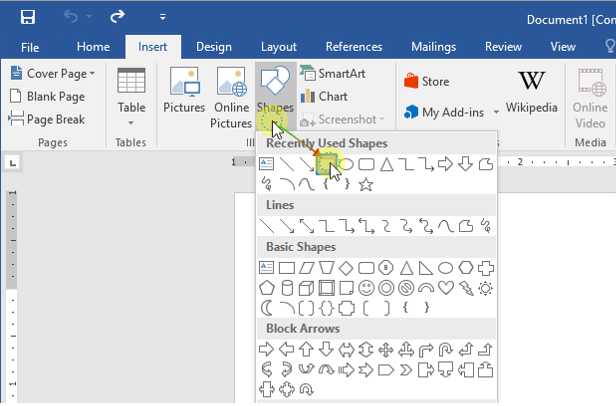
In addition, you’re given a facility to insert new cursor paths and style the path the way you want. These can be done using the cursor path object (Insert > Cursor Path).
See Add Cursor Paths to learn the procedure.
Edit Mouse Clicks
Mouse clicks are interactive objects placed in some areas in a slide. Users must click these areas to trigger the next action. In recording software simulations, ActivePresenter automatically adds this object type wherever and whenever you make a click.
However, it’s likely that you want to change the position and the size of mouse clicks. In that case, you can select them and drag handles to reposition and resize them freely. In case you wish to style them, just do the same as when you customize a normal object.
For information about mouse clicks, see Work with Mouse Clicks.
Add and Edit Feedback Messages
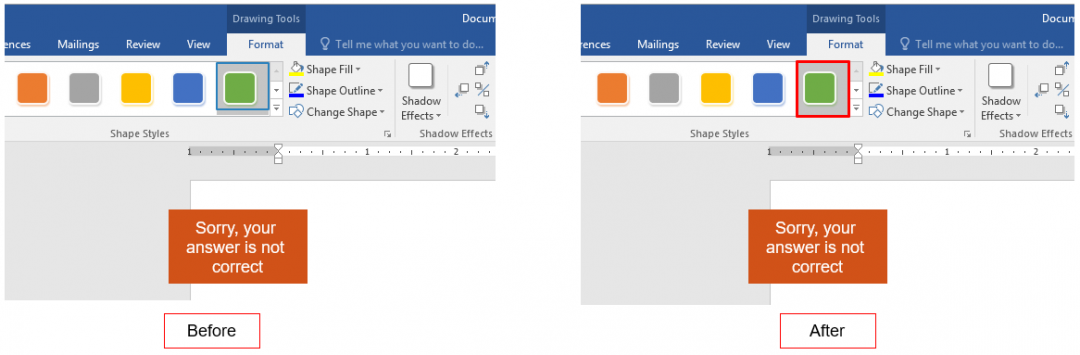
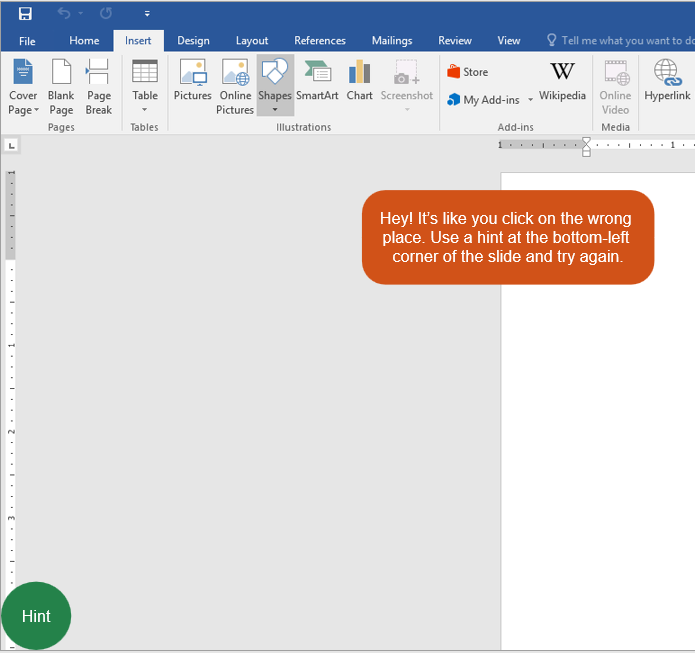
There are some feedback messages in ActivePresenter. They aim at showing how well users do a specific task. When you record software simulations, the app automatically generates some messages like incorrect messages. They are hidden initially and shown when the user action is incorrect.
You can add feedback messages to any project and customize them easily. To help you save time and effort, the app supports some practical commands like Add to Template, Set as Default Feedback Message, Apply to All Feedback Message Objects, or customize default feedback messages in Object Settings view. Using them, you can edit a feedback message, and then apply the change to others without editing one by one.
Note: ActivePresenter creates feedback messages (correct, incorrect, hover) for mouse clicks, key strokes, and text boxes. But by default, you see only the incorrect message after recording. So, remember to select them in the Recording Settings dialog before starting the capturing phase.
Tip: With feedback messages, you can free your creativity in many ways. For example, change the message in a user-friendly way like “Hey! It’s like you click on the wrong place. Use a hint at the bottom-right corner of the slide and try again”.
Edit Smart Annotations
When you make any click or press any key on the keyboard, ActivePresenter automatically creates shapes and adds text to them. The texts show how you perform a step. They are called smart annotations.
To make a good software simulation, it’s better to customize the shapes. For example, you can type the step into a shape and place it at the bottom-right corner of the slide. Every time users look at it, they can know exactly what they have to do.
Record Narration
When the recording audio feature is turned on, the recorded audio may be inserted in different slides. So, you should not record audio and simulation simultaneously. Instead, you should record voice when the recording is finished.
That is, you can insert narration (also voice-over) into a slide during the editing phase. This feature comes in handy when you want to create software simulations with voice prompts.
See Record Narration to learn the technique.
That’s it! You’ve known all techniques for editing a software simulation. Give them a try, and you’ll see ActivePresenter is truly a powerful screencasting tool you shouldn’t miss out!