Using background music is a good way to create engaging video demos and software simulations. Besides recorded videos, ActivePresenter also allows you to add audio to any imported video or presentation. In case your project has many slides, you can make background music play over them with a simple technique. Today we’ll show you all the steps to do that.
Insert an Audio File to Video
In a word, there are two ways to use audio files for videos. First, insert an existing file into a video. Second, record a new audio file right within the app.
Add Existing Audio Files to Videos
If you’ve had audio files, this technique is what you need to insert them into your videos. Do either of the following:
- Drag and drop that file to the app.
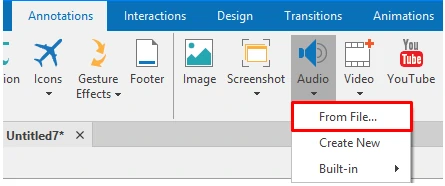
- Select an audio file from your computer and import it into ActivePresenter: In the Annotations tab > Audio > From File….
 Add audio by Recording a Track
The second way is record a new audio file. Follow this procedure:
Step 1: In the Annotations tab > Audio > Create New.
Step 2: Do the same way as when you normally record an audio.
Note:
- In both these ways, you see an audio object appearing on the Canvas as the
 icon. At the same time, its Time Bar is also shown in the Timeline. The Canvas icon is just a visual indicator to remind you that there is an audio object in the slide.
 - You can add as many tracks as you want to each video/slide. This way, you can add each track for each duration in the video/slide.
Set an Audio Track as Background Music
To set an audio track as background music, do as follows:
Step 1: Right-click the audio Time Bar > Play over Multiple Slides. This option comes in handy when your presentation has more than one slide. You want background music to play continuously throughout all slides. There are two available options, namely Top Layer and Bottom Layer. Both of these options create the same effect when the Show Media Controls check box in the Properties pane isn’t selected as you don’t show the controls. But note that the layer you place the audio object affects the stack order of objects on a slide.
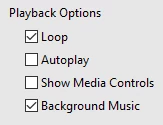
Step 2: (Optional) In the Properties pane > Media ![]() > Audio > Playback Options. Select Loop to make the track replay automatically when the playback is finished.
> Audio > Playback Options. Select Loop to make the track replay automatically when the playback is finished.
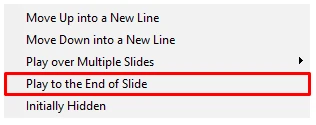
If you want to make the audio duration equal the slide duration, right-click the audio Time Bar > Play to the End of Slide. Or right-click the video Time Bar > Play to the End of Project if your project contains more than one slide.
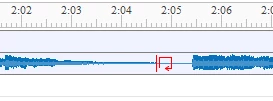
Or, you can drag the end point of the audio Time Bar to the duration you want.
Note: If you wish to improve the audio quality, see Using Audio Fade In/Out.
Additional Options for HTML5
Regarding HTML5 outputs, there are two addition options you should consider:
- Select Background Music to make the track continue playing when the presentation is paused. For example, background music still plays while the presentation pauses to wait for user input. This option is meant for creating HTML5 outputs.
- Select Autoplay to make the audio play automatically when the slide loads, and the Playhead reaches the start point of the video Time bar. This option is also aimed for HTML5 outputs as these outputs contain interactivity. Sometimes, learners don’t want to play audio/video automatically. They just play when taking a specific action.
So, remember to use these ways to insert background music into your videos when making videos with ActivePresenter. If you need any support, don’t hesitate to contact us.