About ActivePresenter – Best Video Editor for Screencast & eLearning purposes
Millions of users are using ActivePresenter every day to make amazing screencast videos and create interactive eLearning lessons with great pleasure. Our users include teachers, trainers, marketing staff, software creators (who want to make software simulations). All of them are extremely satisfied with what we brought to them in ActivePresenter. That is proved by thousands of suggestion from the most famous review website around the world. In today’s article, we would like to guide you through the most interesting features of our software: Editing videos for screencast & eLearning purposes.
In video editing, sometimes you may want to remove unwanted video/audio parts, rearranging positions of parts within a video or copying/ cutting a particular part and paste it into other places. ActivePresenter allows you to do that thanks to Copy/Cut/Delete/Crop command. In this article, I will introduce you how to use these commands in detail. Visually, you can watch our below instructional video.
Video editing features in ActivePresenter
Copy a Video/Audio Range
The video/audio copy command is useful when you want to copy a video/audio range into clipboard, and paste it into other places later.
To copy a video/audio range into clipboard, take following steps:
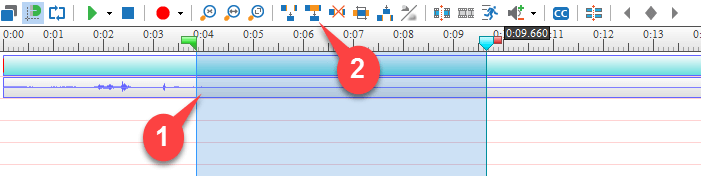
Step 1: Select the range. (1)
Step 2: Click the Copy Range button. (2)
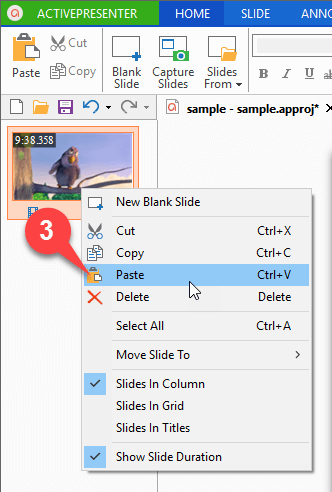
Step 3: Paste the copied content into another place. (3)
ActivePresenter allows you to paste that selected part in either current slide that you are working with or in a new slide in your project.
Cut a Video/Audio Range
The cut command simply deletes the selected content; and places that content in the clipboard.
You can paste that content into other places. To cut a video/audio range, follow steps bellow:
Step 1: Select the range. (1)
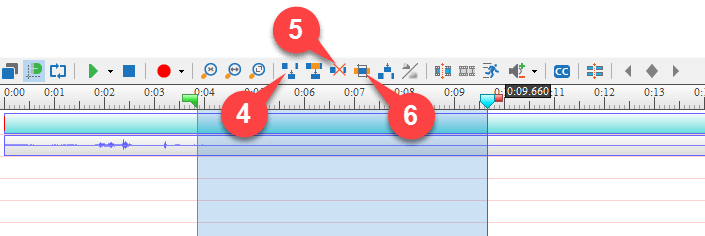
Step 2: Click the Cut Range button. (4)
Step 3 (Optional): Paste the cut content into other places. (3)
Remember that, when you cut any range, all of the information in that range is also deleted while remaining parts are automatically joined together.
Delete a Video/Audio Range
Generally, the delete command works just like the cut command, except one difference: The cut command places the cut contents on the clipboard while the delete command does not.
To apply the delete command, do the same as when applying the cut command:
Step 1: Select the range. (1)
Step 2: Click the Delete button. (5)
Crop a Video/Audio Range
The crop command simply deletes everything other than what is there in the range that you’ve selected. You can read in more details about this command at “How to Crop Video“.
Take following steps to crop a video/audio range:
Step 1: Select the range. (1)
Step 2: Click the Crop to Range button. (6)
So, we have introduced vital steps of applying Copy/Cut/Delete/Crop command for a video/audio file in ActivePresenter. Try it now for FREE and please let us know if you have any obstacle.