When it comes to 3D transformation in Saola Animate, there are two things that you need to be aware of here. They are 3D properties and 3D tools. The 3D properties help you precisely manipulate elements in 3D space, while the 3D tools offer the intuitive 3D view that allows you to quickly and visually adjust elements’ directions on the Canvas. In this tutorial, we will get to know how to use 3D transformation tools in Saola Animate 3.
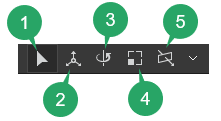
As you can see, the 3D transformation toolbar contains five buttons. They are Select Tool (1), Translate Tool (2), Rotate Tool (3), Scale Tool (4), and Rotate View Tool (5). We will know each of them in detail in the following parts.
This tutorial covers:
1. Select Tool
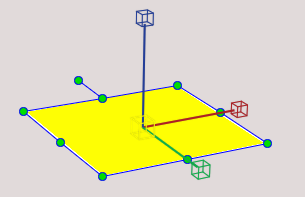
2. Translate Tool
We use the Translate Tool to adjust the translation of the selected elements on Canvas along three axes.
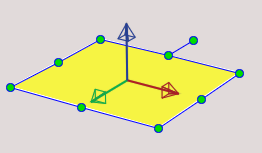
When this tool is enabled, three arrows are rendered on the focus element. They’re the red, green, and blue arrows representing the x, y, and z-axis in the element local coordinate, respectively. When you hover the mouse over one of these arrows, there will be a small letter next to the cursor showing the corresponding axis: ![]() ,
,![]() ,
,![]() .
.
Then, you drag the arrow to move the selected element across the corresponding directions, for example:
3. Rotate Tool
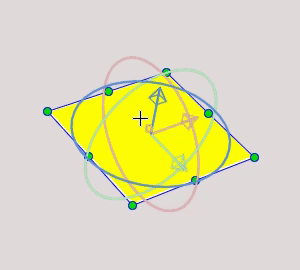
We use the Rotate Tool to rotate the selected elements on Canvas around three axes.
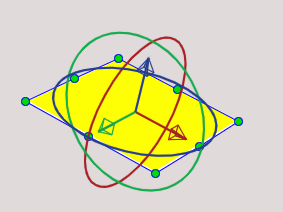
When this tool is enabled, there are three ellipses rendered on the focus element. They are red, green, and blue ellipses rotating the selected element around the local x, y, z-axis. When you hover the mouse to the ellipse, your mouse cursor will change to the crosshair icon. And alongside the crosshair icon, there will be a small letter related to each axis like this ![]()
![]() ,
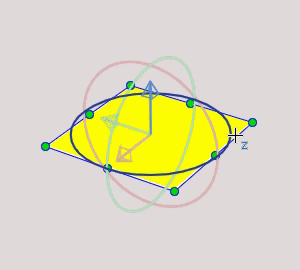
, ![]() . These appearances indicate that you can start rotating the selected elements around the corresponding axis. Then, drag your mouse along the ellipses to rotate the element. For example, this video below illustrates how the element is rotated around the z-axis:
. These appearances indicate that you can start rotating the selected elements around the corresponding axis. Then, drag your mouse along the ellipses to rotate the element. For example, this video below illustrates how the element is rotated around the z-axis:
Besides, you can freely rotate the selected element without being dependent on the x, y, z-axis. Just hover the mouse inside the focus element but out of the ellipses. When the crosshair icon appears with the small letter O (![]() ), you can drag the mouse to rotate the element freely.
), you can drag the mouse to rotate the element freely.
4. Scale Tool
We use the Scale Tool to scale the selected elements on Canvas along three axes.
When this tool is enabled, three arrows (ended by cubes) are rendered on the focus element. They’re the red, green, and blue arrows representing the x, y, and z-axis in the element local coordinate, respectively. The mouse cursor, which you hover over each arrow, will be changed to these: ![]() ,
, ![]() ,
, ![]() .
.
Drag the arrows to scale the selected elements along corresponding directions like this:
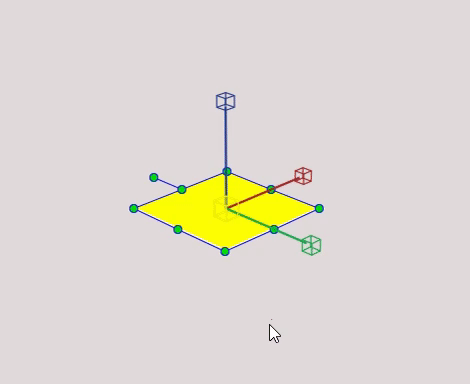
If you want to scale along all axes uniformly, drag the yellow cube at the transform-origin of the focused element.
Note that to scale the 2D element along the z-axis, you need to change its Origin Z to see the result. Please refer to the 3D transformation guide for more information about Scale Z.
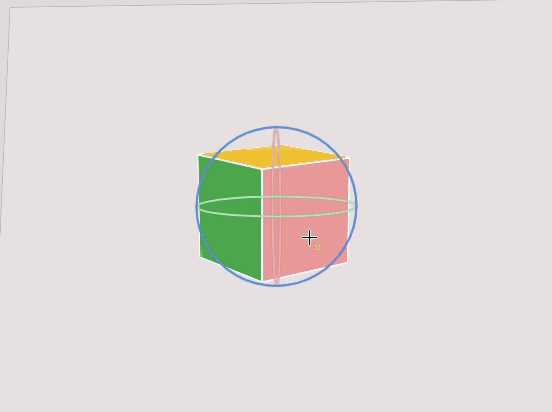
5. Rotate View Tool
By default, your viewing position is in front of the Canvas, and the Canvas coincides with your screen. It may cause some discomfort when editing 3D transformation. Using the Rotate View Tool can help you resolve it. Working with this tool is the same way as the Rotate Tool, so you can rotate the scene view around the axes or freely rotate it.
Besides, Saola Animate also provides some presets to adjust the view. Click the arrow next to the Rotate View Tool icon to show the menu below.
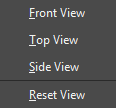
You can choose one of three preset views or reset the view to the default.
Please note that the Rotate View Tool only changes the view for editing elements in 3D space more intuitively but does not affect the output.
That’s all about 3D transformation tools in Saola Animate 3. Try these tools or 3D transformation properties to make your animations live in a 3D space.
Related Articles: