Cursor Path in ActivePresenter enables you to simulate clicking and mouse movements, which is extremely useful for software training and simulations. Let’s take a look at this tool in the tutorial below.
Add Cursor Paths
There are two ways to insert cursor path into a project as I mention following:
- First, ActivePresenter records your mouse movements and automatically converts them into cursor paths during the capture phase.
- Second, you insert cursor paths into the slide manually when editing any project.
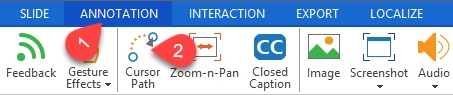
To do that, select the slide you want to add cursor paths and click Cursor Path (2) in the Annotation tab (1).
Any cursor path has major traits below:
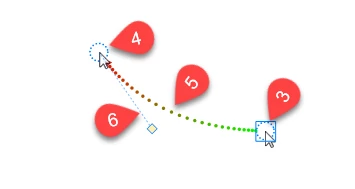
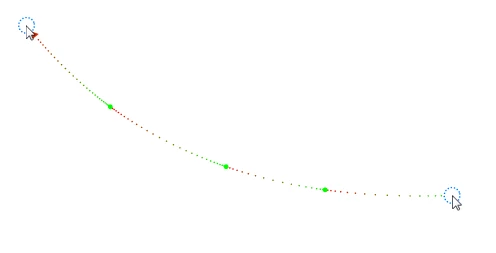
- Each cursor path includes three parts: a start point (3), an end point (4) and a dotted line (5) presenting the movement path of the pointer between these two points.
- A half of the dotted line towards the start point has a green color, and its remaining half gradually turns red at the end point.
- The distance between the dots refers to the speed of the cursor on the screen. For example, the larger distance means the slower speed.
- When you click the start point, ActivePresenter will show a Control Point (6) associated with the end point, and it is always tangent to the path.
Remember that only one cursor path can be added to each slide.
Edit Cursor Paths
Do the following steps to modify the cursor path:
Step 1: Insert more points and change the shape of cursor path.
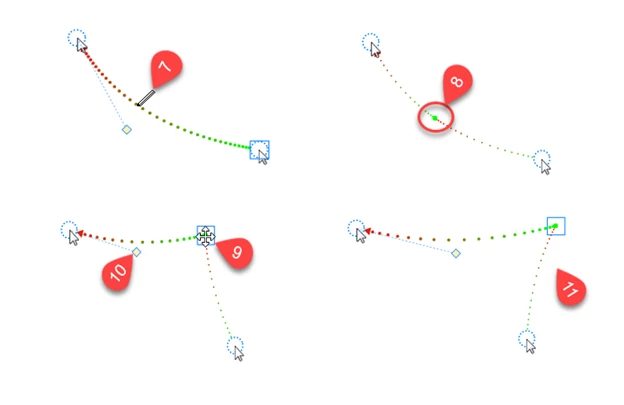
- Move the mouse to anywhere on the dotted line. When the pointer turns into a pencil (7), click to add more points. After this, you can drag that point (8) to a new position (9). At the same time, the original path also changes its shape (11).
- Or click and move the diamond (10) of the Control Point to where you want.
Step 2: Change the time of mouse movements.
For example, I add three points on the dotted line.
Now, let’s look at the Timeline after the applied changes.
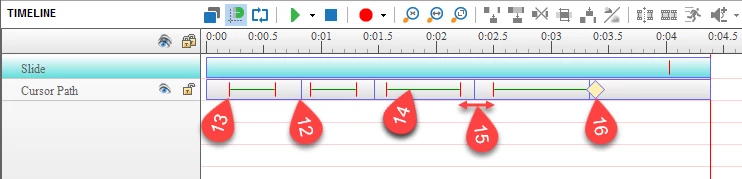
- There are 4 segments in the time bar of Cursor path.
- Each purple vertical line (12) is labeled as the end time of a segment and the start time of the subsequent segment, except the first one.
- The moment when the mouse starts moving is marked with a red vertical line (13).
- The green horizontal line (14) spans the time duration of cursor movement. The cursor is at rest outside this line (15).
You can drag the lines above to adjust where the movements of the cursor begin and how long they last.
Step 2: Change the style of the cursor.
Here’s how to replace the original pointer with other shapes:
- Double click the start point or the end point.
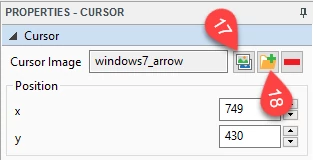
- Click the image icon (17) in the Cursor section of the properties pane.
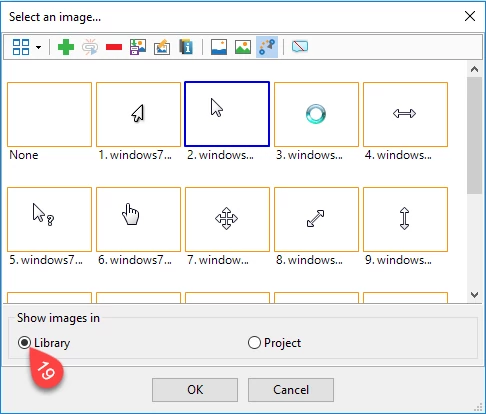
- Select the desired shape in the Library option (19) from the pop-up window.
Also, you can import your own shape from a file by clicking the folder icon (18).
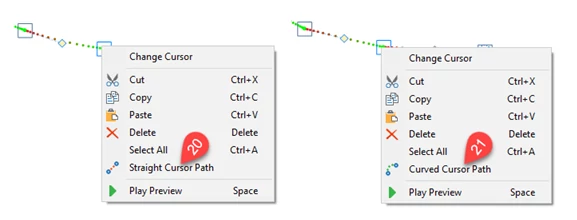
Step 3: Change shape of the cursor path.
In ActivePresenter, you can set the curved or straight line for cursor path. Do the following:
- Right-click the cursor path that you want to change.
- Select Straight Cursor Path (20) or Curved Cursor Path (21).
Step 4: Adding a click point
The yellow diamond (16) on the Timeline represents a click point. This is where ActivePresenter simulates a click by creating a “click” sound and click effect.
You can convert any point on the cursor path into a click point by doing the next steps:
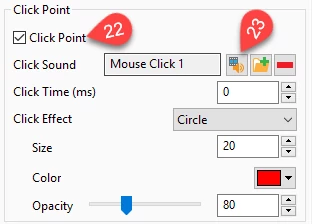
- Click your wanted point (s).
- Select the Click Point check box (22) in the Click Point section of the Properties pane.
- Click the audio icon (23) to change the sound.
- Further customize the click point with some other options such as click time, click effect, size, etc.
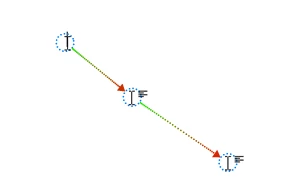
Continuation of Cursor Paths Between Slides
ActivePresenter can help you to align the pointer to the same position as the previous or next slide in the project. You can do this task with some the following steps.
- Right-click the start point, click Snap to Previous (24).
- Right-click the end point, click Snap to Next (25).
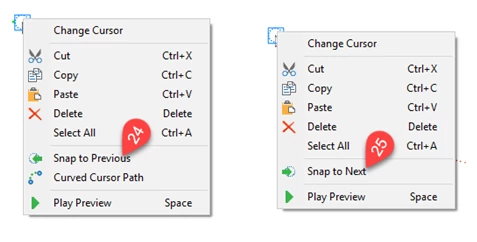
These options will snap the start/end point of the cursor path in the current slide to the appropriate end/start point of the cursor path in the previous or next slide.
Now, you learned how to manipulate the Cursor Path in ActivePresenter. Try it today, and please let us know if you have any obstacle.