Editing the slide backgrounds in the process of creating eLearning lessons can help to make the considerable difference for your courses, and increase the engagement of learners rapidly. In ActivePresenter, you completely make use of this technique with the Drawing tab which I will thoroughly explain in the tutorial below. Before we start, check out what ActivePresenter’s unique features interm of recording computer screen, editing video for screencast purpose.
Accessing to the Drawing Tab
The Drawing tab in ActivePresenter is also defined as the image editor with common editing tools, such as Crop, Blur, Zoom, Scale, and Fill Color.
After inserting an image as a slide background, you can do the next step to open the Drawing tab:
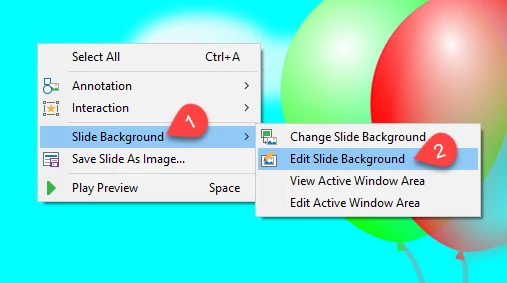
- Right-click the background, point to Slide Background (1), and click Edit Slide Background (2).
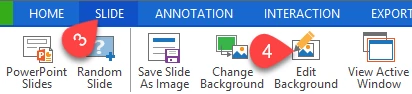
- Or in the Slide tab (3), click Edit Background (4).
Then, ActivePresenter will immediately transfer that slide background to the image editor.
Editing Slide Backgrounds
As you can see, the layout of the Drawing tab in ActivePresenter is quite similar to that of other basic photo editing tools, and the background is placed in the center of the canvas.
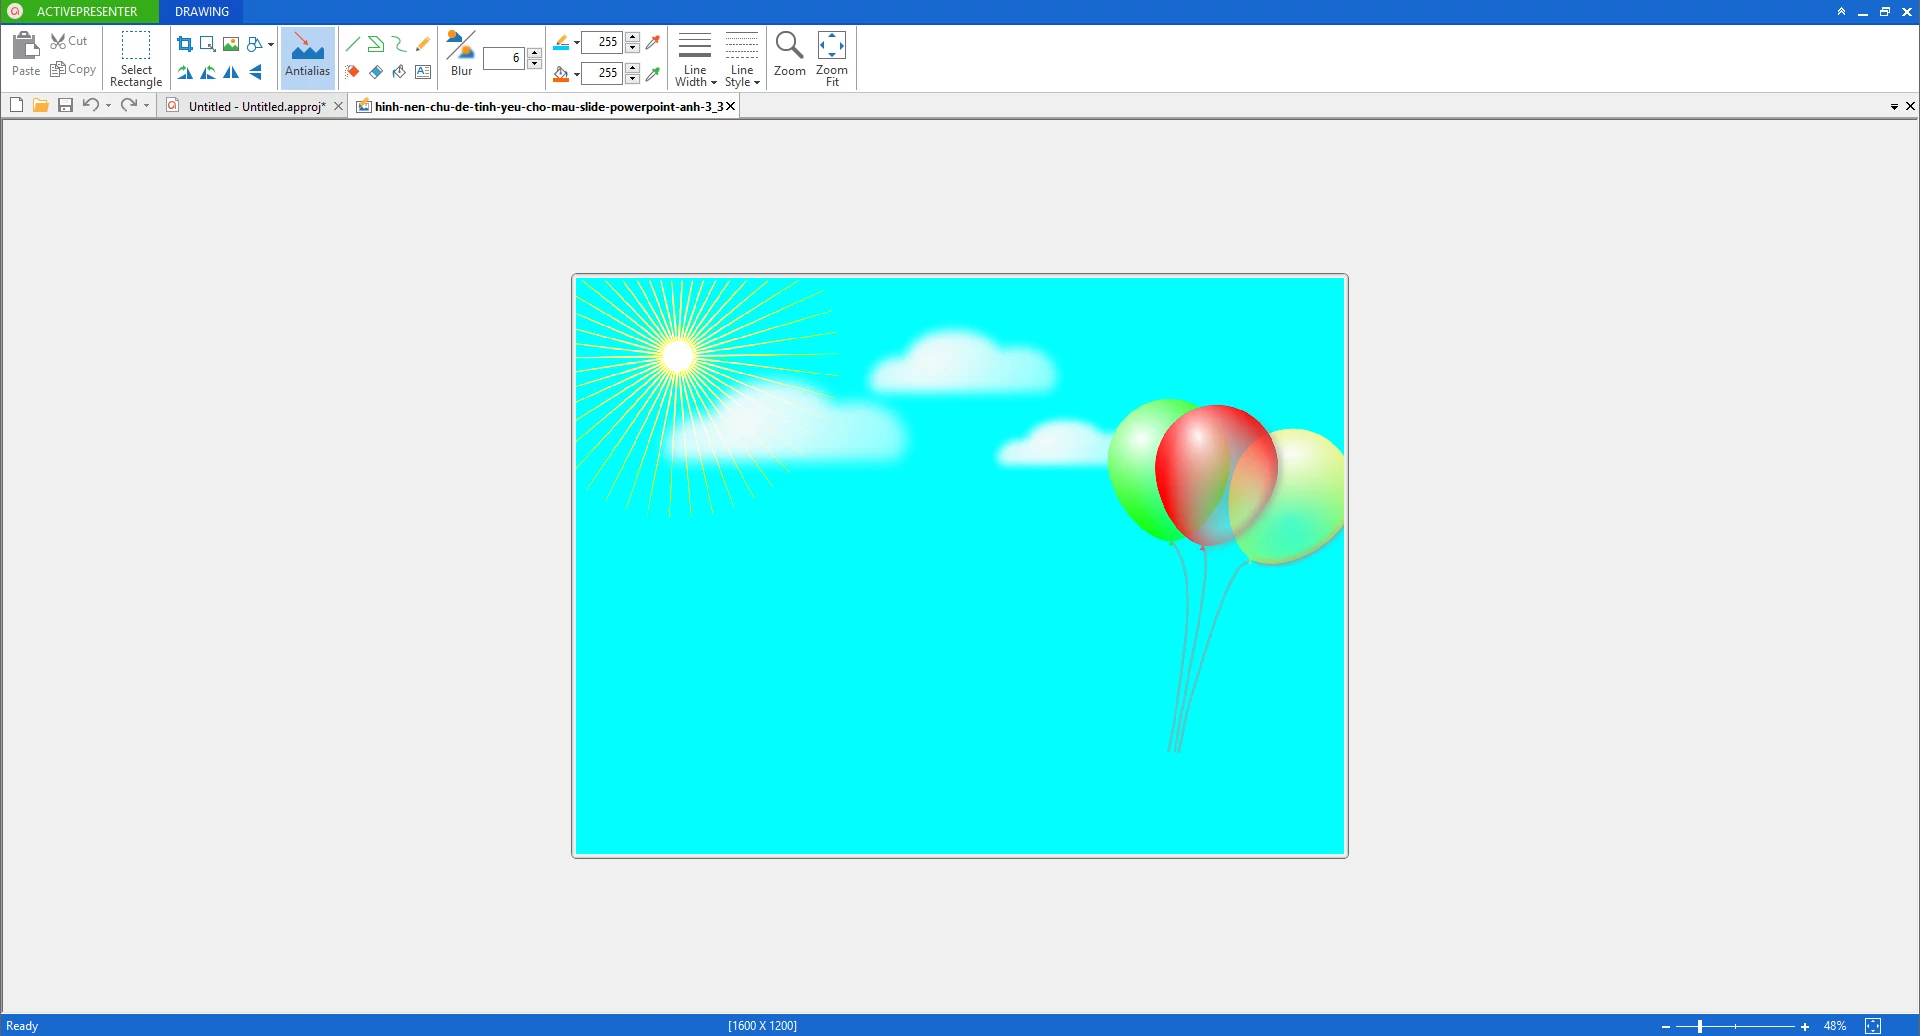
This also means that you can have an easy access to all the tools, and do whatever you want to make your slide background become more amazing.
Step 1: Crop and scale the background.

Resize the background:
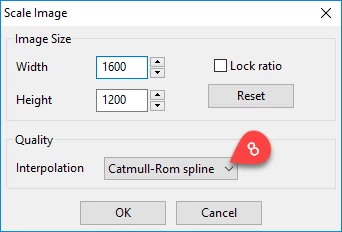
- Click the Scale Image icon (5) to open the Scale Image dialog box.
- Enter new values for the width and height. Also, you can choose one of the algorithms in the Quality section (8) to adjust the quality of the image.
Crop an image:
- Click the Crop icon (6).
- After this, the mouse cursor is changed to the cross-hair (9), and you can drag it to a new location that you want to crop.

Besides, you can change the direction of the background by using the Rotate Right 900, Rotate Left 900, Flip Horizontally, and Flip Vertically tools (7).
Step 2: Delete a region on the image.
You can remove an unwanted part/object on the image by doing one of the following tools:
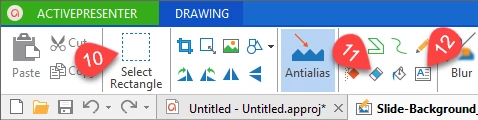
- Click Select Rectangular (10).
- Or click the Eraser icon (11).
Remember that these tools will turn that unwanted part/object to a transparent area.
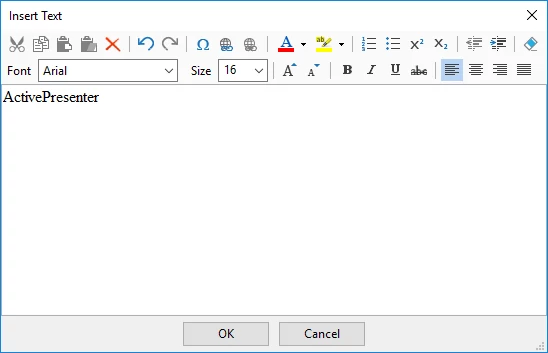
Step 3: Add text to the background.
- Click Text icon (12).
- Click the wanted location on the image.
- Type your text and fine tune it in the Insert Text dialog box.
Step 4: Fill the slide background.
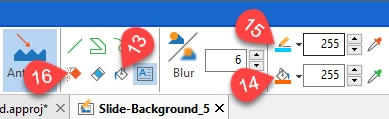
- Click Fill Color (13) to pick a color.
- Click the Flood Fill icon (14) to apply that desired color to your image. A note that the fill will only be clearly visible if the selected region has a transparent background.
Step 5: Use the Air Brush tool.
- Click Pen Color (15) to choose a color.
- Click Air Brush (16), and move the cursor to the location (s) to spray the selected color.
Step 6: Draw over the image.
There are four ways (17) to draw on the slide background in ActivePresenter.
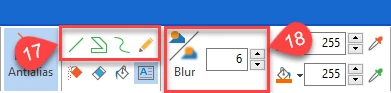
- Click the Line icon to draw a line.
- Or click the Polygon icon to draw a polygon.
- Or click the Spline icon to draw a spline. When you click on various spots, those new points are automatically added to the current point.
- Or click the Pencil icon to draw freehand with a pencil.
You can change the size and style of the line by clicking Line Width and Line Style respectively, then choose your wanted option from the submenus.
Step 7: Blur the region (s) on the background (18).
- Click the Blur
- Specifying the radius of the region that you want to blur.
- Drag the mouse to blur your desired region.
Once finishing the process of editing the slide background, click the disk icon (19) to save your changes.
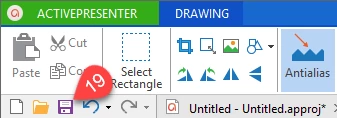
After this, ActivePresenter will automatically apply the new background to the working slide.
That’s all I want to share with you today. Don’t forget to check out our series of ActivePresenter tutorials series, and feel free to email us if you need any support.