As you know, ActivePresenter is considered as one of the most powerful screen recorder, video editor and interactive elearing authoring software. It allow user to record screen on-going activities and then edit the videos to create screencast or elearning lessons. These features are unique and availble on Free edition, standard and also professional edition. This article will give you a quick overview of the ActivePresenter User Interface so as you to easily navigate within. It’s about where you should access in order to work with a particular object as well as to have the desired outcome.
New Project Window
First, let’s take a look at the New Project window:
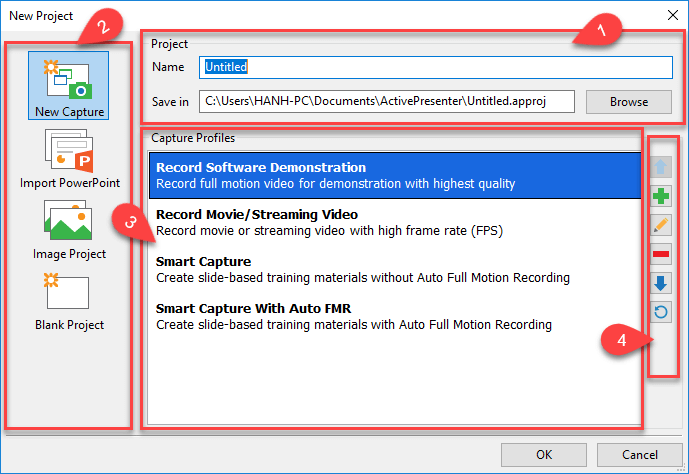
In the top area of the window, you can name your project and choose the path to save it. (1)
In the left side of the window, there have options from which you can choose to create a new project. (2) It might be capturing a new project, creating a new one from PowerPoint slides, from images or simply creating a new blank project.
The center area of the window contains more options of each choice. (3)
We have navigation buttons on the right side. (4)
User Interface
Select the way you want to start a new project then click OK.
Here is the slide view that ActivePresenter presents to you. It should be familiar to anyone who uses Microsoft PowerPoint.
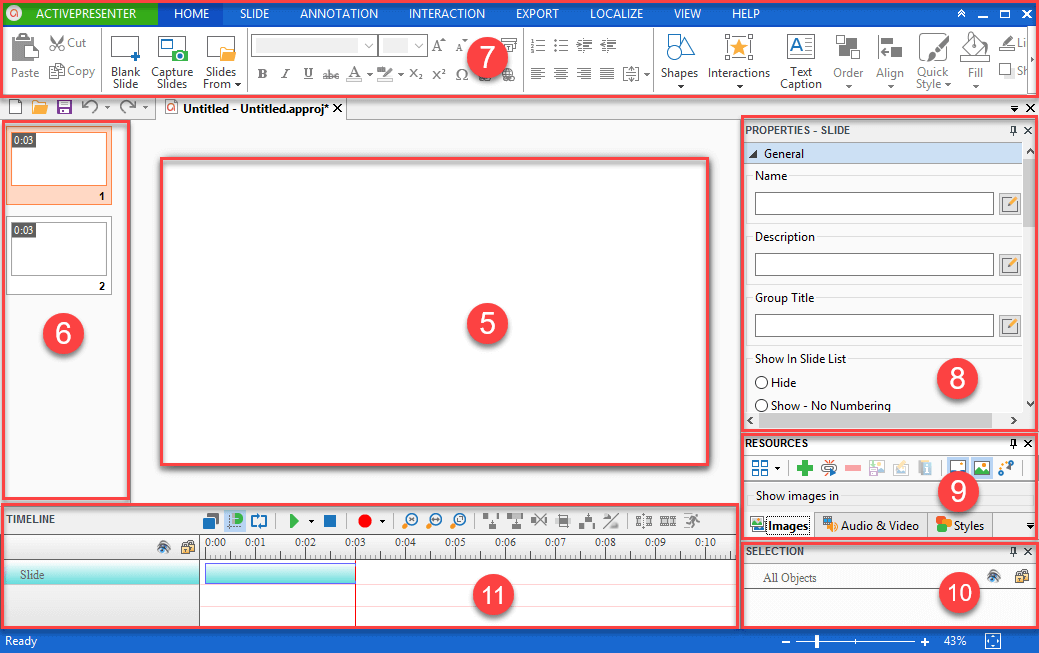
Canvas (5): where you can add content, and edit it.
Slide Organization Panel (6): display all slides in your opening project.
You can add or remove slides, copy and paste slides as well as change slide name and order from here.
Tabbed Toolbar (7): offer tools that you will need to create and control the content. (7)
This toolbar contains many tabs in which each tab has a group of relating activities.
For example, the Interaction tab contains interactive-type objects, and the Export tab allows you to export your projects to many kinds of outputs.
Properties Pane (8): allow you to easily access and change the properties of the current slide and its object properties.
Resource Pane (9): display the resource of the project in terms of Images, Audio/Video and Styles.
Selection Pane (10): let you select or lock objects and change the visibility of objects. You can also do it from the Timeline.
Timeline (11): display the timeline of the current slide along its objects. In ActivePresenter, the Timeline shows all of the objects in terms of their entrance and exit time along with time span.
In order to edit any object, you just need to click on to select it, then the selected object will be highlighted.
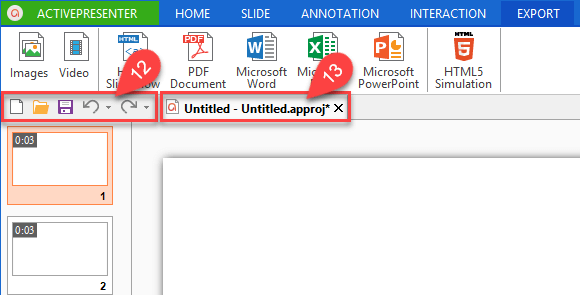
Quick Access Toolbar (12): allow you to have some quick accesses such as creating new projects, opening existing ones saving changes, undo and redo.
Document Tab (13): let you navigate between the opening projects.
So, we have gone through an overview of the ActivePresenter User Interface. Try it today and feel free to email us if you need support.