Working with ActivePresenter, you can assign hotkeys, before starting recording your screen, for many options and change the default hotkeys to new ones. When customizing your own favorite hotkeys, you don’t have to force yourself to remember too many hotkeys that are not assigned by yourself. On top of that, it saves you a ton of time in working, hence increases the productivity. In this article, I will guide you how to do that.
Opening Preferences Window
Access the ActivePresenter menu (1) and select Preferences (2).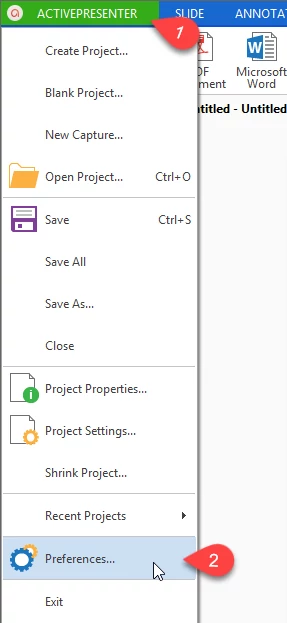
Customizing Hotkeys
The Preferences window pops up having six tabs which deal with six different areas.
Go to open Hotkeys tab. (3)
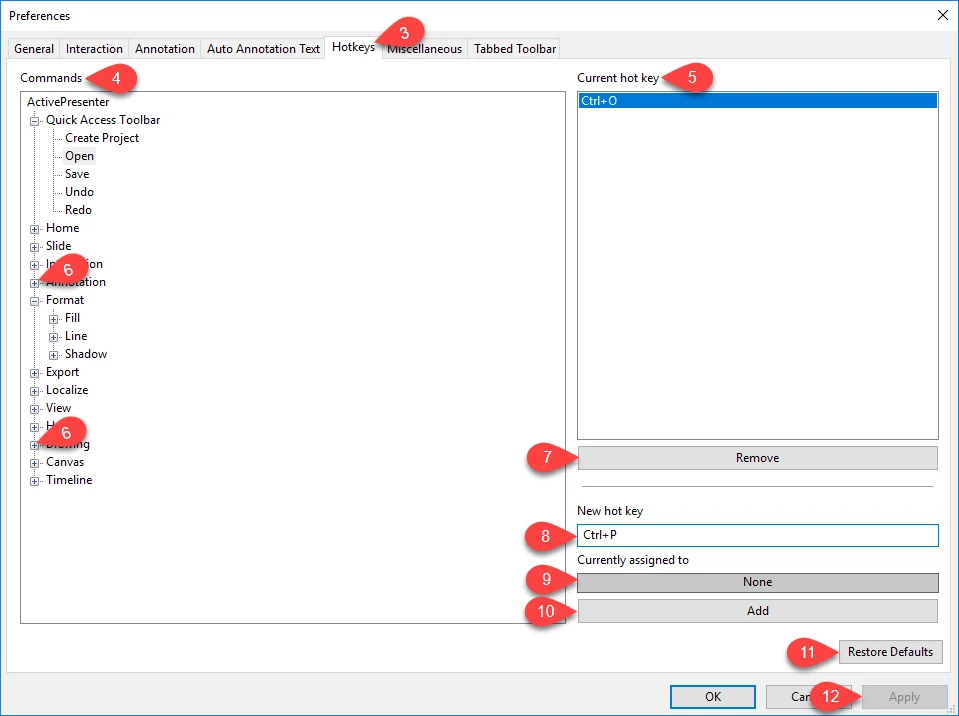
Commands area (4): Show you all the options from which you can choose to assign hotkeys.
Current Hotkey area (5): Display the current hotkey of the option that you choose and the new hotkey after you change it.
Now, to assign and change the hotkey for any option, do as followings:
Step 1: Click the cross icon the left of each property (6) to expand the options inside.
Step 2: Select the option that you want to customize the hotkey.
You can definitely remove the hotkey which is currently assigned to it by clicking the Remove button. (7)
Step 3: Click the New hotkey box (8) and press the hotkey you like.
After that, you will see in the Currently assigned to (9) box whether it is assigned to any other option or not:
- If no, just click Add (10) to apply the change.
- If yes, clicking Add (10) means that you are going to assign the new hotkey and simultaneously delete the old one.
After all the changes, you can come back to the original properties of the hotkey tab by clicking the Restored Defaults button. (11)
Finally, click Apply (12) to save all the changes that you have made.
Let’s get started to customize your favorite hotkeys for productively using ActivePresenter in creating screencasts and eLearning courses. Don’t hesitate to send us an email if you need support.