As a keyframe-based animation tool, Saola Animate lets you create animation keyframes effortlessly. Keep reading to know how.
This tutorial covers:
Creating Animation Keyframes
Keyframes specify the value of a property at a specific time. They are available throughout the Properties pane to set parameters of any property that can be changed over time. To create keyframe animations, you need at least two keyframes with different values of the same property. Keyframe animations are formed based on the property change from the start to the end.
Below are three ways to create animation keyframes.
Using the Properties Pane
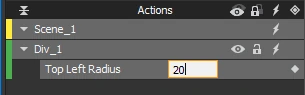
Use small diamonds next to animatable properties to add keyframes. The keyframe will appear at the Playhead position on the timeline.
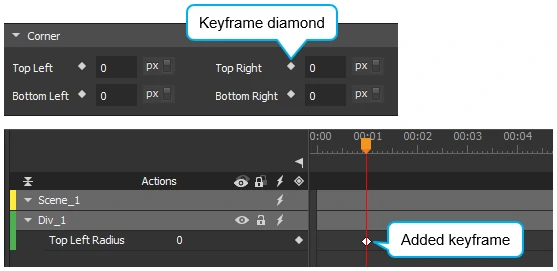
Keyframe diamonds also appear in the Timeline pane. You can click the Add Keyframe button to add more keyframes to an animated property.
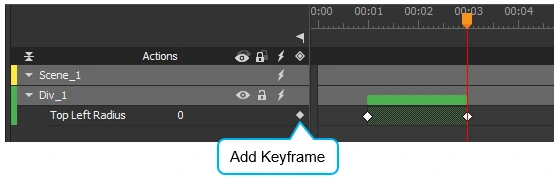
Tip: The best practice is to use the keyframe diamonds the Properties pane to add the starting keyframes, then use the diamonds in the Timeline pane for other keyframes of the same property.
Using the Add Keyframe Menu
Another way to add keyframes is using the Add Keyframe menu which appears when you do either of the following:
- Select an element > Timeline menu > Add Keyframe.
- Right-click an element on the Canvas, in the Timeline or the Elements pane > Add Keyframe.
When you point to the Add Keyframe option, a list of available keyframes appears. Select the keyframe you want.

Creating Animation Keyframes Automatically
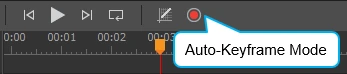
In the Auto-Keyframe mode, Saola Animate automatically generates keyframes when you change the element properties. That way, you will save a great deal of time and effort when creating keyframe animations. To turn this mode on, press the K key or click the Auto-Keyframe Mode button in the Timeline pane.
Adjusting Keyframe Values
The next step after creating keyframes is adjusting keyframe values. Do one of the following:
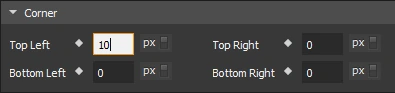
- In the Properties pane: Adjust the property value using spin boxes, sliders, text fields, etc.
- In the Timeline pane: Double-click the value to make it editable and adjust it. To finish editing, press ENTER or click any elsewhere outside.
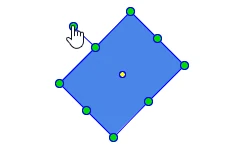
- On the Canvas: For some visual properties such as position, size, and rotate, you can change the value visually on the Canvas. For example, drag the rotation handle to adjust the rotate value.
Note:
If you place the Playhead at an existing keyframe and change the property value, the change will affect that keyframe only. Meanwhile, if you place the Playhead at any other timestamp and change the property value, the change will affect all keyframes of the same property animation.
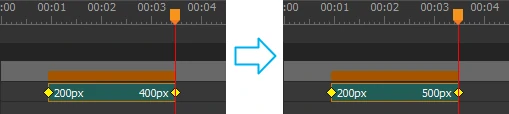
Consider the following animation [Left, duration: 2.5s, value: 200px – 400px].
- Place the Playhead at the starting/ending keyframe: Place the Playhead at the ending keyframe and change the left value from 400px to 500px. The element now moves 300px to the right instead of 200px as before. The ending point changes, leading to the change in the space the element moves.
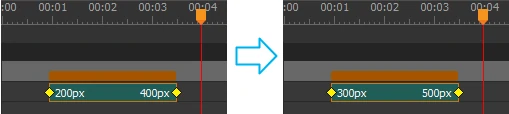
- Place the Playhead at any other timestamp: Change the left value to 500px. The element still moves 200px to the right as before, but it now moves from a different position to another different position. The space remains the same while the starting and ending points are shifted to the new positions.
That’s how to create animation keyframes in Saola Animate. Hope that this helps.